March 31, 2011

Weekly Meal Planner

Do you plan meals? If so, what, why, and how?


I want to introduce you this weekly meal planner. I like planning meals - it means I'll eat well. I was using this guy all the time. I would write small notes on it so I knew to prep extra veggies, or to soak beans, or pull things out of the freezer). It made grocery shopping and meal planning easier tasks. While it saved time, it saved money too because I was able to plan meals around foods I had purchased (reducing food waste, and at times allowing me to increase or double batches of certain foods for meals later in the week).


I'm always looking for creative ways to change things up - including new foods to try.  I have heard from friends that have shared Google docs for meals, freezer contents (sound familiar, Nico?), to friends that meal swap once per week. I have a shared doc for pantry items and cellar contents (we have accumulated a fine collection of Belgian brews).  I want/need an app for telling me what I have at home, what needs replacing, and what we have enough of (to avoid too many bulk purchases) - linked google doc? I'm smartphone-less and dataplan-less, so I'm thinking of something that can be implementable, user-friendly, and cheap. I find the old-fashioned way meets all these needs, and I'm still a sucker for checking out cookbooks, reading through cooking mags, and perusing foodgawker.
P.S. If you end up printing and using this - you can stick it in a binder slip sheet to use with an erasable marker. Just post on the fridge (the originals are laminated, come with an erasable marker, and magnets to go up on the fridge). I'm sorry about the bad paragraph spacing. I don't understand why Blogger's template can be so difficult to type in at times. I just import all my docs over from NeoOffice or Google Docs. 

March 30, 2011

Channa Masala

I love the smaller denser heartier black chickpeas or kala channa, but if you can't find them, regular chickpeas or garbanzo beans are fine. The term chickpeas and garbanzo beans can be used interchangeably, while black chickpeas are actually much smaller and darker. 

Since Indian foods tend to have longer ingredient lists with some hard to find spices (and who wants to buy a spice you'll use once?) try this: omit the things you don't have, and add the ones you do. Harder to find ingredients are marked as optional. This dish freezes well. Channa masala is usually served with rice or chappati (or naan), some yogurt, and salad. Try serving it on top of couscous. Couscous cooks in 5 minutes, and is a timesaver.

Channa Masala or Black Chickpeas Curry
Yield: 4 servings

Ingredients:
1 tsp olive oil
1/2 tsp cumin seeds (optional)
1/2 tsp udad dhal, (optional)
pinch asafoetida (hing), (optional)
1/2 cup onions, diced
1 clove garlic, minced
1 tsp ginger, minced fine
1 small jalapeno, seeded, deveined and minced (optional)
1 tsp turmeric
1 tsp cumin powder
1 tsp paprika
2, 14 oz cans chickpeas/garbanzo beans or 1 and ½ cups black chickpeas or regular chickpeas prepared by soaking and cooking.
1/2 cup canned diced tomatoes (or 1-2 chopped tomatoes)
1 tsp fenugreek powder, if using seeds, toasted and ground (optional)
1/2 cup water
1 tsp garam masala (optional)
cilantro and green onions, optional for garnish
salt to taste

Directions:
  1. Heat up oil in a large soup stockpot. Once hot add in cumin seeds, udad dhal, and hing. Fry until fragrant.
  2. Add in onions, garlic, ginger, and jalapeno. Stir-fry.
  3. Add in turmeric, cumin powder, and paprika. Stir everything together. 
  4. Stir in chickpeas, tomatoes, fenugreek powder, and water. Add more water if too thick. Stir everything together. 
  5. Partially cover and bring to a simmer. Cook 20 minutes.
  6. Stir in garam masala, taste to adjust for salt, and top with cilantro and green onions.

March 28, 2011

Garden Fridays: March 25

plastic bottle holders
Plastic bottle containers for seedlings
plastic bottle holders
Basil sprouts
Genovese basil sprouts in half a windowbox
small pots
Reusing pots (I put the pots in the dishwasher to sanitize them)
Patio red peppers
Plastic bottle holders

I started several summer seedlings in makeshift plastic bottle containers. I cut the bottles (mine were 1.5 L water bottles) in half, placing the cap end down, and used the bottom-half of the bottle as a water holder. So the top-half of the bottle is your pot for the plant, where the narrow bottle top drains off water, and the bottom half of the bottle catches all the water. This does a good job of draining extra water, without having to worry about drowning flats. In these containers, young plants will have roots that come out of the bottom and stay moist from the extra water.

This is a cheap way to start a number of seedlings without having to transplant them into bigger pots. Put a small slit in the lower chamber so the pots can sit on top of each other. I made dozens of these over the winter and had them ready to go as soon as I needed them. I saved old smaller pots and disinfected them. You could use old yogurt containers, dixie cups, eggshell flats, even toilet paper rolls cut in half. I planted 3 seeds per pot in regular potting soil mix. As they get established (and if they grow) I will pinch off or thin out seedlings.

Any ideas on when/what/how to feed seedlings? These guys won't go in to the garden until early June. Do you have other good ideas on starting seedlings? I'd love to hear from you on what works well/ what doesn't. It's pretty obvious that I'm a lazy novice gardener, but I'm trying to learn from my mistakes while also being economical and creative. These are growing on a large window sill which receives late-afternoon southern light.

I totally want this seed packet from the Monticello Kitchen Garden Sampler.

Here are my seedlings:
Red patio bell peppers: 3 pots
Slim jim eggplants: 4 pots
Ida gold tomatoes:  3 pots
Siberian tomatoes:  3 pots
Genovese basil: 1 half of small window box
Coriander: 1 half of small window box

March 24, 2011

Potatoes with Turmeric and Mustard Seeds

Potatoes with turmeric and mustard seeds
I know that after you saw the bittermelon post you couldn't wait for these potatoes! They are a favorite and can really be served with anything. Super simple to prepare, these are always a hit. If you want them spicier top them with chopped jalapeno and cilantro. Sometimes, shredded coconut is also good. Once again, since Indian foods tend to have crazy long ingredient lists, just omit what you don't have (I have listed these as optional).

Potatoes with Turmeric and Mustard Seeds
(Bataka ni Shak)
Serves: 4
2 cups diced new potatoes (peeled; you may want 6-8 potatoes); baking potatoes, such as russets, will fall apart.
1 tbsp peanut oil, or olive oil
1 tsp mustard seeds
½ tsp cumin seeds (optional)
pinch asafoetida powder or hing (optional)
¾ tsp turmeric powder
salt to taste (probably ½ tsp)
½ cup water
cilantro to garnish

Directions:
  1. Heat up the peanut oil or olive oil in a medium sauce pan over medium-high heat.
  2. Once hot, add in mustard seeds, cumin seeds, and asafoetida powder (you'll be making a vaghar). Once mustard seeds start to pop add in potatoes. Stir everything together.
  3. Add in turmeric and salt, and stir together. Add in water, and stir.
  4. Cover the pan slightly, and cook for 20 minutes. You might need to add in more water. Just keep an eye on it – you don't want the potatoes to stick to the bottom of the pan. Taste for salt. If potatoes pierce easily with a fork, they are cooked. Top with cilantro and serve immediately.  
Alternative: the potatoes can be peeled, cut up and cooked in microwave safe dish along with about 3/4 cup water. You can do the vaghar with the mustard seeds then add cooked potatoes and finish with turmeric and salt. 

March 21, 2011

Gujarati Bittermelon or karela ni shak

Bittermelons, also called karela
Cut in half, then remove the seeds
Bittermelon
bittermelons waiting to be stir-fried
stir frying
Karela with garlic, ginger, onions, and mustard seeds.
karela ni
shak
Served with some black chickpeas and couscous, and potatoes 

When was the last time you tried a totally new food? I recently retried eating bittermelon, or in Gujarati, karela (kha-reh-la). Bittermelons are a type of really bitter squash with a spicy, slightly pungent taste, that works to clear the palette. I think bittermelons taste very good with lentils and dhal. 

Up for a bitter treat? 

Growing up, bitter flavors were loved by my parents (fenugreek leaves called methi, bittermelon, unripe mangoes, pani-puri pani, vhal – a type of broad bean similar to limas, and even cilantro). Bittermelon is not exactly kid-friendly food. As kids, we'd explain how awful the bitter taste was, and how nothing could mask (we'd dip our veggies in ketchup, Cool Whip, drown it in yogurt, dhal, whatever) that awful mouth puckering bitter flavor. My parents, having a strict no food-waste policy, would force us to finish our plates. Begrudgingly, we'd finish the food, complaining all the while, and taking dollops of Cool Whip out (somehow this was allowed). All those years of forcing us to clean our plates did not create a terrible relationship with the foods we grew up eating, my siblings and I love food (sweet, sour, bitter and salty!) Now we force those foods on our friends and families.

Today, bitter foods do not bother me. I love methi theplas (a type of tortilla made with fenugreek leaves – and btw, mom, if you're reading this I need that recipe), and I have tried lambic guezes and other wild ales which are both sour and bitter. So why not try bittermelon again? Most Asian or South Asian stores carry them. Look for warty green spiky cucumber-like squash with no obvious bruising or wilting. Asians and South Asians LOVE bittermelon. This is a simple way to prepare them, and is my mom's way of prepping them. I served this with some black chickpeas, potatoes, and couscous.

Indians believe that bittermelon, and many bitter fruits and vegetables, helps to reduce or improve the symptoms of type 2 diabetes - and that their consumption can also work to prevent type 2 diabetes. They also believe that bitter foods help thin the blood, which results in less cardiovascular diseases. 

Gujarati-style Bittermelon
(Karela ni shak)
Serves: 4

Ingredients:
2 small-medium bittermelons (4-6” long)
1 tsp olive oil
1 clove garlic, chopped
1 tsp, ginger, chopped fine
½ tsp mustard seeds
pinch of asafoetida or hing
½ cup onion, diced
½ cup water
1-2 tomatoes, diced (helps to cut down on bitterness)
salt to taste
½ tsp turmeric
½ tsp cumin
cilantro to garnish

Directions:
  1. Wash and cut the bittermelons in half. Cut the halves lengthwise and remove the seeds. You can also cut it into 1/2” segments and remove the seeds and white pith.
  2. Make a vaghar. A vaghar is when you heat up oil and add seeds and some spices to release their flavors. Vaghars are the lifeline of Guju cooking. Heat up the olive oil over medium heat. Add in mustard seeds and hing. When the mustard seeds begin to pop, add in ginger, garlic, and onions. Stir and cook.
  3. Add in bittermelon and stir fry for about 10 minutes. Add in water and add in salt, turmeric, and tomatoes. Continue cooking another 10 minutes.
  4. Add in cumin powder, stir to combine and garnish with cilantro. Serve.   

March 18, 2011

Garden Friday: March 18

This week was a fantastic gardening week! Karl helped me construct a bed out of some old stones lying around. We built up a wall around the narrow bed, and he helped me haul the soil and compost around. The warmest day so far, also coincided with my major gardening day, so I enjoyed being out in full sunshine - it got up to 62! I topped off some pots with new soil, and added some new containers. There is a stash of firewood for some future bbq nights - and now the garden is looking much more cared for!
The bed is narrow and long; I planted cauliflower, red cabbages, broccoli, spring onions and radishes. Sugar snap peas are planted along the length of the back of the bed. The peas should grow up, not taking up too much space.
In pots, I planted the remaining cauliflower, cabbage, and broccoli. I also planted a lettuce mix in the big round pot. The strawberries, chard, and mint did very well over the winter. I topped them off and gave them some compost.
de tuin
I met the neighbor behind us (Saturday was a lovely day so everyone in Belgium was outside) and he is putting up a bamboo fence, but also designing a real garden. It’s always nice to meet your neighbors.
Spring pots
Cauliflower; let's see if it grows in a pot
Spring bed
Here’s the bed (looking one way and then the other)
Bed

March 16, 2011

Turkish Pide with Eggplant and Feta

Turkish pides
Nom
What do Turkish pide's and Nirvana have in common? Nothing, except that I'm writing up this post while listening to Nirvana's Smells Like Teen Spirit. Pide's make me want to thrash my head around. Forget it, pide's are like reaching a pizza nirvana. You can see that I should just stick to writing about food and forget about everything else (but quick side note, if you want to channel your teenage years, don't miss the 90's show from NPR's All Songs Considered. It'll take you straight to 1994).

Pides are like pizza canoes stuffed with savory fillings. Making them will take some time because the dough takes longer to knead than regular pizza dough. Enlist help, and divide up tasks. Someone can prep the fillings, while someone else makes the dough. Karl made the dough, and I prepped two stuffings: feta and dill, and eggplant. The recipes below have been adapted from a fantastic Turkish cookbook, Ayla Algar's Classical Turkish Cooking.

With so many fast-foodish Turkish owned restaurants in Belgium, I wish real Turkish food was as widely available as the fast-foodified kebabs and durums. Mostly, I wish they had pide's available everywhere. So utterly good.

Pide dough - Yield: 8 individual pides
Ingredients
4 tsp yeast
½ tsp sugar
½ cup warm water
½ cup all-purpose flour
3 and ½ cups flour (bread flour if you have it)
1 tsp salt
3 tbsp olive oil
1 cup water
1 egg beaten (for egg wash)

Directions:
  1. You'll make a sponge out of the first 4 ingredients. Combine the yeast, sugar, and warm water in a large bowl. This should eventually bubble or look scummy (the yeast is active). Stir in the flour, cover the mixture, and let it rise in a warm location (such as your oven) for 30 minutes.
  2. Put the flour in a large bowl. Make a well in the middle, and pour in the sponge, salt, olive oil, and the warm water. Gradually stir in the flour until it gets shaggy. It will be heavy. Turn it out onto a floured surface and knead it for 15 minutes. The dough will be slightly damp and very heavy. Put the dough in a lightly oiled bowl, cover, and let rise 1 hour.
  3. Once ready, turn the dough out on a lightly floured surface. Roll it into a log and divide it into 8 pieces. Roll these into balls, and set them on a lightly floured surface. Cover with a damp towel and let rest at least 30 minutes. Preheat the oven to it's hottest setting. If you have a pizza stone, stick it in the oven while it preheats.
  4. To prepare the pide, roll each ball into an oval (~6” by 12”). A slight dusting of flour will keep it from sticking. Put 2-3 tbsp of the stuffing in the middle and spread it out leaving a half-inch border.
  5. Fold the layers lengthwise slightly over the filling. The layers may overlap. You'll have smaller points on the end. You can pinch them together or flatten them to finish the canoe. If desired, brush them carefully with some eggwash.
  6. Carefully lay the pides on the hot stone; with a round-12” pizza stone, 2 pides were able to get cooked at a time. Cook until golden, 10-15 minutes.
Rolling out the pide dough (above)
Pide with eggplant filling

Feta and Dill filling
Yield: Enough stuffing for 4 individual pide. Double recipe if you want to use one stuffing.

Ingredients:
8 oz feta cheese (or 200 g, which is more like 7 ounces)
1 egg lightly beaten
2 tbsp butter
1/3 cup fresh dill, chopped (I used parsley instead)

Directions:
  1. Mix all the ingredients together and set aside.

Eggplant filling
Yield: Enough stuffing for 4 individual pide. Double recipe if you want to use one stuffing. Filling can be prepared ahead of time.
Pides look like canoes
Ingredients:
2 medium eggplants, about 1 lb (use 3-4 Japanese ones, or 2 medium globe eggplants)
salt
2 tbsp olive oil
½ cup tomatoes, chopped
1 bell pepper chopped, any variety of peppers will do
1 chili chopped, seeded and de-veined
2 cloves garlic, chopped
½ tsp red chili flakes
½ cup parsley, chopped
½ cup cilantro or basil, chopped

Directions:
  1. Wash and slice eggplant lengthwise and then cut it into thin slices. Salt the slices generously and set in a colander to drain for an hour. Rinse the eggplant to remove the salt, and then squeeze the eggplant dry.
  2. Heat up olive oil over medium-high heat, add the eggplant and cook until golden. Once golden, remove from pan and set aside. Chop them when cool enough to handle.
  3. Add the tomatoes, peppers and chilies to the pan. Cook 5 minutes. Stir in eggplant and garlic, heat through. Add in red pepper flakes, herbs, and adjust for salt. 

March 11, 2011

Garden Fridays: March 11

It's been a lazy cold few weeks and has not amounted to too many productive garden days, although it has amounted to many successful cooking days. Although my grow-your-own shiitake mushrooms took a beating, I'm happy that the lettuce seedlings held on (the peas...not so much).

This week, I headed to the garden store to pick several bags of soil and compost. It was much easier going with my neighbor (who has a car) than making the trek back and forth on my bike. Belgium will not see that miraculous stint again, but then again, they probably weren't impressed either. 

I'm planning on setting out lettuce and snow peas. I picked up broccoli, cabbage, and cauliflower seedlings so they'll go out as well. Stay tuned (Turkish pide post coming soon) and wish me luck!


Lettuce seedlings

March 9, 2011

Beer post: La Brasserie à Vapeur

We recently visited a small family-owned brewery, La Brasserie à Vapeur. They hold public brewing sessions from 9-12 pm on the last Saturday of the month. The farmhouse brewery is located in the middle of Pipaix, in the Wallonian Hainut region, and is a gem of a family-owned brewery. The brewing process is powered by an old steam engine, which is visible just behind the mash tun.

As groups of people filtered in and out during the day, we got to take a tour and see their fermentation tanks, grain grinder, and wort chiller. They have working brewing equipment that dates into the early 1900's. While I cannot remember how large the fermentation tanks were (photo below), they sometimes add up to 3 kg of spices in a batch! Visiting a brewery during their brew day is really intense, and very educational. I'm amazed at how calm and collected the brewers were, especially because there was so many people everywhere, and they had to keep telling folks to move. They never appeared stressed out or the least bit annoyed, instead stopping to chat and crack a few jokes.

Across the street from the brewery is the Vapeur Brasserie. During the public brew day, visitors can reserve a spot for a lunchtime grand buffet-style meal and all-inclusive beers for €30.00. Several main dishes were prepared from their beers including smoked salmon, ham, and several breads. They had over a dozen Belgian cheeses, and plenty of buffet fixins. If you go to their public brew day, plan to spend the whole day there. We had scheduled another brewery tour, so after a quick beer tasting we were on our way. Unfortunately, we were only able to try their Saison de Pipaix, a much darker style amber saison with lots of spices. It reminded me of the saison styles from Fantome Brewery.

Most breweries welcome visitors, but it's best to call ahead to make sure they are open, and not booked. Breweries get lots of traffic in the high-tourism season (basically, as soon as it's warm), but you can always ask to join a larger group if there is space. I have found it's best to drive, because you have control over when you can leave or arrive. It makes it nicer when you're planning on visiting more than one brewery.  
Just outside of the main brewhouse (above)
Public brewing day. It was steamy inside (above)
A steam engine powers the main part of the brewery, and gives the brewery its name
Spying on the cool ship 
Fermentation tanks
It was challenging to take pics because of all the steam.


March 7, 2011

Spinach and Mushroom Lasagna

This is a simple, straightforward vegetarian spinach and mushroom lasagna. It takes just over an hour to prepare. I don't mind this time, since I usually just crank up some music and open a few beers. The lasagna can be prepared in advance, and baked later. This recipe is really dedicated to two people whose lasagna recipes I absolutely adore. Kathy and Sara, I hope my version makes you proud.

I make the lasagna sauce from scratch. Egg-based lasagna noodles hold up well, and the lightly sauteéd spinach, mushrooms, and cheese make a good dish, excellent. Any mixture of mushrooms will do, such as white button, cremini, or oyster mushrooms.

This serves 4-6 people; the lasagna is cooked in a 7” x 10” casserole dish. Yes, in Europe servings sizes are smaller, including common cooking dishes, something I have come to appreciate. I will post a picture of my fridge at the bottom of this post.

First, prepare the marinara sauce. It will need about 20-25 minutes to cook. While it cooks, begin heating water for the pasta (omit if using no-boil lasagna noodles), and then prep the mushroom and spinach. Finally, get the ricotta and mozzarella out. I undercook the noodles so that they will remain firm while layering. They will get cooked anyways.

Some ingredients for the marinara sauce (above and below)

Tomato chunks for the marinara sauce

Vegetable Marinara Sauce:
Ingredients:
1
tbsp olive oil
½ cup onion, chopped
3 cloves garlic, chopped
½ cup bell pepper or carrot, chopped, such as 1 small red bell pepper or carrot,
1 bay leaf
3
tbsp fresh parsley or 1 tbsp dried
2
tbsp dried oregano
1/2 tsp red chili flakes, optional
1/2 tsp salt
2 14 oz cans, diced low-sodium tomatoes
1/2 cup water or more (rinse out can with water to get the rest of the tomato sauce in the can)
juice of half a lemon or generous pour red wine (optional)

Directions:
  1. Heat up olive oil over medium-high heat in a medium pan. Once hot, add in garlic and sauté 3 minutes.
  2. Next, add in onions and bay leaf and sauté 5 minutes.
  3. Add in bell peppers or carrots, herbs, and sprinkle with red chili flakes.
  4. Add in tomato chunks and water. Stir in salt.
  5. Bring to a simmer, cover the pan so the sauce doesn’t spurt out of the pan.
  6. Once sauce is thickened, stir in lemon juice, adjust to taste. Heat through and remove bay leaf, and then turn off heat and begin assembling the rest of lasagna ingredients.
Now for the lasagna...
Lasagna eats
Noodles, mozzarella and ricotta (above)
DSC_0012
2 very large handfuls of fresh spinach (above)
DSC_0018
Half the spinach, cooked down (above)
DSC_0020
Mushrooms (above)
DSC_0022
Wilted spinach and chopped mushrooms (above)
    Spinach and Mushroom Lasagna
    Ingredients:
    1 batch of marinara sauce
    2 generous handfuls of fresh spinach (about 4 loosely packed cups of spinach), washed and drained.
    2 cups of fresh whole mushrooms (white button, cremini, or oyster)
    1 tbsp olive oil
    2 tsp white wine vinegar
    1 8 oz serving of ricotta cheese
    1 8 oz block of fresh mozzarella (I used 6 oz), shredded or cut into thin slices.
    salt and pepper to taste
    8 lasagna noodles, cooked according to package directions. You'll make 4 layers.
    See note below.

    Directions:
    1. Heat up olive oil in a wide skillet over medium-high heat. Once hot add in whole mushrooms and cook over medium-high heat for 5 minutes. Turn heat down to medium and continue to cook another 5 minutes. It is not essential to cook them down all the way. Drizzle 2 tsp of white wine vinegar over the mushrooms, let it sizzle and make that nice sound, then remove mushrooms to a cutting board or plate. Turn heat down to low.
    2. Preheat oven to 400 F.
    3. Add in spinach. Let it wilt down and then add in more. It will completely cook down. Should take between 5-7 minutes to cook it all the way down. Meanwhile, chop up the mushrooms coarsely. Set the chopped mushrooms and wilted spinach in bowl or plate.
    4. Stir the ricotta in its own container to make it fluffy; shred or thinly slice the mozzarella and set aside.
    5. To assemble the lasagna, lightly oil the bottom of a casserole dish and spread about 1 cup of marinara sauce along the bottom. Put 2 lasagna noodles down side by side, but not overlapping. On top of these noodles, make a layer of spinach and mushrooms, top with a few slices of mozzarella. It'll melt and spread, so a little bit of cheese goes a long way. Spoon about ½ cup to ¾ cup marinara sauce over it.
    6. Place 2 more lasagna noodles down side by side so it goes on top of the previous layer. Take spoonfuls of the ricotta and spread it around making a nice even layer. You can use half the ricotta.
    7. Place 2 more lasagna noodles down on top of the previous layer. Top this layer with ricotta first, then place mushrooms, spinach, and mozzarella on top. Lightly spoon ½ cup to ¾ cup marinara sauce on top.
    8. Place the last 2 noodles on top and spoon about 1-1/2 cups of marinara on top. Spread the sauce evenly. You might need to add a bit more sauce on top. Once done, cover the pan with foil and place in the oven for 40 minutes.
    9. Remove foil, top with remaining mozzarella cheese and bake until the cheese is golden brown on top (about another 10-12 minutes). Let stand 10 minutes once out of oven, then cut into squares with a sharp knife and serve.
    Note: Cook the lasagna noodles halfway. Leave them in the pot with their cooking water. During each round of layering, I like to use a spatula or cooking spoon that is wider and longer than the pot to carefully pick up one noodle at a time. I set the utensil over the pot, and let it hang and drain over the pot the way laundry might hang on an Ikea clothes rack. This ensures that the noodles won't tear, and that I won't scald my fingers. This is also the point where I became to engrossed it how excited I was to eat the lasagna, that I forgot to take pictures. It never occurred to me to take a few final shots once it came out of the oven. Ah well.


    And now, the fridge:
    Doesn't look too tiny yet? Note shoebox size freezer.

    Perspective fridge shot. Enjoy.

    March 4, 2011

    Vegetable Potsticker Dumplings 3 Ways

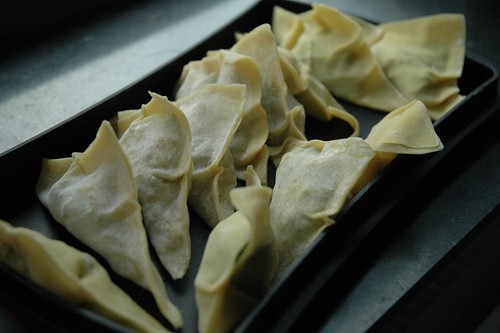
    I'll admit it. I was jealous. You would be to if you looked at these fantastic delicious dumplings and pot stickers. I was jealous, but inspired. A few weekends back, I made batches of these and put them in the freezer. Below are 3 recipes for preparing vegetarian potsticker dumplings with ready-prepared wonton wrappers (square or circular). Although I use the word dumpling often, these are probably closer to potstickers, since they are first lightly pan fried in a skillet, and then steamed, hence potsticker dumplings.

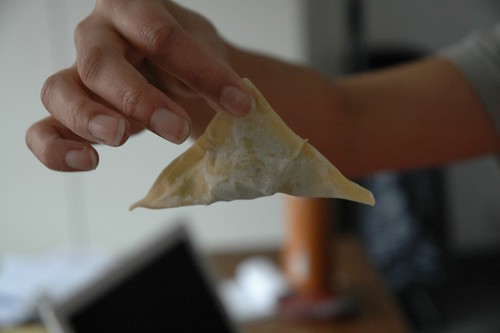
    Prepare the ingredients, and then lay out the fillings in bowls. Set out the wonton wrappers, a small bowl of water, and a freezer-safe tray or dish. Fill each wrapper with 1 tsp of stuffing, wet the borders on one side of the wrapper, and fold together. You can make nice pleats if you want; avoid over-stuffing as it'll make it difficult to stay closed. Freeze dumplings before transferring them to freezer safe storage bags. Don't forget to label them if you make multiple recipes.
    Gyoza! Yowza!


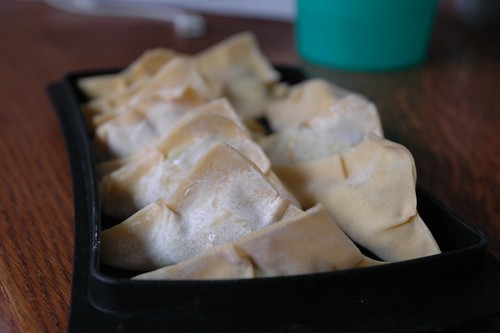
    When ready to cook (frozen or fresh) heat up 1 tbsp of peanut oil in a pan over medium-high heat. Add in dumplings in a single layer, and cook 1-2 minutes (fresh), and 2-4 minutes (frozen) or until bottoms are golden. Add in ¼ cup of water, and steam the dumplings until the water evaporates, about 2 minutes. Carefully, remove the dumplings (or pot stickers) and serve immediately with some dipping sauce. I like to mix together 3 tbsp soy sauce, 1 tbsp rice wine vinegar, 1 tsp sesame oil, and 1 tbsp green onions. Four to five dumplings make a nice appetizer.

    Recipe 1: Chinese 5-spice potsticker dumplings
    1 block of tempeh, steamed and crumbled
    1 tbsp peanut oil
    1 clove garlic, chopped fine
    1 medium carrot, grated
    1 cup napa cabbage, shredded
    1, 1/2-inch piece of ginger, chopped fine
    2 green onions, chopped fine
    2 tbsp cilantro, chopped fine
    ½ tsp Chinese 5-spice powder
    30 wonton wrappers
    1. Bring a small pot of water to boil. Once boiling, add in tempeh and turn heat down to medium. Steam/boil for 10 minutes. Set aside to cool. Crumble into a fine texture once cool enough to handle.
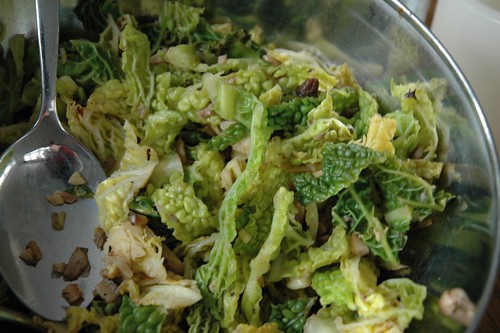
    2. In a large bowl combine carrot, cabbage, ginger, green onions, and cilantro. Stir to combine.
    3. Heat the peanut oil over high heat in a wide skillet, add in garlic and tempeh and stir-fry 5 minutes. Once golden, add in carrot through cilantro mixture. Continue to cook 2 minutes and stir in Chinese 5-spice powder. Remove to a bowl to cool.
    Recipe 2: Chinese dumplings with cabbage, mushrooms and leeks
    Recipe adapted from Deborah Madison's Vegetarian Cooking for Everyone. The recipe calls for 24 wonton wrappers, but when I made this it made closer to 50.

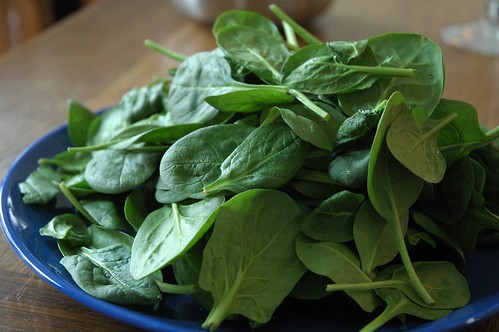
    1 pound napa cabbage or 4 generous cups, shredded, or sliced very fine
    salt
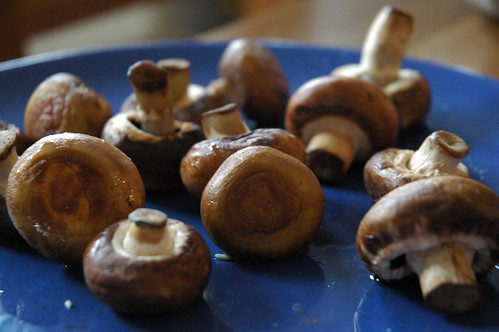
    ½ cup whole shiitake or oyster mushrooms, finely chopped (*see note below)
    2 tbsp leeks or green onions, chopped
    1 clove garlic, chopped fine
    1, ½-piece ginger, chopped fine
    1 tsp rice-wine vinegar
    salt and pepper to taste
    50 wonton wrappers
    *Note: you can also use ¼ cup dried black Chinese mushrooms, and ¼ cup dried tree ear mushrooms, rehydrated, and chopped. If using these, omit shiitake, and use fresh mushrooms instead.
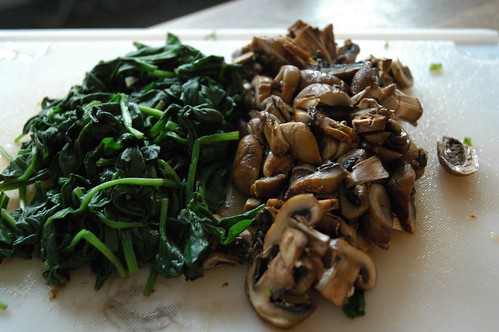
    1. Set the cabbage in a colander over the sink. Salt the cabbage generously and let sit for about an hour. Squeeze excess water from cabbage. Rinse the cabbage lightly to get rid of the salt. Taste to make sure it isn't too salty.
    2. Combine cabbage, mushrooms, leeks or green onions, garlic, ginger, and rice-wine vinegar. Season with salt and pepper.
    3. When ready to cook, add in ½ cup of water instead of ¼ cup of water and steam them for 7 minutes. Since the stuffing is raw, it'll cook the veggies down a bit.
    Recipe 3: Spicy edamame potsticker dumplings
    Recipe adapted from Cooking Light magazine. I have made these several times, and they are the simplest dumplings to prepare.

    1 cup edamame, shelled (if frozen, cooked according to package directions)
    1 tsp fresh lemon juice
    ¼ tsp red chili flakes
    ½ tsp cumin
    1 tsp sesame oil
    salt and pepper to taste
    20 wonton wrappers
    1. Combine edamame, lemon juice, red chili flakes, and cumin in a food processor; process until smooth, do not over process. Stir in sesame oil, and taste. Adjust with salt and pepper. To make without a food processor, smash the beans when they are hot with potato masher, and then add in rest of ingredients and continue to smash.
    Dipping sauce: Soy-rice-sesame dipping sauce
    3 tbsp low-sodium soy sauce
    1 tbsp water
    1 tbsp rice wine vinegar
    1 tsp toasted sesame oil or dark sesame oil
    Optional: 1 tbsp green onions or 1 tsp toasted sesame seeds
    1. Combine all ingredients together and stir in green onions or sesame seeds if using. Serve immediately. You can alter the proportions of any ingredient, or omit them. To make a spicier dipping sauce, add in ¼ tsp red chili flakes and 1 clove minced fresh garlic.