Showing posts with label onions. Show all posts

July 11, 2014

Spaghetti with beluga lentils

those are lentils

DSC_0914

pretty Beluga lentils

spaghetti with beluga marinara sauce

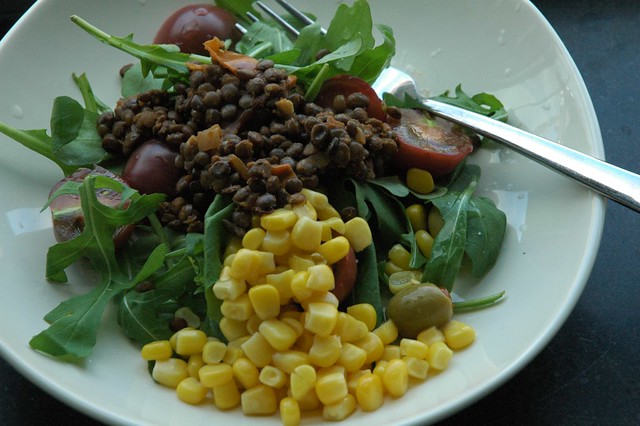
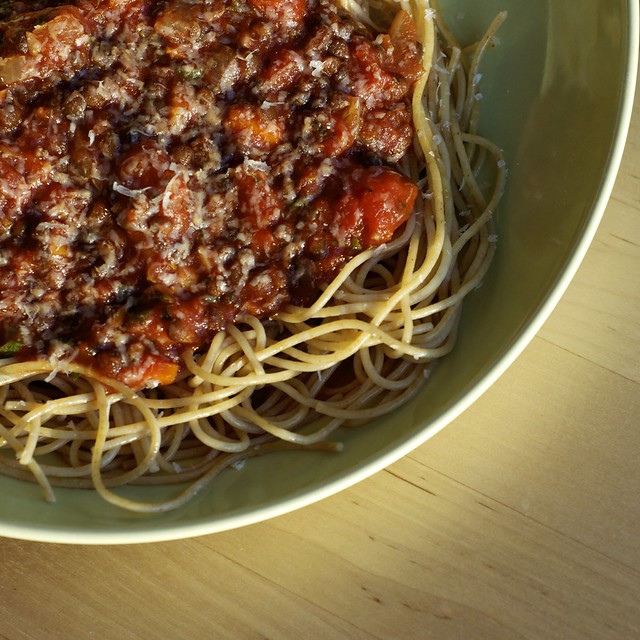
This is my version of a healthy marinara sauce with lentils. Lentils cook in no time in the pressure cooker. Surely by now, I've at least convinced you how awesome a pressure cooker is? I won't give up on you!

This recipe comes together quickly if you can think of it in 3 steps. Step 1, prepare the lentils in the pressure cooker. Step 2, prepare the marinara sauce, and Step 3, cook the spaghetti noodles. Most of the time, I start the pasta boiling water first, and then get to my tomato sauce, but you know your own ability to multitask.

This recipe is dedicated to my hubs. See hubs, now you know how I make it!

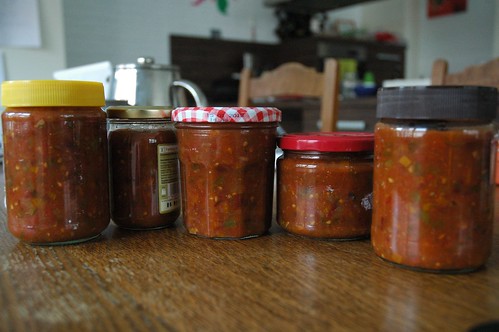
Spicy tomato sauce or marinara with beluga lentils
Yield: 4 servings, about 1 and 1/4 cup sauce per serving

Ingredients:
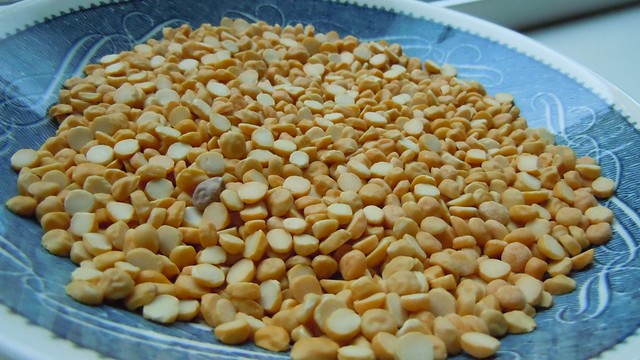
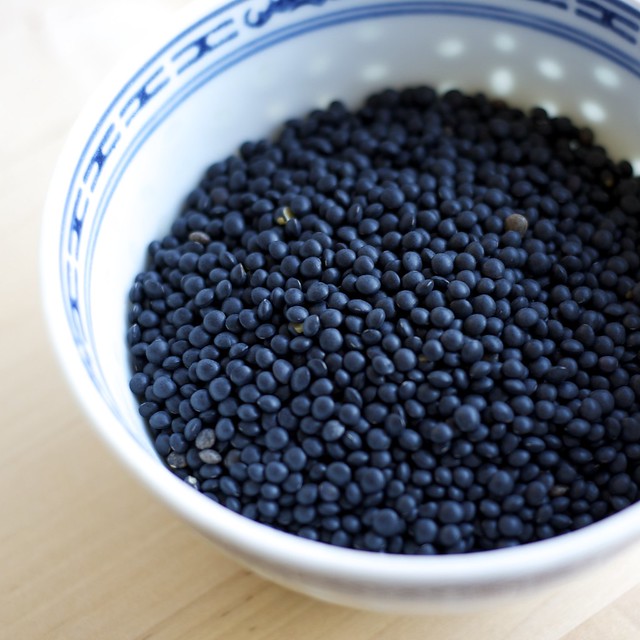
1/2 cup dried beluga lentils or regular green lentils
1 and 1/2 to 2 cups water
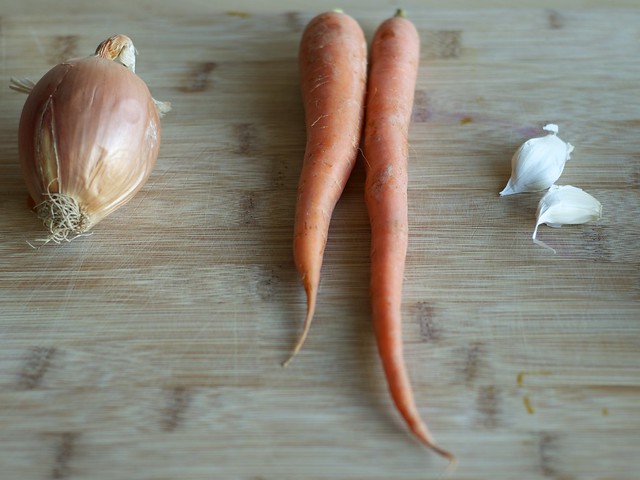
2 cloves garlic
a generous pour of olive oil
1 onion, finely diced
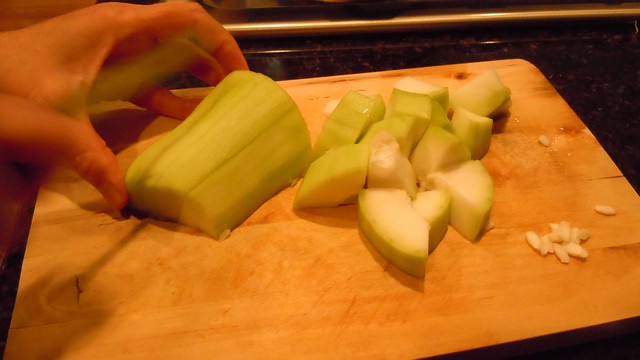
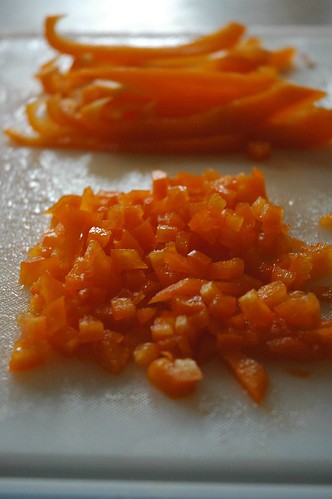
1 large carrot, or 2 medium carrots, peeled and quarter diced
1/4 to 1/3 cup of white wine, enough to barely cover bottom of pan (I think red would be fine too; honestly, I've used whatever is in the fridge or pantry) - use vegetable broth or water if avoiding wine.
2 T dried oregano
1 tsp dried thyme
2 T dried parsley 
1 tsp dried red chili flakes
1 and 1/4 tsp salt
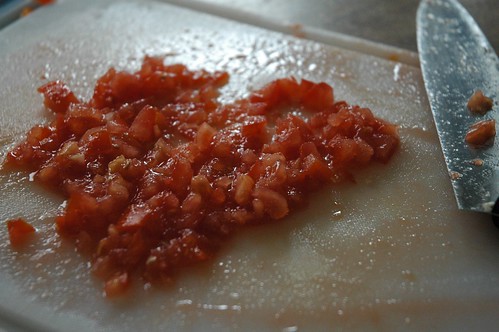
1, 28 oz can San Marzano style tomatoes either whole or in chunks * see my note below
1/2 cup water
freshly grated parmesan
basil or parsley to garnish

To boil spaghetti
4 quarts water plus salt to boil
1/2 package or 1/2 lb whole wheat thin spaghetti

Special tools: None besides a good knife, and cutting board. Use the small pressure cooker fry pan for the lentils. For the marinara sauce and the spaghetti, have 2 pots ready. The first should be a large pot to cook pasta, the second should be a wide stir fry pan with a sturdy lid. If you don't have a pressure cooker, cook the lentils in a large pot.

*My cooking note: If using whole peeled canned tomatoes, blend half or 3/4 of the tomatoes in a blender and leave the rest sort of roughly chopped. It is OK with me if you want no chunks, just blend all of it. Do this before you get started. 

Directions:

See my note above indicated with * above.

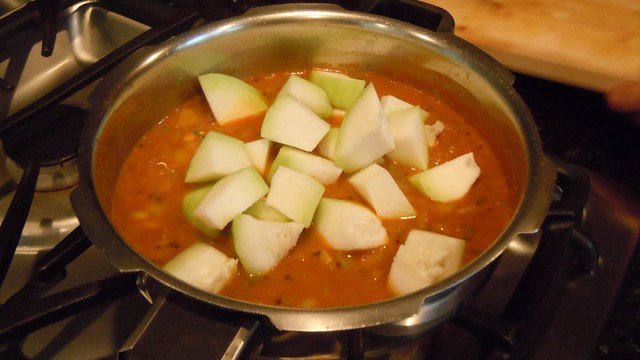
Step 1: Add the lentils to the small pressure fry pan pressure cooker. Add the water, stir, and set the cooker over high heat on the stove (these are the first two ingredients on the ingredients list). Close the lid to the pressure cooker. Bring to the first red ring (low pressure) and cook 10 minutes on low pressure. Once time is up, remove the cooker from the heat, and set aside to cool down using the natural release method. 

Step 2: Prepare the pasta cooking water. Add the water and salt to a large pot. Depending on your stove, you can begin heating up the water for the pasta. 

Step 3: In a separate wide enough skillet with a lid, heat up a few generous glugs of olive oil over medium heat. Once hot add in the onions and stir, and then add in the garlic and carrots. Cook until the onions begin to just brown slightly. Pour in the wine, and cook until half of the wine is evaporated. 

Step 4: Add in the herbs and spices and stir together. Next, add in the tomato sauce, water, and salt. Turn the heat down to medium low heat,  and cover with a lid so that the sauce doesn't splatter on the cooking range. The water for the pasta should be close to boiling. If not, wait. The sauce will just continue to cook and thicken up a bit. 

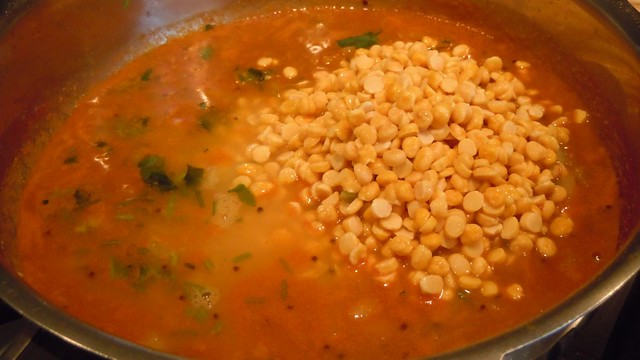
Step 5: When the pasta water is ready and boiling, add the spaghetti, or other desired pasta, and cook until ready.  Next, drain the lentils from the pressure cooker, and then add them to the tomato sauce. Stir and taste the tomato sauce for herbs and salt. 

Step 6: When the pasta is done cooking, reserve 1 cup of the hot pasta cooking water and then drain off the pasta in a colander. Toss a little olive oil and a few splashes of the hot remaining pasta cooking water to keep the noodles separate. This is my favorite trick to serving pasta hot.

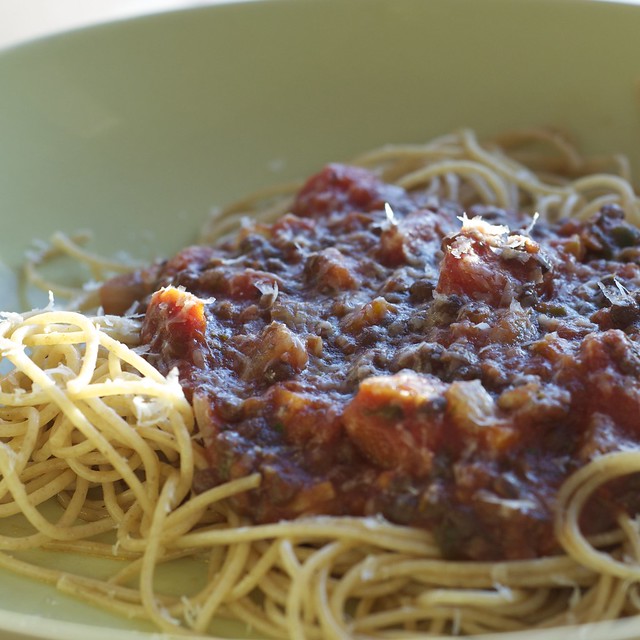
When ready to serve, add about 1 cup of cooked noodles to a plate and top with 1 and 1/4 cups of sauce. Pass fresh parmesan and chopped parsley at the table. 

December 2, 2012

Vegan Delight


 This week's CSA goods. 

Watermelon radishes

There is something that happens when you begin designing foods around vegetables, or really plant-based foods, as opposed to meats. Since I began teaching, I'm reminded how pervasive the meat and potatoes diet actually is. For example, when I have given assignments and asked students to design a healthier meal plan, the majority of their recommendations have meat as the star ingredient followed by some of the recommendations they learn in class. Modern nutrition advice advocates for healthy eating patterns, and these patterns are moving towards plant-based diets with meat and meat based proteins as sides - or condiments. I incorporate and teach population-level dietary intakes, and I teach about what is over and under-consumed. Having the majority of intake come from plant based foods, such as whole grains, fruits, vegetables, plant-based proteins, and nuts and seeds, gives the best protection against chronic diseases, and promotes health. Since chronic diseases usually manifest after years of poor dietary choices, the eating patterns established in early adulthood have huge payoffs in chronic disease prevention in older adulthood.

So do I practice what I preach? I often forget that nutrition is something that I do for a living, but is also something that I really love. I overlook the fact that it took me a while to make these changes, and that I often flex them for convenience. I try to stay mindful of that, but also raise the bar high enough that I get my students to at least think about all the ways nutrition and health are connected. I think I reach about 25% of them.

This fall, I joined a local CSA (community supported agriculture) from Snow's Bend Farm
located just outside Tuscaloosa. Local farms often allow customers to  purchase a "share"  in the farm, and for that share they get a box or basket of freshly grown locally raised produce. Snow's Bends' CSA has been bountiful and diverse. I've tried things I hadn't before: watermelon radish, kohlrabi, purple collards, red turnips, and escarole. Then I've tried things that make me so freaking thankful that local farms are doing well: kale, red beets, striped beets, garlic, sweet potatoes, bok choy, dill, cilantro, basil, lettuce mix, cabbage, snap beans, romaine lettuce, collards, turnips, mustard greens, parsnips, butternut squash, carrots, edamame, arugula, okra, swiss chard, spinach, and fresh baby ginger. I have cooked many meals utilizing amazing, delicious, fresh produce, and I design meals around what I get in the box. So far, there has been red lentil dhal with swiss chard, cannelloni with fresh spinach, salads, stir-fried turnips, bok choy, and cilantro, lots of frozen cabbage, collards, beans, dill, and edamame, braised butternut squash, multiple batches of Cajun baked sweet potato fries, and tequila based martinis featuring watermelon radishes and hot banana peppers.

I'm about two weeks out from the end of the semester. I have ~140 papers to grade, 120 assignments to  grade, and final exams to be written. This past Friday, I realized I had hit the 15th week of the semester. Cooking is my salvation - if I have time (paired with beers and/or fancy shmancy cocktails).

Vegan Delight
This dish is an Asian-style slaw using watermelon radishes and carrots. It is used as a topping on braised butternut squash and rice or barley pilaf. It tastes like seaweed salad but with a slightly different texture.
Yield: 4 servings, 1/3 cup each

Ingredients:
1-2 medium watermelon radishes, grated
1 large carrot, grated
2 tbsp chives cut into 1/4" slivers
2 tbsp rice wine vinegar
1/4 tsp red chili flakes
1/4 cup water
1 tsp miso
1 tsp plum paste like Japanese Umeboshi
1 tsp sesame oil

Directions:
1. Shred the watermelon radishes and carrots.
2. Place them in a bowl, and add the scallions on top.
3. Pour rice wine vinegar on top and stir together.
4. Heat up 1/4 cup water, and dissolve miso and plum paste in the water.
5. Pour sesame oil on top of miso mixture.
6. Pour everything over the radish and carrots mixture. Stir to combine, and adjust salt to taste.

I served this over some braised butternut squash and a barley pilaf. I've been eye-spying Mark Bittman's recipes lately, and several of his dishes have been making it onto our weekly meals. The braised butternut squash is so simple to prepare, yet tastes like it took much longer. It is quite simple, and can be incorporated into several dishes (stuffing for quesadillas, reheated and served over a salad, etc).

March 31, 2012

Tofu mushroom étouffée!

Wow. I think there is something addictive in this dish. It tastes so good. I adapted it from the FatFree Vegan Kitchen. I made the roux the traditional (full disclosure: full-fat) way. I'm not a huge fan of eliminating all fats either because I think fats can carry flavors, have a role in absorbing nutrients, contribute to satiety, and good blood sugar regulation. However, her take was quite creative, and I would try it again now that I've made it and understand the steps more clearly. 


The flour used in étouffée is toasted until it becomes a rich toasty brown. Getting the red-brown sauce is done by toasting the flour in a pan. Stir it a lot. You don’t want it to burn. It will smell kind of like chestnuts. I like the addition of soy sauce from the original recipe. Overall, I think this dish actually has a lot going on in terms of prep work, cooking time, and stand-by time. Read the directions all the way through, and then begin. 


Etoufee


Tofu mushroom étouffée
Adapted from the Fatfree Vegan Kitchen's Vegan Sausage and Mushroom Etouffee
Yield: 4-6 servings


Ingredients:
1 cup long-grain rice, prepared according to package directions
2-3 tbsp peanut oil
1 package extra-firm tofu (300 g)
2 ribs celery, chopped, about roughly 
1 medium carrot, chopped into coins
1 small onion, chopped medium dice
1 small bell pepper, cut into 1" chunks
1 cup sliced buttom mushrooms, or about 8-10 sliced, wipe clean then slice
3 cloves garlic, sliced
1/2 cup parsley, divided


Roux
3 tbsp all-purpose flour
2 tbsp peanut oil
2 cups (16 oz) vegetable broth
1 tsp soy sauce
1 tsp red chili powder (or paprika if you want it less spicy)
1/4 tsp cayenne powder
1/2 tsp ground black pepper
1/2 tsp salt (optional)


Cook rice according to package directions. 


If you use a high-qualify pressed tofu (like one from an Asian grocer) you won't really have to press much water out of it. Slice up the tofu into squares, or cubes, really however you want to serve it. Lay it out on a plate and lightly sprinkle with salt. After a few minutes dab the tofu squares with a cloth to pick up the water. Flip and repeat.


Heat up a cast iron pan over medium heat. Pour in 3 tbsp of peanut oil and heat up. When ready add the tofu to the pan, laying out in a single layer and being careful not to overcrowd the pan. Cook on each side until golden-brown, about 14-20 minutes. Remove the tofu, replacing it with the other uncooked ones until all of them have been cooked.


To the same cast iron pan add in the onions and cook until just beginning to get golden brown. There should be enough oil leftover that you won't need to add any new oil. Add in celery, followed by carrots, and bell peppers. Continue to cook about 5 minutes. Add in mushrooms and stir everything carefully so the uncooked mushrooms get distributed evenly.


While you are waiting for the mushrooms to cook down, add 3 tbsp of flour to a new wide skillet or a medium saucepan. Just use a pan that you can make sure and see that the flour is changing. Cook it over medium heat. It won't turn when you're staring at it, but the second you forget about it for longer than 2 minutes, that's when it goes from white to burned. Pay attention and stir it with a whisk once a minute. Give the pan a few good shakes like you're on a cooking show. It will go from white, to golden, to still golden, to still golden, to tan, to brown and toasted. Once done remove the pan from the heat, and if you want remove the flour to a bowl until ready to use.


Stir the veggies too and now add the garlic and parsley. See what I mean about a lot of stuff going on? It's ok though because you got your rice cooking, you got the veggies done, you got the tofu on the side and ready to go.


Now get your broth ready. Once it's ready stir in about a tsp or small dash soy sauce or Bragg's. In the same pan that you used for the flour, add 2 tbsp of peanut oil and heat up over medium-high heat. Once hot add in toasted flour and whisk until it becomes like a nice chunky paste almost like miso. Gradually pour the broth mixture over whisking the mixture the whole time. It should look like a lovely brownish red sauce. Stir it continuously for 10 minutes or until it starts to thicken. Add the spices and remaining parsley. Continue stirring.


Once it reaches desired thickness, it should be thick without being too thick like a gravy, but thicker than a sauce. It should easily coat, or smother, the veggies. In whatever pan is bigger, pour the sauce in the veggies, or the veggies in the sauce. Remember to add the tofu to the veggies, I like keeping them separate because the tofu stays chewy much longer. Stir together and heat through.


Serve over rice. I like to add the rice into custard cups and turn them out onto a plate for a nice presentation. This dish is really delicious. I love popping open a beer and cranking up the music because it's much harder to leave any of this unattended. Maybe it'll end up as one of your favorites?


Beer pairing: a lemony saison, such as Saison Dupont, or a citrusy light hopped IPA. 

December 30, 2011

Red lentil dhal served over rice


As the holidays wind down it’s nice to have a hearty and healthy meal after days of gorging and drinking. I recently bought some Delhaize brand curry powder (no salt added) and found it fresh and delicious. I added it to these lentils along with some vegetable broth and this is the curried outcome.

This holiday we traveled by train to visit family. It was a nice relaxing way to get from one place to another. Earlier, Belgian rail strikes scared us into thinking that we’d have no trains for travel. After the strikes settled down tickets were purchased and rail travel resumed as normal. While I think car and air travel have their obvious advantages (e.g speed, setting your own schedule, convenience), it was especially wonderful to walk to the train station, sit down, read, and let the trains take us.

Happy Holidays!

Red lentil dhal served over rice
Serves: 4

Ingredients:
1 cup uncooked rice, prepared according to package directions
1 tsp olive oil
¼ tsp mustard seeds
¼ tsp cumin seeds
asafoetida (pinch)
few pods whole cardamom
1 cup onion, chopped
1 tbsp ginger, grated over a small hand grater
½ tsp cinnamon
red chili powder to taste; I used ¼ tsp
½ tsp garam masala
2 tsps curry powder
1 cup red lentils (masoor dhal), washed and drained
2 cups vegetable broth or water, plus 1 cup water extra

Directions:
  1. As always, hard to find spices can be omitted - any store bought curry powder will do. Begin cooking rice. Put 1 cup long-grain rice in a pot and fill with 2 and ¾ cups water (or according to package directions).
  2. Heat up about 1-2 teaspoons of olive oil in a medium size pot over medium-high heat. Add in mustard and cumin seeds. Once the mustard seeds begin to pop, add asafoetida and cardamom pods. Add onions and stir-fry lightly. Stir in ginger, cinnamon, red chili powder, and garam masala.
  3. Stir these until fragrant. Add in red lentils along with 2 cups vegetable broth or water. Stir and bring to a simmer. Stir this frequently. When the lentils have been cooking for at least 10 minutes, stir in curry powder and adjust for salt.
  4. Turn the heat to low and add in 1 cup of water. Simmer on low heat, partially covered, until the desired thickness is reached. Serve over rice. This last step should take about 20 minutes.

December 14, 2011

Bhajias two-ways with applebutter chutney

I keep thinking I'm going to have an epiphany of an awesome intro to these amazing bhajias (chickpea flour fritters), but I never come up with anything better than, these are delicious and next time you break out the home deep fryer, put these on the list (as evidenced terrible writer's block). On a recent visit back to NC (which geographically falls in the southeast, ahem, Sara) my friend, Nick (who is basically the best cook ever - you too Nico), made sweet potato fries spiced with brown sugar, garlic, and a pleasant dusting of cinnamon, half a dozen pizzas, and amazing sweet potato latkes (it should be noted that the fries were the only thing that went into the fryer). Since getting back to Belgium I've been in a rare no writing funk. I honestly think I'm reverse homesick.

These bhajias are filled with minced onion and chilies (chili's, chile's, sp?). My mom swears by using wheat germ in the batter because they soak up less oil and produce a crispy batter with bite. Sara are you still reading? Because you have to make these and bring the deep fryer back. Then as if those spiced ones weren't good enough, we went and made another batter for banana bhajias. Oh hell yes we did. Served with some apple butter chutney these are best served immediately. Random side note, go and listen to the new Drake album (solid throughout), and then when you are done, go listen to Yelawolf (I'm a big fan of the tracks in the middle of the album).


Bhajias two ways with applebutter chutney
(chickpea flour fritters)
Yield: 4-6 servings

Ingredients:
1/2 cup diced onion, fine dice
1-2 jalapenos, sliced very fine
3/4 cup chickpea, or besan, flour
1/2 cup wheat germ, fine ground
1/2 tsp sanchar (contains black salt, pepper, and citric acid), optional
1/8 tsp citric acid powder 
1/2 - 1 tsp garam masala 
1/4 tsp or more red chili powder
1/8 tsp baking soda
1 tbsp yogurt
1/2 tsp turmeric
1 tbsp brown sugar
oil, such as peanut oil, enough to fry

Directions:
Mix everything (onion through brown sugar) together and add enough water to make it pasty. Heat up oil in a fryer. Once hot drop heaping teaspoonfuls into the hot oil and fry until golden brown. 

Apple butter chutney
Ingredients:
1/2 tsp cumin
1/2 tsp coriander
1 tsp fresh lime or lemon juice
water to thin
1/2 cup apple butter

Directions:
Mix together all ingredients. Taste to adjust for seasonings. 


Banana Bhajias
(Chickpea fritters with bananas)

Ingredients:
1-2 firm bananas, sliced into wide coins
1/4 tsp turmeric
water to make pasty
1/2 cup chickpea flour (preferably black chickpea flour because it is finer)
1/2 - 1 cup wheat germ, fine ground
water to make it pasty
1-2 tbsp yogurt
oil, such as peanut oil, enough to fry. 

Directions:
Mix everything together and add enough water to make it pasty. Heat up oil in a fryer. Drop the banana coins into the batter and carefully drop them into the hot oil; fry until golden brown. Remove with a slotted spoon to a glass dish lined with paper towels. 

November 22, 2011

Yellow split pea and calabash squash curry

Yellow split peas
Split yellow peas.

Calabash squash
Calabash squash, a type of young bottle gourd.

Sauteing onions
Onions, ginger, and garlic sauteing along with fenugreek, udad dhal, and mustard seeds. 

Chopped and peeled calabash squash
Prepping the calabash squash.

DSCN0002
A thicker consistency before adding the split yellow peas.

DSCN0004
Thin the dish with enough water to let everything fill out.

DSCN0006
Squash chunks get added.

Yellow split pea and calabash squash curry

June 14, 2012 update: Laura, of the ever-spectacular Hip Pressure Cooking, was kind enough to share my (mom's) recipe in her Reader Recipes. I've been a fan of pressure cooking for a long time, and her cooker reviews and lessons can be transformational to anyone that cooks. Her approach is to bring this method of cooking to about any cuisine, and after scanning her pics, she pretty much nails them. My personal favorites (those I have bookmarked until I get my own pressure cooker) of Laura's are: tamales, eggs, crema Catalana, and artichokes.

If you're new to pressure cooking, but are intrigued and curious, check out the July 2012 Pressure Cooker Challenge. Join a community of support, build up skills, and share your recipes and techniques.

Mom's dudhi channa shak or yellow split pea and squash curry. One of a dozen recipes I have carefully gleaned on my trip home. 

In getting the Gujarati term for this squash/gourd correct, I did a few web searches, and asked each parent to spell it before settling on a spelling. Dudhi. Doothi. Doodhi. In Hindi, lauki.  Calabash squash is a type of bottle gourd which is used when it's young and green. If you can find it (usually at an Asian or south Asian market) peel the skin off and remove the seeds. It's mild, and it holds its shape well in curries or soups which are simmered. However, don't let it scare you off - yellow summer squash or zucchini squash can be used instead of the calabash squash.

Although the recipe ingredient list looks long you can omit many of the spices you don't have, or add spices such as increasing the heat with extra jalapenos or red chili powder. First read the recipe all the way through. Soak the lentils first, then prep the ingredients. This soaking time will help reduce the total cooking time of the lentils. This dish can be cooked in a pressure cooker which can cut cooking time in half, or can be cooked in a pot on the stove. A pressure cooker is high on my wish list of solid kitchen tools. 

The cooking times and directions have been written for stove-top and pressure cooker cooking methods. Serve the finished dish alongside some buttered hot pita bread, or over rice. Since it's close to Thanksgiving, it would make an excellent vegetarian/vegan main course, or perhaps even a one-pot meal for the weekend. With days of steady rain projected for the Pacific Northwest weather, this dish really hits the spot. 

Yellow split pea and calabash squash curry
(Dudhi channa ni shak)
Yield: 4 servings

Ingredients:
1 cup yellow split peas; soaked in water in a bowl, set aside.
1 tbsp peanut oil
1/4 tsp udad dhal, optional
1/4 tsp fenugreek seeds, optional
1/2 tsp mustard seeds, optional
pinch asafoetida, or hing, optional
1 clove garlic, chopped
1 tbsp ginger, chopped fine
1/2 cup onion, chopped fine
water as needed
2 cups calabash squash, peeled and cut into 1" chunks. Remove the seeds (ok to substitute unpeeled yellow summer squash or zucchini squash)
1/3 cup tomato chunks, thinned with about 2 tbsp of water
1/2 tsp turmeric
1 tsp salt
1 tsp cumin, ground
1 tsp coriander, ground
1/2 cup chopped cilantro, divided, safe half for garnish
1-2 tsps garam masala, to add just before serving
red chili flakes to be passed when served

Directions for stove-top method:
Approx. cooking time: 40 minutes
1. Wash the yellow split peas well. Place them in a medium size bowl and cover them with water.
2. Add the oil to a medium-sized pot, and heat up over medium-high heat. Once the oil is hot, add in the udad dhal, fenugreek and mustard seeds. When the mustard seeds begin to pop (about 1 minute) add in the asafoetida powder. Stir everything together and then add the onions, garlic, and ginger. Continue to saute, turning the heat down to medium. If omitting the optional ingredients, add the onions, garlic, and ginger to the oil and saute until golden. 
3. Add the yellow split peas (along with the water they are soaking in) to the pot along with 1-2 cups of water. Add the tomato chunks thinned with a bit of water, turmeric, salt, cumin and coriander. 
4. Add the calabash squash chunks (see note below about subbing squashes), and half of the chopped cilantro. Stir everything together and bring to a simmer over medium heat. Let cook 30-35 minutes. Stir it often, and check to see how the lentils and squash are cooking. The dish is done when the lentils are cooked, the squash is easily pierced with a fork, and the dish can be served over rice without being too soupy.  
5. Stir in garam masala and the chopped cilantro and serve. 
(Note: if subbing in summer squash or zucchini, let the lentils cook for 30-35 minutes before adding the squash in. The curry can be cooked an additional 10 minutes. This will prevent the squash from over cooking and falling apart. 


Directions for a pressure cooker:
Approx. cooking time: 25 minutes
Follow steps 1-4 in the directions above, but only add 1 cup of water. Because the pressure cooker cooks everything super fast the extra water is not necessary to accommodate the water that boils off on the stove top. Once you bring the curry to a nice simmer as in step 4, set the pressure cooker to 3 whistles on medium-high heat. 

If using summer squash or yellow squash, increase the soaking time of the lentils to 1 hour, and cook the mixture to a max of 2 whistles. It may take some adjustment, but it will prevent the squash from turning into a soggy mess, and should cook the lentils. Finish the dish by stirring in garam masala and chopped cilantro. 

October 24, 2011

Ubiquitous Lentils

Lentils
Ubiquitous spicy lentils

I make this dish when I remember to cook lentils, because the recipe makes a lot of lentils, and the dish can go in everything. These ubiquitous lentils were used to top a salad, as a side dish to enchiladas, they were stuffed inside calzones, and were consumed after Friday happy hour. I've been cooking up plain lentils and beans lately to have on hand to add to many other dishes. Pre-cooked plain beans and lentils can be added to soups, pastas, salads, top pizzas, thrown into burritos or quesadillas, or put on toast. Canned varieties are a fine substitute, but home-cooking them is easier and cheaper. I must have been thinking about Herbivoracious's Mexican cowboy beans when I made this, so I'm dedicating these lentils to that delicious blog.

I just got done reading Mark Bittman's essay Cooking Solves Everything: How Time in the Kitchen Can Save Your Health, Your Budget, and Even the Planet. If your familiar with Bittman, you'll know he writes about food and cooking with a real food real ingredients mentality. As a cook, it was inspirational and reminded me how important it is to share cooking, in whatever fashion, with others because home-cooked meals made from largely unprocessed foods are rare. If you cook simple healthy foods on a daily basis you have the ability to impact behaviors of others around you because cooking and feeding people involves people to react to what you are putting in front of them whether it tastes good or bad.

Cooking and sharing meals changes the perceptions of the how and what of cooking meals. Cooking impacts health because by cooking on a daily basis you have the ability to cook healthy foods and serve yourself normal portions of food, and avoid prepared foods that derive the majority of their flavor from salt (either as sodium or MSG), fat, sugar, and other flavor enhancers. These foods, the bulk of which are highly processed, or restaurant and fast foods, are bad for health. Bad. Bad. Bad.

Cooking, while not as obvious as it seems, supports local food economies. Bittman argues that cooks, that cook a lot get selective about ingredients, and are tuned into the cost of the food they are buying; they purchase seasonally, not because they are dedicated locavores, or trendy foodies, but because cooks purchase and select the foods they cook with. Most grocery stores, while they stock huge varieties of fresh fruits and vegetables, run the best deals on seasonal produce. The best part about this, is that it's usually right in front of you as you go into any grocery store.

I have been following the Food Day events that have been going around nationally. My friend, Alyse, helped organize the NC Food Day where they organized over 1060 lbs of fresh fruits and veg for needy families. The Food Day campaign aims to raise awareness and action on local foods policies to support local food economies, promote sustainable agriculture, protect the environment by exposing big agribusiness marketing and manufacturing, and improve nutrition and chronic disease knowledge. It fits closely with the Bittman's essay because cooking is a one-step action to supporting better health and stronger food economies.

Ubiquitous Lentils

Ingredients:
olive or peanut oil for sauteing
1 onion, chopped
2-3 cloves garlic, minced
a tad bit of beer to reduce (optional)
2 tomatoes, chopped, or diced plain canned tomatoes
salt to taste
1 chipotle pepper, chopped
1 tsp herbs (optional, such as oregano or thyme)
1 tbsp cumin
2-3 cups cooked lentils, more or less, or 2 cans of lentils, rinsed and drained.
water to bring everything together, or broth
Fresh squeeze of lime

Directions:
1. In a wide and deep saute pan, cook onions and garlic together in olive oil over medium-high heat. After they start looking golden, reduce them a bit with a splash or two of beer. You can use any variety you like. You don't have beer? No worries, just skip. Cooking and quaffing a beer are side by side activities in my book. I tend to drink a lot of Belgian strong golden ales (such as Duvel), so I used a few splashes just to see what it would taste like, it was good.
2. It will sound fancy and smell good. Stir in the tomatoes, salt, chopped chipotle peppers, herbs and cumin. Stir it all around, and then add the cooked lentils.
3. Add in the broth or water and cook until combined and reduced down a bit. Should take about 20 minutes, or less. Squeeze with lime and serve. Can store up to a week in the fridge.  

October 16, 2011

5-bean chili with Leffe brown beer and chipotle peppers


I try to cook beans from scratch because I like that they aren't too processed, but I use canned beans too. To make it easier to use dried beans, I'll share how I normally prep them. I either soak the beans, in a huge bowl filled with lots of water, first thing in the morning, or I soak them overnight. If you soak them in the morning, you can cook the beans when you prep dinner; if you soak overnight, you can cook them first thing in the morning. They can cook, mostly ignored, in a large soup stockpot, or pressure cooker, or crock-pot (see this post on cooking beans and lentils). Once done cooking, you can store the cooled beans and broth in the fridge until ready to use. If you start doing this 2 days per week, you'll have lots of healthy beans to throw into random dishes. For example, stirring in a cup of mixed beans into a pasta dish, topping a salad, filling a burrito with them, or beans on toast. Or perhaps some spicy chili for a cool fall day?

I've used the Belgian Leffe brown beer for this because it has a balanced subtle sweetness, and I like the malty notes it left in the chili. Use any brown or amber beers (or really any beer you feel like dumping into a soup pot) with a nice body and aroma. Plus it's always cool to cook with beer. 

5-bean chili with Leffe brown beer and chipotle peppers
Ingredients: listed in order of use
Yield: 4 servings, about 1 and 1/2 cups

1 and 1/4 cup dried beans, (any mixture of dried black beans, chickpeas, kidney beans, pinto beans, white beans) soaked and cooked; Canned beans are totally fine too. Use 2 or 3, 14 oz cans of different canned beans.
1 tsp olive oil
1 red onion
1 bay leaf
2 cloves garlic, chopped
1 cup Leffe dark beer, slightly more if foamy at first (let it reduce by half), 
1 cup chopped green bell pepper
2 Tbsp chili powder (recipe below)
1 small canned chipotle pepper, about 1 tbsp chopped pepper, add more for extra heat
remainder of beer
1 cup canned diced tomatoes
1 cup corn, frozen or canned
1 tbsp fresh lime juice
cilantro to garnish
1/2 tsp salt (to taste if not enough)
yogurt and shredded cheese (optional for garnish)

Chili powder:
1 T of smoked paprika
1 T cumin
1 T oregano (or other mixed herbs such as thyme, mint,)
1/8 tsp cayenne powder
1/4 tsp cinnamon
1/2 tsp salt
This is a variation that can be adjusted to your taste and preference. The smoked paprika is very delicious in this dish. I'd recommend adding a tsp to the chili just before serving. Mix all the spices together in a small bowl and set aside until ready to use.

Directions:
  1. Saute onions and garlic in the olive oil. Once the onions turn a bit golden, add in 1 cup or more of the beer. It will foam and settle down, releasing a delicious smell. Let it reduce by half, then add in the green bell peppers.
  2. Add in 2 T of the spice mixture and the chipotle peppers (a chopped chipotle pepper should be about 2 tbsp).
  3. Add the cooked beans to the pot along with the about 1 cup of the bean broth. If using canned beans, rinse and drain them (it removes the salty brine taste), and use 1 cup water instead. Pour the rest of the beer into the chili, along with 1 cup of chopped tomatoes. Stir to combine, turn up heat and simmer for 30 minutes. Before serving add in 1 cup of canned corn (if using frozen corn add it in 10 minutes before the chili is done). Stir in rest of beer and 1tbsp of lime juice.

Top with a dollop of plain yogurt, shredded cheese and garlic bread.

October 11, 2011

Butternut squash and pear soup


This is an excellent soup, I often heat some up for breakfast in the morning with a slice of toast. I make this soup as soon as butternut squash hits the markets. No blender, no problem. Just mash the contents with a potato masher in the roasting pan and add them in. It makes a chunky soup, but soup is soup. Since the main ingredients are roasted first then made into soup, this makes an excellent soup to make on the weekends, or if you have some free time at home. The prep is all in cutting the squash, but most of the time is spent idly.

Butternut squash and pear soup
Yield: 4-6 servings, 1 or 1 and 1/2 cups each.

Ingredients:
1 butternut squash, chopped in half and seeds removed, leave the peel on.
3-4 pears, peeled and cut in halves, seeds removed
large handful fresh thyme, washed and left whole
4 garlic cloves, unpeeled and left whole
olive oil as needed
coarse salt
1 red onion chopped fine
1/4 cup white wine
2 cups vegetable broth, or water
1/2 cup milk (soymilk or cream is fine too)
salt as needed

Directions:

Preheat the oven to 400º F or 200º C. Wash and scrub the squash and pears. For cutting the butternut squash, leave them unpeeled. I like to lay the squash down and cut it in half along the shortest width, the middle of the squash. Then take each side, place them cut side down on a cutting board so they don't slip, and cut them in half; the top half into two halves, and the bottom into two halves exposing the seeds in the middle. Scoop out the seeds and save them. You can roast them (see note at end of post). For the pears, peel them, cut them in half and remove the seeds and stem.

  1. Wash the thyme and leave it whole.
  2. Peel the garlic cloves and leave them whole. You can give them a quick smash if you want.
  3. Pour about 1 and 1/2 teaspoons of olive oil in a roasting pan. Place the pear halves, butternut squash halves (the fleshy part should be touching the bottom of the pan), garlic cloves, and thyme in a roasting pan. Pour about 1-2 teaspoons of additional olive oil on top and sprinkle with coarse salt.
  4. Roast in the oven for 30 minutes to an hour. The longer roasting time will help the juices caramelize, the squash is done when golden brown on top and is easily pierced with a fork or knife. Let cool on countertop.
  5. When the squash is cool enough to handle, peel the skin off. It should come off very easily. Remove the thyme from the stems. Leave everything in the pan.
  6. In a medium size soup stockpot, heat up about 1 tsp of olive oil. Add in the chopped red onions and cook until nice and golden. Add in wine and let reduce. Add the squash, thyme, pears, garlic and all the roasting juices.
  7. Add in vegetable broth and bring to a simmer. If you have an immersion blender, turn down the heat and gradually blend everything together. Alternatively, you can place half the contents in a blender (allow space in the cover for steam to escape, and repeat as necessary), and blend together. Returning the blended soup to the pot. Once it reaches a creamy silky consistency, stir in the milk or cream, and heat up.

Note: When the squash is done roasting, you can lay out the washed butternut squash seeds on a baking tray and roast them on low heat. I just add a tad bit of oil and a sprinkling of salt. They take about 20-25 minutes at 200º F.

August 31, 2011

Easy refrigerator pickles


Refrigerator pickles made with bush and lemon cucumbers

Easy refrigerator pickles

refrigerator pickles

Khavanu turns 3 today. I started blogging (I still find that word awkward) as a way to share recipes and  store my favorite recipes online. I didn't think I'd stick with it. It has grown into something I really enjoy doing. Some outcomes I'm generally happy about are that my photography skills have improved, I've grown as a cook, and I've been able to see how progress has been made in the garden. After moving to Belgium a year and a half ago, I began including travel posts. However, my writing is still awful! Isn't it?

My goals, since this is a kitchen sink of ideas, are:
- to try out more regional Belgian (or other) foods in the upcoming posts and cook more foods with beer.
- Write better, clearer instructions from recipes that have been tested at least three times.
- Challenge myself to write more nutrition public health posts.

In keeping with my goals, and honoring my very first dorky post, here is my tried and true version of refrigerator pickles (which I've been using and adapting from Alton Brown's Good Eats!). I've made these pickles dozens of times. The cucumbers came from my garden and are a mixture of bush cucumbers and lemon cucumbers.

Easy refrigerator pickles
Yield: 3 jars, 8 oz each
Ingredients, listed in order of use

Sterilized jars and lids, such as 3 8 oz ball jars, or a mixture of other clean glass jars and lids
4-6 small-medium cucumbers
multiple cloves garlic (1 smashed clove for each jar)
1 onion, sliced in rings or half-rings
1 cup water
1 cup cider vinegar
1/2 cup white wine vinegar (or champagne vinegar if you can find it)
1/2 cup sugar
2 tbsp plus 2 tsp kosher salt
1 tsp mustard seeds
1 tsp coriander seeds
1/4 tsp turmeric
1 tsp pickling spice (optional)

Directions:
  1. With all clean utensils prep the cucumbers by slicing into 1/4" slices or prep them as spears. Place 1 smashed garlic clove in each jar. Fill with cucumbers and onions, and set aside.
  2. In a non-reactive medium sauce-pan combine water, cider vinegar, white wine vinegar, sugar, and salt. Stir to combine. Add in mustard seeds, coriander seeds, turmeric and pickling spice and heat up over medium-high heat. Bring to a simmer and let it simmer for 4 minutes to wake up the spices.
  3. Fill each jar with the pickling liquid, and let stand. Top the jars with any remaining liquid. Once cooled off, tighten the lids and place in the fridge.

The pickles should be ready in as little as 3 days, but a week is better for them to set. You can easily double the recipe if you have more pickles or jars. 

July 24, 2011

Picnic Potato Salad

A healthier tastier potato salad.
Potato salad

Potato salad


Now all you need is a nice picnic location, or an invite to a BBQ.
A nice picnic spot with an old abby.
Someone to carry the picnic supplies?
Park Abby

This is a healthy potato salad made out of a yogurt and mustard dressing. It's refreshing and tangy and nothing like the heavy mayonnaise bland potato salads. Start by bringing some water to boil in a large pot. While the water is warming up, scrub, peel, and quarter the potatoes. While the potatoes cook, prep the rest of the ingredients. 

Picnic Potato Salad
Serves: 4 or more
6-8 medium to large potatoes, washed, peeled and quartered into large chunks
salt, about 1 tsp
1/3 cup yogurt (half mayonnaise and half yogurt is fine too)
2-3 tbsp fine Dijon mustard (may want to add to your taste)
1/2 cup finely chopped red bell pepper (or any other color is fine)
2-3 tbsp parsley, chopped fine
2 spring green onions, chopped with about 4" of the greens chopped into chives
salt and pepper to taste

Directions:
1. Bring a large pot of water to boil over high heat. Lightly salt the water with about 1 tsp of salt (I used coarse salt). Covering the pan will make it boil more quickly.
2. Once the water comes to a simmer, or light bubbles form from the bottom to the top in a steady stream, carefully add in quartered potato chunks and turn heat down to medium. Cook 15-20 minutes or until soft. Don't cook the potatoes so long that they fall apart, you don't want boiling water, a light simmer is fine. Turn the heat off once cooked. They can sit in the water until just ready to use.
3. In a small mixing bowl add yogurt through green onions. Stir to combine. Taste to adjust seasoning. Since the potatoes were cooked in salted water, you may not need to add in any extra salt.
4. Drain potatoes in a colander, but before draining, reserve 1/2 cup of the cooking water, such as in a coffee mug or teacup. Place the large pot on a heat-safe surface or on a pot holder.
5. Add the drained potatoes back to the large pot, and place the dressing on top.
6. Carefully mix the potatoes and dressing together. Take a big spatula, and gradually fold the potatoes from bottom to top. If too thick, thin with some of the reserved water. Serve immediately, or place in fridge until ready to serve. Some water may separate from the yogurt, just stir carefully before serving.

April 12, 2011

Chipotle Salsa

Salsa ingredients + lazy Friday afternoon + bad photography = chipotle salsa!
orange bell peppers getting diced
green bell peppers getting prepped
After hand-chopping almost a dozen of these guys, I realized I needed a picture. Tomato love.
Jars of chipotle salsa

and since it's a lazy Friday:
Duds' shows off his stretching
Not sure if salsa is kitty appropriate

This is a delicious, hearty, spicy, tasty, slightly smoky fresh salsa and I can't wait to share it on here. I've been eating it this entire past month. The recipe comes from my family in NC, I can't remember when I copied it down, but I've held onto it for a few years. It's easy to prepare and freezes well. You can chop all ingredients by hand – it'll take about an hour; a food processor will certainly speed things up, and can be used as well.

S and K's Chipotle Salsa
2 and ½ lbs ripe tomatoes, chopped fine
1 onion, chopped fine
1-2 bell peppers (green, red, or yellow), chopped fine
1-2 cloves garlic, minced
1 small can, 7.5 oz chipotle peppers in adobo sauce, chopped fine
2 tsp of adobo sauce
1-2 tbsp lime juice
1-2 tbsp vinegar (e.g. white-wine vinegar is fine)
1-2 tsp salt
1-2 tsp cumin
1-2 tsp oregano (dried is fine)
½ cup cilantro, chopped fine

For a super hot salsa, count 1-2 chipotle peppers per tomato; for a medium salsa use 4-5 chipotle peppers for the batch, and for a mild salsa use 2-3 chipotle peppers for the batch. Use gloves to handle peppers. Start off adding half the chipotle amount, taste and adjust, and add extra as needed. The salsa can get spicy quickly.

If using a food processor you'll whip this up in no time. Attach the chopping blades and mince whole garlic first. Add in onions (prepped as quarters) and chop to combine. Chop until desired consistency is reached. Remove to a bowl, or a large soup stockpot. Add in bell peppers (prepped as quarters), chop then remove. Finally, add in tomatoes (prepped as quarters) with chipotle peppers (kept whole) and chop until desired consistency is reached. Add all chopped ingredients to a large mixing bowl, or a large soup stockpot. Stir in adobo sauce, lime juice through cilantro and combine. If adding additional chipotle peppers, just chop them in the food processor and add to the pot.

Directions:
  1. Combine all ingredients together in a large soup stockpot. Stir to combine and adjust for taste.
  2. Heat up salsa over medium heat and simmer 10-15 minutes. Once cool, ladle into jars and set in fridge. You can freeze extras, thaw overnight in the fridge and it's ready to eat.

April 10, 2011

Chili sin Carne (con frijoles!)

Tacos with chili con frijoles

Chili con frijoles
Chili con frijoles

In my never-ending quest to satiate my Mexican food hunger cravings, I scoured the Leuven library to check out some Mexican cookbooks. I adapted a recipe from Tacos and Tortillas by Thea Spierings to be vegetarian and include more taco-esque ingredients. Cookbooks with simple pictures do loads to help with language learning.

If you've never had bean-based tacos I would highly recommend trying this. When I taught cooking classes, I often taught how to prepare simple healthy foods, encouraged trying new foods, and helped plan meals to make the most out of food budgets. In prepping tacos, I would recommend cutting half the beef with beans to improve nutritional content and extend food dollars. A lot of meals I taught revolved around beans – beans are high in protein, fiber, and nutrition. Beans cooked from scratch are dirt cheap (although they do take some planning), and they have a long shelf life. Canned beans can be very cheap, and require no cooking (besides heat and eat). The bean filling can be used in tacos, quesadillas, burritos, or served alongside some rice.

Chili sin Carne (con frijoles!)
Serves 4-6
1 tbsp olive oil
½ block of frozen tofu, defrosted and chopped fine (optional)
1 onion, chopped
1 bell pepper, chopped or mixture of red, yellow, or green bell peppers
1 jalapeno, seeded, deveined and chopped
2 cloves garlic, chopped
2, 14 oz cans pinto beans (or mixture kidney and pinto), rinsed and drained, or 1 and ½ cups soaked pinto beans prepared with the soak and cook method
1, 6 or 8 oz can pineapple chunks in their own syrup, rinsed and drained
2-3 tbsp hot chili sauce
1 pack of taco shells

Fix-ins for tacos:
2 cups shredded lettuce
salsa (like this really yummy chipotle salsa)
black olives
chopped tomatoes or bell peppers
sour cream
avocado chunks or guacomole

Directions:
  1. Heat up olive oil in a wide skillet over medium-high heat. If using tofu, add it in and stir fry until golden brown. Once golden, remove from pan and then add in onions and bell pepper. Continue to cook 5-7 minutes.
  2. Preheat oven to 350° F.
  3. Stir in jalapeno and garlic. Season with a bit of salt.
  4. Add in pinto beans, tofu (if using), pineapple chunks, and hot chili sauce. Stir to combine until heated through. Meanwhile, place taco shells on a pan and heat up until hot.
  5. Set out taco fix-ins on a counter and serve immediately.   

April 5, 2011

Refried Beans

Refried beans
With some pre-planning you can enjoy home-cooked delicious refried beans. This recipe contains no lard, so if you are a purist, you can sub in lard, but I made these veg. Home-cooked beans are better in this dish, although you could use canned beans. You can combine pinto beans with red kidney or white cannellini beans; black beans can be substituted for pinto beans. Soak 1 and ½ cups of dried beans overnight, or for at least 6 hours, and prepare with the soak and cook method (or pressure cooker, or crock pot, or whatever). Save the bean broth – you'll use it for the refried beans. Refried beans will last up to 4 days in the fridge, and can be frozen.

Refried Beans
Serves: 4-6
~2 cups pinto beans, cooked (canned is fine, you'll need 2, 14 oz cans rinsed and drained)
broth from beans
2 tbsp peanut oil
1 onion, chopped
2 tsp garlic
1 jalapeno, seeded and deveined, minced (optional)
salt
½ tsp paprika (optional)
  1. Heat up peanut oil in a wide skillet – cast iron is best so you can mash the beans in the pot, but I mashed them carefully in a non-stick skillet. Once hot add in onion and cook until golden brown. Stir often.
  2. Add in garlic and jalapeno and stir to combine. Sprinkle with a bit of salt, stir together, and cook another 3 minutes.
  3. Add in beans 1 cup at a time. Add in ¼ – 1/3 cup water and let simmer briefly.
  4. Once beans are hot start mashing the beans. As the water evaporates, add in more water.
  5. Repeat with second batch of beans. Add in small bits of water to keep the beans from sticking excessively. The beans will thicken up.
  6. Continue mashing until desired consistency is obtained. Adjust with salt and paprika.
  7. Serve as desired (e.g. on nachos, in tacos, with enchiladas, on heuvos rancheros, etc, etc)

March 30, 2011

Channa Masala

I love the smaller denser heartier black chickpeas or kala channa, but if you can't find them, regular chickpeas or garbanzo beans are fine. The term chickpeas and garbanzo beans can be used interchangeably, while black chickpeas are actually much smaller and darker. 

Since Indian foods tend to have longer ingredient lists with some hard to find spices (and who wants to buy a spice you'll use once?) try this: omit the things you don't have, and add the ones you do. Harder to find ingredients are marked as optional. This dish freezes well. Channa masala is usually served with rice or chappati (or naan), some yogurt, and salad. Try serving it on top of couscous. Couscous cooks in 5 minutes, and is a timesaver.

Channa Masala or Black Chickpeas Curry
Yield: 4 servings

Ingredients:
1 tsp olive oil
1/2 tsp cumin seeds (optional)
1/2 tsp udad dhal, (optional)
pinch asafoetida (hing), (optional)
1/2 cup onions, diced
1 clove garlic, minced
1 tsp ginger, minced fine
1 small jalapeno, seeded, deveined and minced (optional)
1 tsp turmeric
1 tsp cumin powder
1 tsp paprika
2, 14 oz cans chickpeas/garbanzo beans or 1 and ½ cups black chickpeas or regular chickpeas prepared by soaking and cooking.
1/2 cup canned diced tomatoes (or 1-2 chopped tomatoes)
1 tsp fenugreek powder, if using seeds, toasted and ground (optional)
1/2 cup water
1 tsp garam masala (optional)
cilantro and green onions, optional for garnish
salt to taste

Directions:
  1. Heat up oil in a large soup stockpot. Once hot add in cumin seeds, udad dhal, and hing. Fry until fragrant.
  2. Add in onions, garlic, ginger, and jalapeno. Stir-fry.
  3. Add in turmeric, cumin powder, and paprika. Stir everything together. 
  4. Stir in chickpeas, tomatoes, fenugreek powder, and water. Add more water if too thick. Stir everything together. 
  5. Partially cover and bring to a simmer. Cook 20 minutes.
  6. Stir in garam masala, taste to adjust for salt, and top with cilantro and green onions.