Showing posts with label rice. Show all posts

November 11, 2014

Uttapam

DSC_0432
American uttapam (salt, pepper, cumin seeds, cilantro, diced onions and bell peppers, cheese)
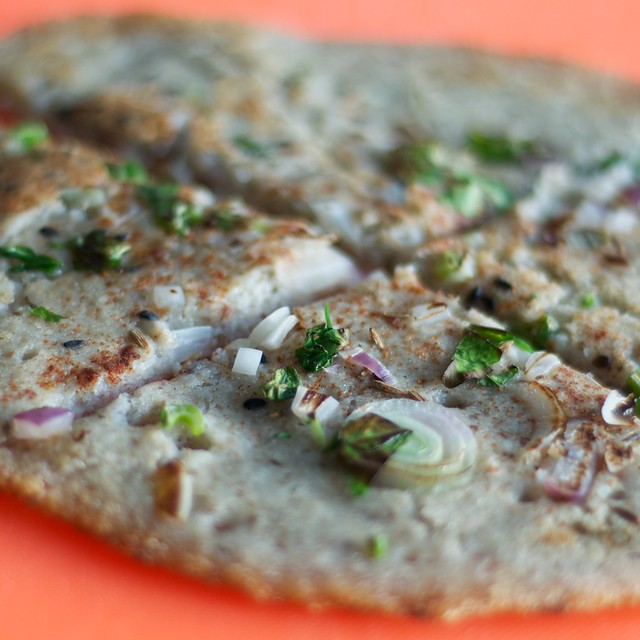
DSC_0418
Simple uttapam (salt, pepper, cumin seeds, cilantro, onion, paprika, sesame seeds)
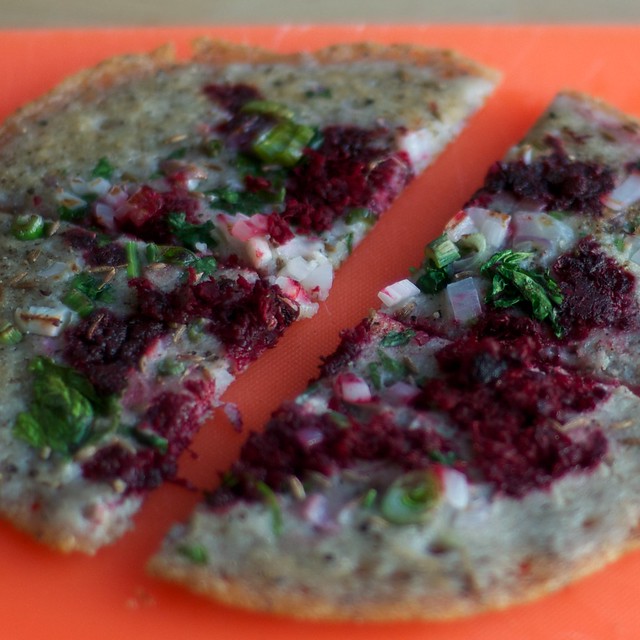
DSC_0435
More advanced uttapam (salt, pepper, cumin seeds, grated beets, chopped fennel)

With this recipe I must offer a disclaimer. Firstly, I am not South Indian.

Secondly, this recipe is not a hand me down from my mother, or her mother, or any long lost family relative from generations of genius cooks. This recipe is solely born out of my singular obsession with certain South Indian foods which happen to contain soaked rice and udad dhal.

Thirdly, I am an ABCD* that speaks fluent, funny sounding Gujarati. If you put a vegetarian south Indian dish in front of me, it will be devoured. Murukku have no chance of surviving. Your extra rasam will find it's way into my stomach. Any dosa batter you had on hand, will be carried out of your home. Idlis? Gone. *An ABCD is an American-born confused desi. Non-resident Indians (NRIs) that settled in the US, call first generation Indians ABCDs because of our broken sounding language skills and lack of proper desi identity. And the fact that I have lumped all the South Indian states into a single culinary tradition. 

My obsession has proven to be useful. For a few years, the only Indian dish I would prepare would be dosa and sambar. Sometimes I'd venture out and make idli's, or chole, but this dish was the only dish I'd prepare regularly. It's unfortunate, that I overlooked uttapam for so long because it contains the same traits that I love about dosa: the planning, the soaking, the grinding, the inevitable wait for the bubbly to occur. If dosa is a lean, crispy, fattening, thin rice crepe, then uttapam is the stocky, well-rounded, rice griddle pancake. But uttapam is so much better. You serve it like an upside down pancake, and while it cooks, you can add toppings to it, so it's kind of like a griddle-cake pizza.

Uttapam is made out of a base of white rice and udad dhal or split black gram. These two ingredients are added to a bowl, covered with water, and allowed to soak overnight. Once done soaking, they are blended together, allowed to rest in a warm spot overnight, and then given a few last minute additions before being the world's answer to the best damn savory pancakes.

So how can you make it? You need four main ingredients: long-grain white rice and brown rice, yellow split peas, and udad dhal. I know - this list seems long, however these ingredients are shelf-stable and don't require much storage room. And once you start preparing the batter weekly, you'll have all the ingredients in your larder. Of these essential ingredients, udad is key. It's sold as urad, udad or black Bengal gram, and is often sold in one of three ways: 1) whole and peeled so it looks white, 2) it is sold split with the black skins on, or 3) it is sold split with no skins. Any variety of these will work. I have tried them all. While not common in grocery stores or co-ops, urad dhal can be purchased online, or a south Asian grocery store.

Finally, I want to note here that I've experimented with different types of lentils so that you won't have to. I've experimented with different ratios of lentils to rice. Of the lentils, I've tried: yellow-split peas, red lentils, green split peas, regular grocery store lentils, and mung beans. I find that udad dhal works the best, and I like the body the yellow-split peas provides. Since I wanted to try healthier types of whole grain rice, I've also tried different ratios of: white and brown basmati rice and white jasmine rice, grocery store regular brown rice, grocery store regular long grain rice, parboiled long-grain rice, forbidden black rice, and red wehani rice. Of these rices, all of the long-grain varieties worked, but the forbidden black rice and the red rices were too starchy and caused the uttapam to stick when cooked. So far, I found half white rice and half brown rice to be a good cooked consistency.

Ready to get started?
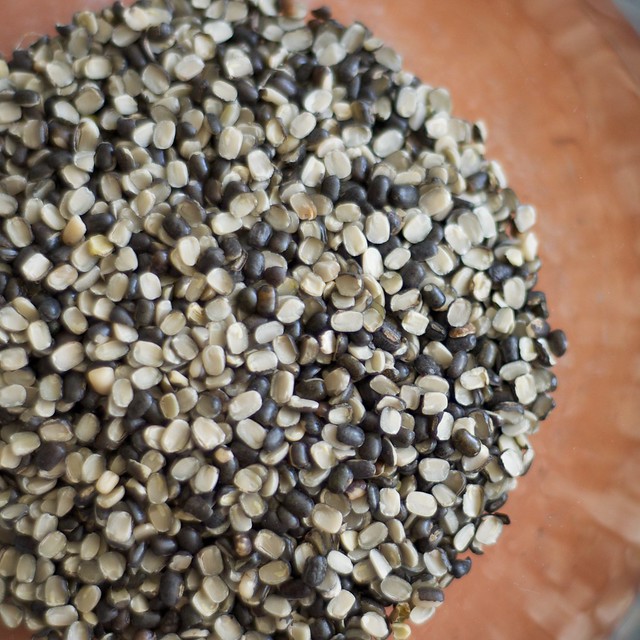
DSC_0010
For my uttapam, I add 1/2 cup (100 g) udad dhal to a large bowl.
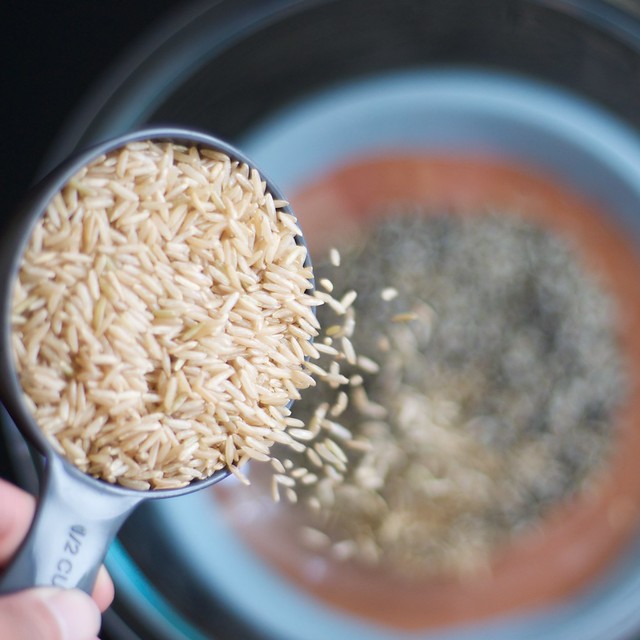
DSC_0043

DSC_0054
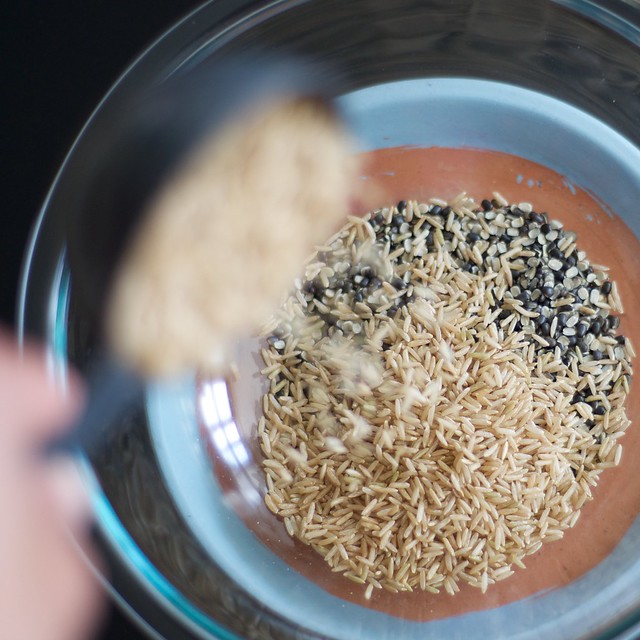
Then I add 1/2 cup (105 g) of long-grain organic brown rice (these pictures were fun to take).
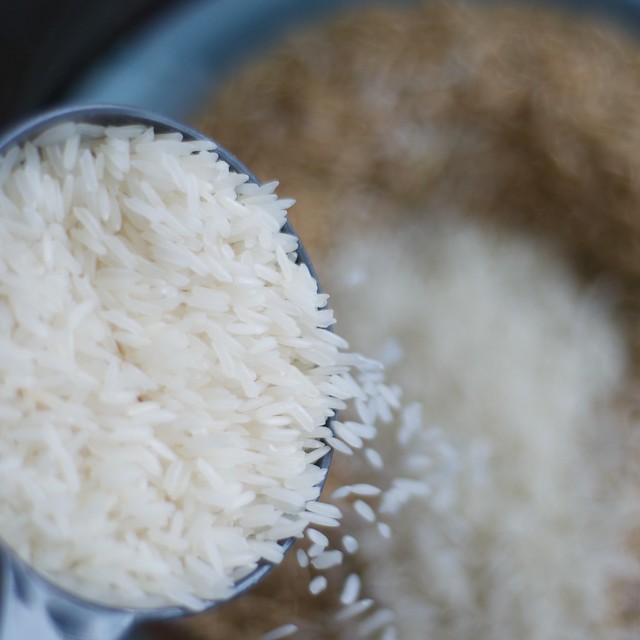
DSC_0066
Next, add 1/2 cup (120 g) of long-grain white rice.
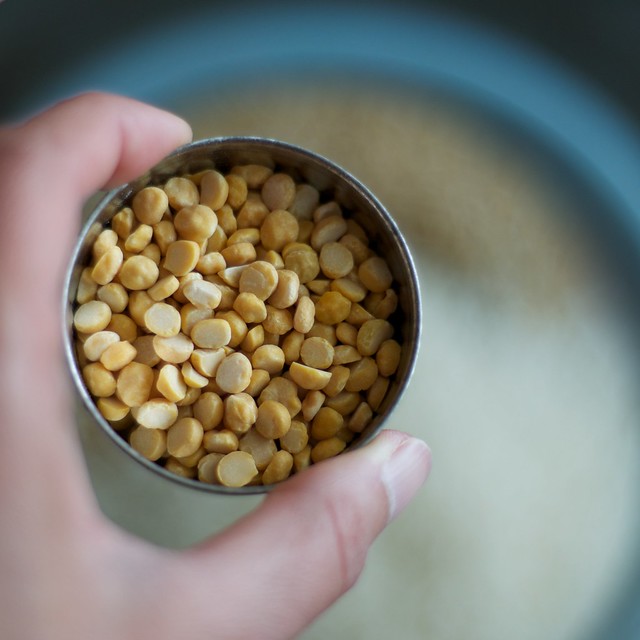
DSC_0085
Next, add 2 tbsp (25 g) of yellow split peas (or channa dhal) to the bowl.
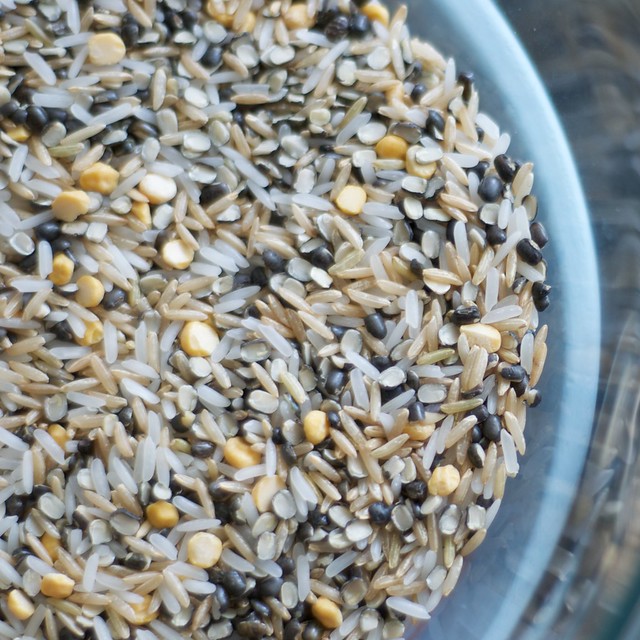
DSC_0100
Once these 4 ingredients have been added, stir the contents of the bowl. The next step is adding water and then letting the lentils and rice soak overnight.
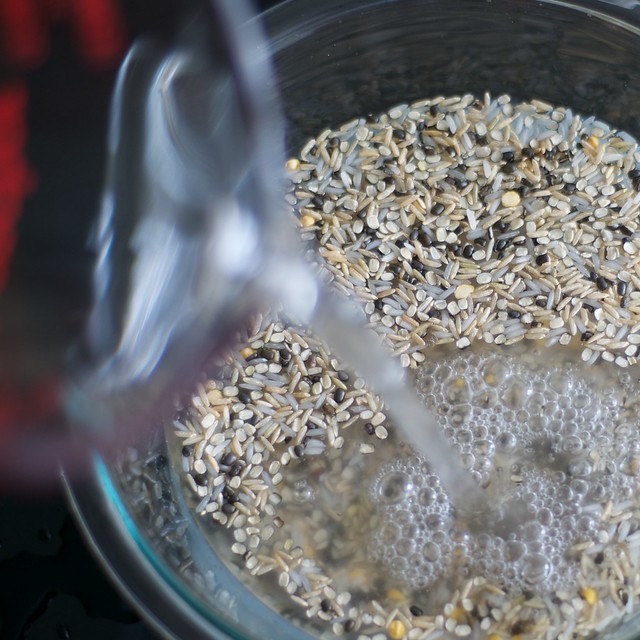
DSC_0122
Pour in about 2 cups of cold water and let it soak overnight. I like to place a plate on top and then place the bowl in the oven.
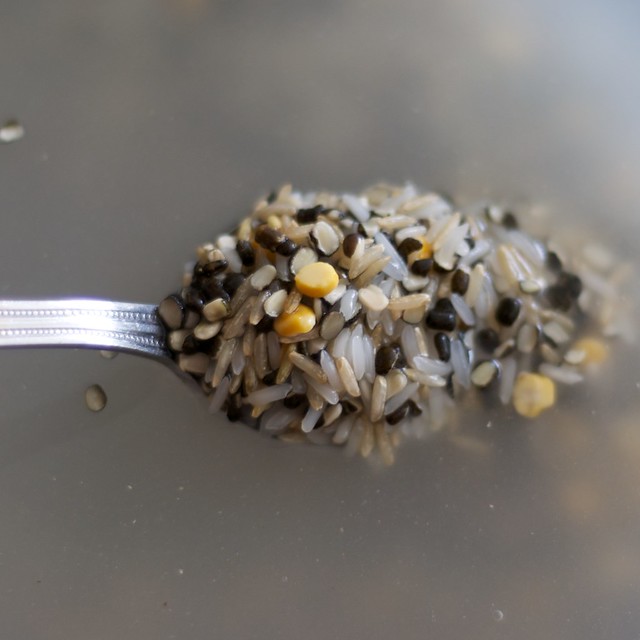
DSC_0136
The soaked lentils and rice should like this after pouring water into the bowl.

Then, the next day:
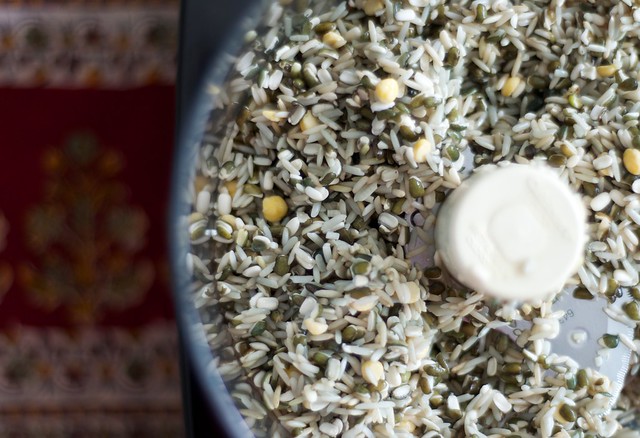
DSC_0234
Drain off the water from the soaked lentils and rice, and add them to the food processor. Make sure the mixing blades are in the food processor. The udad dhal may look green. That's ok.
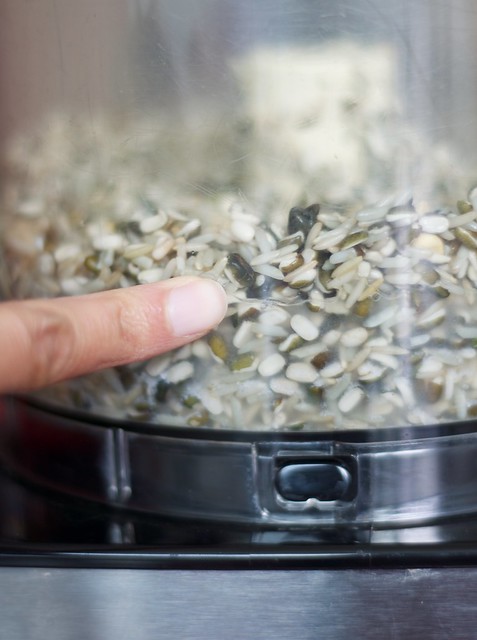
DSC_0246
Pour in about 1/2 cup to 1 cup of water. This is about how much water is needed. About 2 tablespoons of plain yogurt may be added at this step.
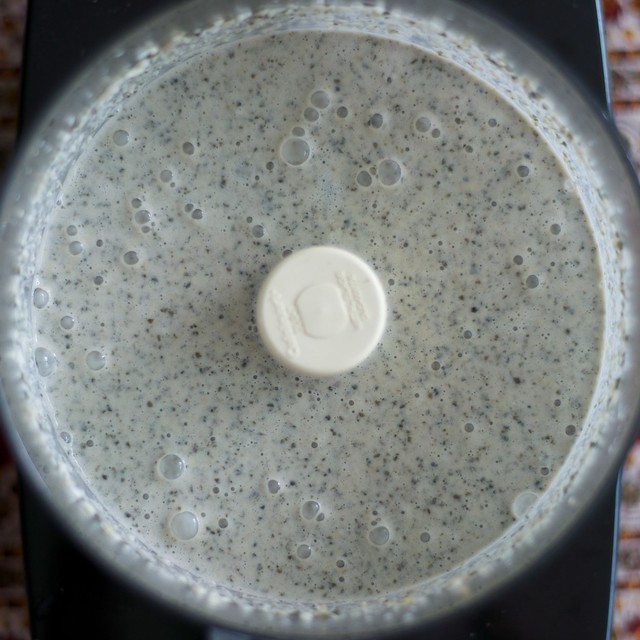
DSC_0252
Blend for 1 minute. Scraping down the sides with a rubber spatula. Process for 15 second to 30 second intervals until the texture is uniform.
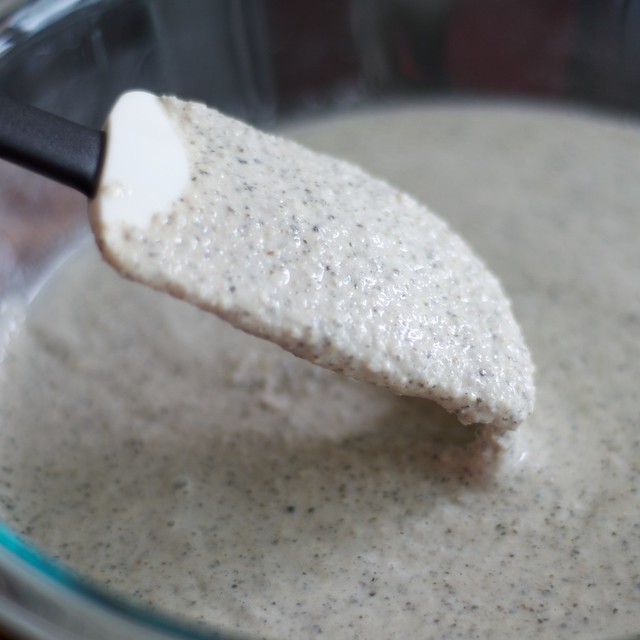
DSC_0302
The uttapam batter is ready to rest. Now at this step, the uttapam batter should be covered with a plate or plastic wrap, and placed in a warm area to ripen. This can take a few hours to overnight, depending on how warm your kitchen remains. I like to place the bowl in the oven.

The recipe follows below. While this might not be an authentic recipe, it's easily replicable in any kitchen with a blender or food processor.

Neeli's inauthentic tasty Uttapam
Yield: 4 servings, such as 2 to 3, 6" uttapam per person. This recipe is best thought of as prepared in multi-day steps. Day 1: soak ingredients. Day 2: blend ingredients and allow them to rest. Day 3: Eat! Repeat! I recommend serving for lunch or breakfast. 

Special tools: a large mixing bowl, a food processor, patience and curiosity.

Day 1: Foundation for batter (these ingredients will be soaked together)
1/2 cup (100 g) udad dhal (please note that split black gram, whole black gram, peeled split black gram, or unpeeled split black gram will all work fine)
1/2 (120 g) long grain white rice (basmati, jasmine, or regular grocery store long-grain rice, I prefer organic)
1/2 cup (105 g) long grain brown rice (basmati, jasmine, or regular grocery store brown long-grain rice is fine, I prefer organic)
2 tbsp  (25 g) yellow split peas or channa dhal, mung beans can be OK too here, although sometimes they sprout if left to soak for too long.
2-4 cups water

Day 2: Blending time
the drained rice and lentils
2 to 3 cups of water, may reserve the soaking water, or can use fresh water.
2 T to 1/4 cup yogurt (can be omitted)

Directions for Day 1 and Day 2:
Step 1: I rinse the rice and the lentils. Purists will not rinse, but these are organic products from the earth, and I have made three batches where a stone, yes a stone, has been ground into the batter. Trust me, NO ONE wants to bite down on a stone, and tiny stones are not good for your blender or food processor blades. Rinse the lentils and rice well. After rinsing, add them to a large mixing bowl and cover with water. Cover the bowl and let the lentils and rice soak for 1 day, or overnight. For example, you may soak the lentils and rice overnight. Then, the following day the rice and lentils can be blended in the morning. Alternatively, you may soak these together before going to work in the morning, and when you get home you can blend the batter.

Step 2: Drain the water from the soaked lentils and rice. Inspect the rice and lentils carefully for any loose stones or rocks. Set aside about 2-3 cups of water. We will not use all the water.

Step 3: Place the drained and soaked rice and lentils into the work bowl of a food processor, or blender. Pour in 1/2 cup to 1 cup of water into the work bowl.  Process or blend together for about 1 minute. After 30 seconds, stop the blender or food processor and use a rubber spatula to scrape down the sides. Only add water if it's too dry. We want a batter with the consistency of pancake batter. Continue processing until all the lentils and rice are uniformly blended. We will not use all the soaked water.

Step 4: Now, a controversial step. I add about 1-2 tbsp of plain yogurt to my batter to kickstart the fermentation, and add a bit of sourness to my batter. Kataash perhaps (a slight tang or pleasant sourness). I add it towards the end of the blending time. For example, once my batter has reached the proper consistency, I pulse in some yogurt until well blended.

Step 5: Turn out the batter to a bowl and cover with plastic wrap or a towel. The batter can be allowed to rest on the counter or in the oven. After a day, place it in the fridge until ready to make. I find it helpful to place reminders on my cell phone to avoid forgetting about the batter.

Day 3: Cooking time
Yield: 4 servings, such as 2 to 3, 6" uttapam per person.
1 recipe of uttapam batter
1/4 cup semolina or sooji  (common ingredient in couscous, and processed into Cream of Wheat)
1/2 tsp salt to taste
1/8 tsp baking soda
Oil (peanut or olive is fine)

Toppings:
flaked sea salt and fresh black pepper
fresh cilantro, chopped
sliced jalapeno rings, remove seeds
cumin seeds, whole
paprika, ground
shredded carrots or beets
diced onions and bell peppers
cheese, cheddar or mont jack
Other nice toppings: chopped fennel, diced tomatoes, diced avocado

Cooking Directions:
Step 1: To the batter, add about 1/4 cup of semolina (sooji), salt to taste, and a thick pinch of baking soda. Stir to combine. The semolina is a non-stick trick.  If omitted, the first few uttapam will stick to the pan, but will eventually stop once enough oil is used. If omitting the semolina, be generous with the oil.

Step 2: Meanwhile, heat up a non-stick griddle, or a cast-iron over medium heat. Add some oil and once hot, pour in about 1/4 or 1/3 cup batter. I like to use a measuring cup or ladle. The batter will spread out, and you can help it.  Drizzle a little oil around the edges. Cook for 1-2 minutes over medium heat. Now, to the toppings.

Step 3: The uttapam can be topped with anything. I like these variations:

Simple: salt, pepper, cumin seeds, cilantro, onion, paprika.
Advanced option 1: salt, pepper, cumin seeds, grated beets, chopped fennel.
Advanced option 2: salt, pepper, cumin seeds, cilantro, paprika, diced fennel
American: salt, pepper, cumin seeds, cilantro, diced onions and bell peppers, cheese

4. Add the toppings of your choice, cook about 3-4 minutes longer, and if desired flip over to cook bottom. The flipping over step may be omitted. Serve immediately toppings side up, with some fresh tomatoes, cilantro chutney, and yogurt.

September 15, 2014

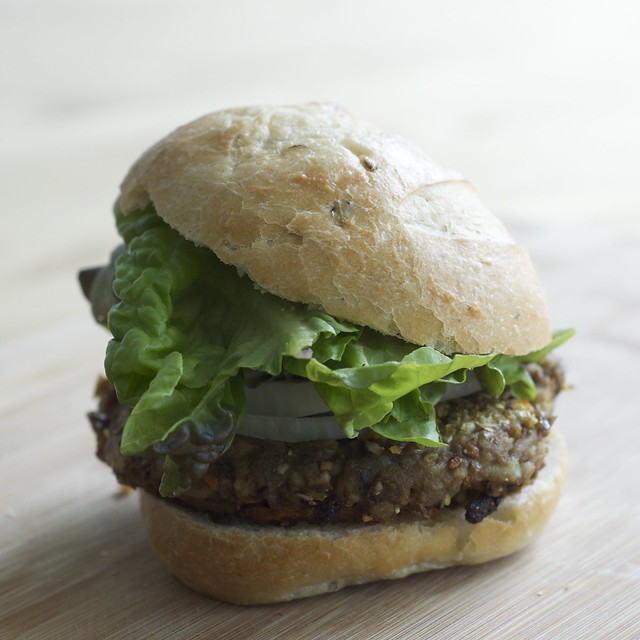
Lentil Veggie Burgers

Veggie burgers

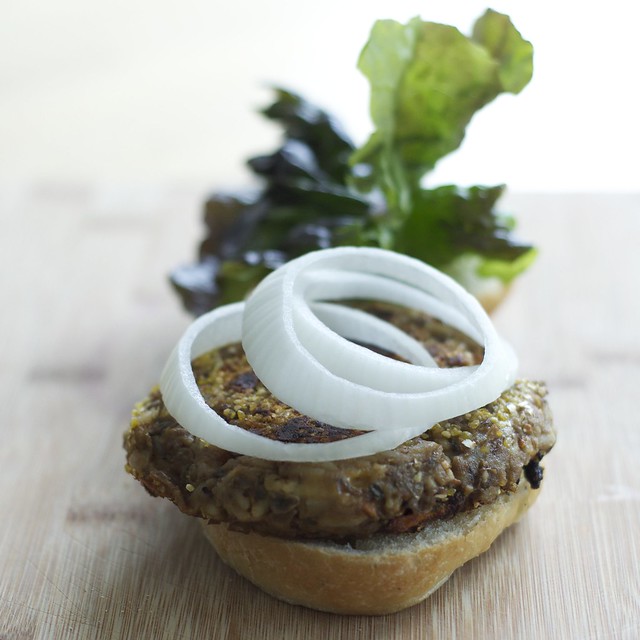
Spicy lentil veggie burgers

For these veggie burgers, any spice mix can be added to suit your own tastes. Although I include chopped pickled jalapeños in mine (this is my secret delicious ingredient), they can be easily omitted. This is a great base for adding your own spices to your own signature veggie burger. Because everyone should have a signature veggie burger. I happen to have like 10. No seriously, this one, this one, this one, this one and then another version of that one. See the one in this picture? This one. Ok, I promise, last one.

These can be grilled, pan-fried, or baked. I've provided all of the directions below.

Spicy Lentil Veggie Burgers
Yield: 10 patties, roughly 1/3-1/2 cup patties

Ingredients:
1 cup dried lentils, rinsed and drained (prepare from scratch, or sub in 2, 14 oz cans lentils, rinsed and drained)
3 cups water (omit if using canned lentils)
1 small shredded beet, or carrot
1/3 cup diced white onion
1/2 cup shredded cheese, such as smoked cheddar (optional, can be omitted)
1-2 tbsp chili powder (commercial or prepare your own, recipe below)
5 pickled jalapeño slices, finely minced
1/2 cup cooked rice, more or less is fine
1/2 cup oats, more as needed (either instant or 1-minute oats are fine)
1/4 cup corn meal, for dredging lightly

Spicy mix
1 tbsp chili powder (e.g. red chili, ancho chili, or chipotle chili)
2 tsp cumin
2 tsp oregano
1 tsp salt
1/2 tsp smoked paprika
1/4 tsp garlic powder

Special tools: a large mixing bowl, colander, pots and pans, a box grater, and a spice grinder if grinding your own dried chili peppers. I used a pressure cooker to prepare the lentils while I prepped the rest of the ingredients.

1. Rinse the lentils. If preparing the lentils from scratch, add 1 cup lentils and 3 cups water to the pressure cooker. The smaller fry pan is fine. Close the lid and bring the cooker to the first red ring (low pressure). Cook 14 minutes over low pressure, and use the natural release method once the time is up. Once cool, drain the lentils in a colander for several minutes. If preparing on the stove, add the lentils and water to a pot and cook over medium heat for 30-45 minutes until soft. Once cool, drain the lentils in a colander for several minutes. No need to rinse them if cooked from scratch. If using canned lentils, rinse and drain them in a colander.

2. Shred a small beet over a box grater and add it to a large mixing bowl. Add the onions, cheese, chopped jalapeños, and rice.  Stir to combine.

3. Add the lentils and spices. Stir, then add the oats and combine until the mixture is fairly dry. We don't want it to be too wet where everything falls apart, and we don't want it too dry where it gets crumbly (see note below). Use your hands and shape a few patties. If it's too wet, add some extra oats, and try again. You can also add an egg at this point, because that will act as a binder. I usually don't add eggs, I think the oats work just fine.
Note: I do not recommend using a food processor because the consistency between too dry and too wet happens quickly, and the resulting product could be a mushy mess. All you really need to do is stir together the ingredients.

4. Smooth down the lentil mixture with the back of a spoon so it is uniformly level, and cover the bowl with a plate. Let the lentil mixture rest for 30 minutes in the fridge. This helps the oats soften up and set. This means the veggie burgers are more likely to retain their shape when cooking.

5. Once ready, shape the patties with your hand, or a 1/3 or 1/2 cup dry mixing up measure. Dredge the formed patty lightly in the cornmeal. Place them on a clean plate or cutting board.

6. When you have six or eight patties, heat some olive oil in a wide skillet and heat up over medium heat. Once hot add in the patties, and cook 4-6 minutes per side (preferred method, but grilling is really super too!)

If baking: lay out the patties on a lightly greased sheet, and spray or brush the top sides of the patties. Bake at 350 for 10 minutes. Flip them, once golden, spray or brush tops with a bit of oil and bake another 10 minutes. Serve when golden.

If grilling: place all the formed patties on a plate and place in the fridge for an hour or overnight. They should be cold just up until they hit the hot grill. These can be cooked on medium heat on a gas grill, 5 minutes per side. Use a spatula and carefully lift them up before flipping to catch the whole burger. Use some tongs or another spatula to help them along. If overhandled they can fall apart. Make sure you lightly grease each side of the patty before putting it on the grill.

Serve alongside some toasted brioche buns, fresh lettuce, and onions rings. I like to roast fingerling potatoes too and serve them on the side. These store well in the fridge for up to 4 days. Don't leave them any longer.

August 20, 2014

Channa dhal curry and grilled patty pan squash

DSC_0011

DSC_0020

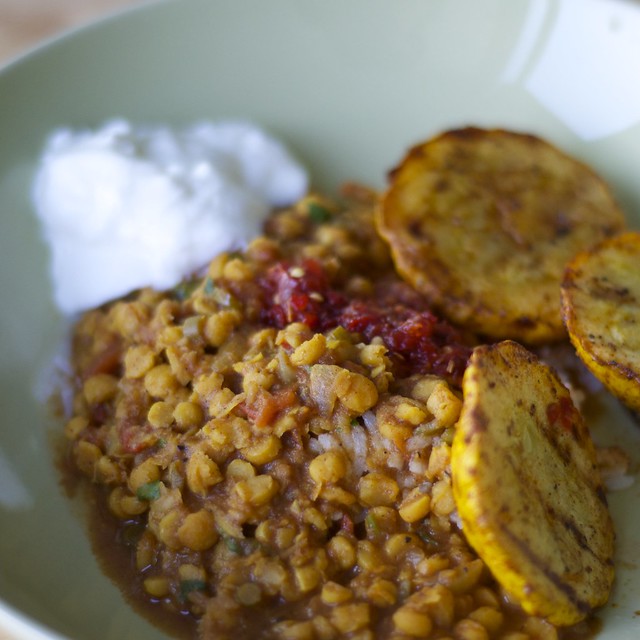
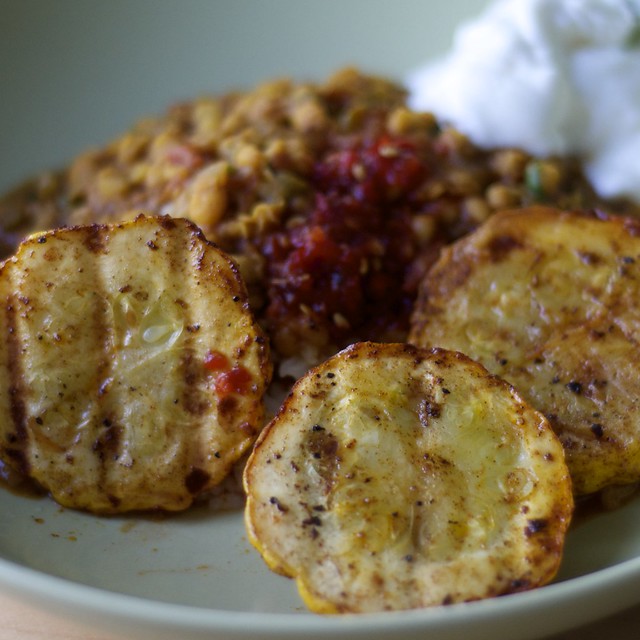
No surprise here, another pressure cooker lentil recipe. This time, channa dhal is used (channa is yellow split pea). Channa dhal is highly nutritious. What is channa? Basically, a young version of a garbanzo or chickpea. It's packed with fiber, protein, and carbs; it has a healthy dose of iron and calcium, and it, like many other dried beans, is a great source of folate, biotin, and choline. 1 The tomatoes in the dish make the iron more bioavailable. Since tomatoes contain Vitamin C they enhance iron absorption. 1 This dish is just good. It can be used as a base for other beans or lentils, or you can sub in tofu, or chicken, or potatoes. Whatever floats your boat. I served mine with some grilled summer patty pan squash, basmati rice, yogurt, and some sambal olek.

This summer, I've been playing ultimate almost three times a week. Holy smokes, Seattle has an amazeballs ultimate scene. To get to the fields, I started riding my bike. I've been putting over 30 miles on my commuter hybrid a week (I have a 2008 Trek). To get home, I ride up a fairly long incline, and have decided to upgrade to a road bike. So if there are any foodie readers that are also bike riders, what should I be looking for?

I'm not into racing as a sport. I primarily ride on asphalt (did I really just type asphalt?), and I use my bike for most errands within a short distance. The things I like about my current bike set up: it's a workhorse, it has a rack with bike saddle bags that I use all the time. When I lived in AL, and commuted to work, I added fenders. I'd like to keep those elements. What I don't like: my bike is heavy, and slow, and I have a love/hate relationship when riding up hills. I view the uphill climb as a cardio workout, but I would like some efficiency.

On the weekends, when the weather is good, I like going for long bike rides. I've ridden up to Kenmore and Woodinville on my hybrid. The hubs has a road bike so I slow us down a lot. So far, I've been doing some online research, visiting and riding bikes at bike shops, and keeping a spreadsheet of different models, price ranges, and specs. A few weekends ago, I tried out two bikes from the same make (Raleigh Ravenio/Capri 2.0 and 3.0). The difference between my bike and the road bike was astounding. The road bikes were zippy and responsive. I would not use those two terms on my current hybrid. My hybrid is a great bike for occasional rides, that will occur on largely flat surfaces. I love that it got me used to the idea of using a bike for getting around town. Sadly, I think I have outgrown it.

Channa dhal curry with grilled patty pan squash
Yield: 4 generous servings, 1 squash per person

Ingredients
1 cup channa dhal
2 cups water
1 cup rice, such as Basmati or Jasmine rice
2 and 1/4 cups water for the rice
1-2 tbsp oil
1/2 cup onions, chopped
2 cloves garlic
1 tbsp finely minced or grated ginger
1 jalapeño, diced (optional)
3 Roma tomatoes, diced
1/4 to 1 cup water, keep on the side.

Dry Spices*
1 tbsp ground cumin
1 tsp paprika or red chili powder (use paprika if you want it less spicy)
1/2 tsp turmeric
1/2 tsp cinnamon
pinch nutmeg
lots of cracks of fresh black pepper
*if you don't have all these spices, a commercial curry mix can be subbed in easily instead. Just use 1-2 tbsp, and remember the more you use, the spicier it will be.

Garnishing spices/seasoning*
1 tsp salt (if using a commercially prepared mix, check to see if it has salt)
1 tbsp ground, coriander
1 tsp garam masala
1/4 cup chopped fresh cilantro
*if you don't have all of these, I would solely recommend salt and the cilantro.

Directions for the Channa dhal curry 
Step 1. Soak the channa dhal in the 2 cups of water, and set aside while prepping the rest of the ingredients.

Step 2. Prepare the rice. I use a rice cooker with the following amounts: 1 cup long grain white rice to 2 and 1/4 cups water. Turn the rice cooker on and forget it. Come back later, voilá: rice!

Step 3. Measure out the dry spices in a small bowl and set aside.

Step 4. In the small pressure fry pan pressure cooker (PC), heat up 1 tbsp of olive oil over medium heat. Once hot, add in onions and stir. Cook 2 minutes.

Step 5. Add in garlic, ginger, and jalapeños. Stir and let cook 1 minute. Add the dry spices and cook until the mixture becomes very dry. Then, add the tomatoes, and stir it together. The tomatoes will release water and everything will come together as the tomatoes cook. Let cook 4 minutes.

Step 6. Rinse the channa dhal, and add it to the PC. Stir in 1 to 1/2 cups of water and close the cooker. The liquid amount should not exceed the 1/2 mark on the PC.

Step 7. Turn the heat to high and bring the PC to low pressure (first red ring), and cook 14 minutes at low pressure. Once pressure is reached, turn the heat to the lowest setting to maintain low pressure (usually low heat). If using a glass range, move the PC off the heat for a minute or so. At the same time, turn the heat to the lowest setting, and then add the PC back on. When the time is up, turn the heat off and move the PC off the burner. Use the natural release method. This just means moving the PC off the burner and letting the pressure release naturally. It should take ~10 minutes. Use this time to prepare the garnishing.

Step 8. Once the PC is ready, remove the lid, and add the garnishing spices and seasoning. Taste for salt, and add a little more if needed. Serve over rice, and pass yogurt at the table. Top with the grilled patty pan squash (recipe follows below).

Grilled patty pan squash
Yield: 4 servings, 1 squash each

Ingredients:
4 patty pan squash, cut in half (you could also use compact summer or zucchini squash cut in halves)
1 tbsp olive oil
salt to taste (I am loving this flaked sea salt at the moment)
fresh black pepper
1/2 tsp paprika

Directions for patty pan squash
Step 1. Heat the grill to medium high heat if using a gas grill.

Step 2. In a large bowl, add halved patty pan squash and drizzle with olive oil. Sprinkle salt and pepper on top and toss the patty pan squash until the sides are evenly coated. Add the paprika and repeat.

Step 3. When the grill is hot, place the squash, cut side down on the grill and cook about 5-7 minutes per side. Use tongs to flip them over. Thicker (bigger) squash will require more heat. I like them slightly undercooked because they stay crunchier.

1. Brown J. Nutrition Through the Life Cycle. Stamford, CT: Cengage Learning; 2014.

August 9, 2014

Coconut Yogurt Rice

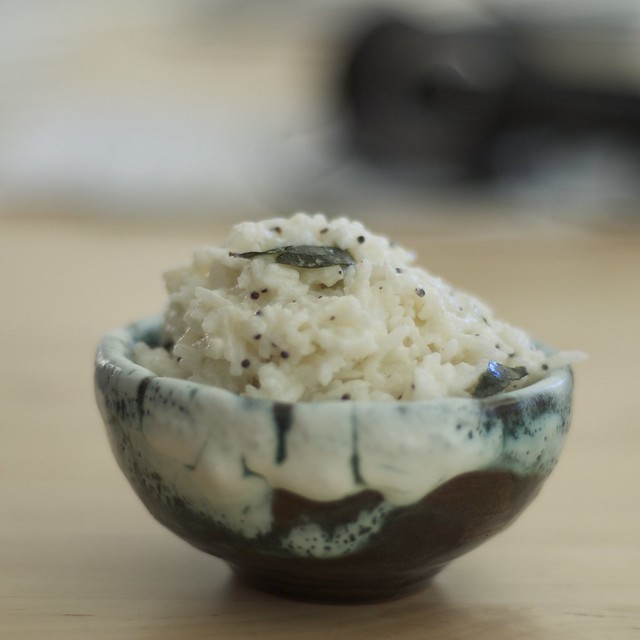
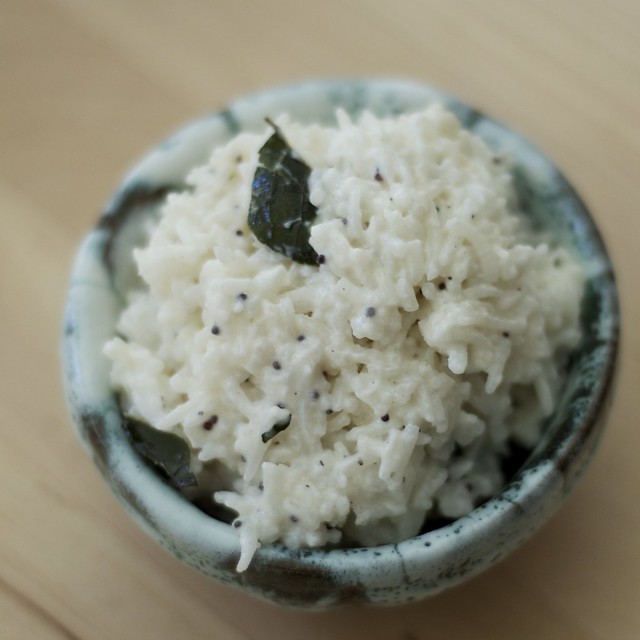
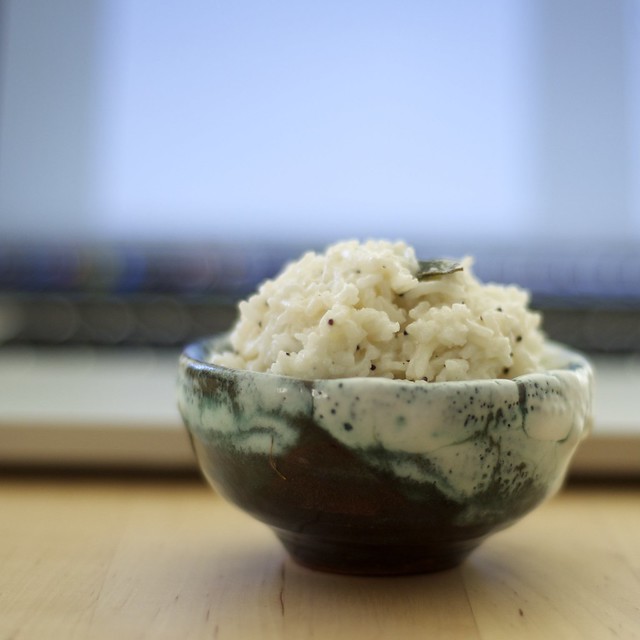
coconut yogurt rice

coconut yogurt rice

coconut yogurt rice

I keep showing up with this dish everywhere I go. Hey let's go on a picnic. What did you bring? Oh nothing, just this rice. Come over for lunch. What did you make? Oh just this rice dish and some salad. Hey it's lunch time, what do I have that I can eat quickly? Oh just this rice.

Years ago when I lived in Houston, my family and I would head out to the Sri Meenakshi Hindu temple in Pearland, TX, and then stay for lunch - eating just prepared homemade tamarind and yogurt rice. The kitchen staff would prepare fresh batches, and it was fun to watch them mix up the rice in these enormous stainless steel bowls. Half the family was split on yogurt/curd or dhai rice, and the other half were tamarind rice, so we'd get both, and sit on the temple grounds enjoying a sunny Sunday or Saturday. Then we'd get ladoos.

I've made this three times in the past two weeks. My mom has been sending me home with lots of delicious home cooked leftovers, and one day I had so much rice I made this. Making yogurt or dhai rice is really easy. Take leftover long grain rice, and then add plain yogurt, and some seasoned oil, and mix together, and then serve. Comes together in minutes if you have enough leftover rice. My yogurt rice is completely inauthentic, but it tastes good, and everyone that has tried it so far has asked for the recipe.

Coconut Yogurt Rice
Yield: 4 servings, split however you like

Ingredients:
4-5 cups cooked white rice, preferably Basmati rice
1/2 cup yogurt
1/3 cup unsweetened coconut, ground to a fine powder
salt and pepper

Ingredients for Vaghar:
1 tsp mustard seeds
pinch hing (asafoetida) can be omitted (ask for it at a South Asian grocery store)
4-6 mitto limbdo/curry leaves
2 tbsp peanut oil

Directions:
1. If using leftover rice that has been chilled in the fridge, heat it back up with a bit of water. It will make mixing everything easier. Add the rice to a large mixing bowl, such as large pyrex or other large stainless steel mixing bowl. Add the yogurt, coconut, and salt and pepper. Stir to combine.
Note: you can also use just cooked rice. It will be good too, but chilling the rice first keeps it more toothsome and less mushy. 

Next we are going to make a vaghar. Use an oil with a high smoke point like peanut oil. Add the oil to a small pot, like a small saucepan, and when hot add in spices and fresh herb leaves to infuse the oil with the aromatics. Usually the vaghar can be poured over something as a finish, or things can be added to it to such as done when cooking. Let's do the vaghar:

2. In a small saucepan with a lid, heat up the peanut oil. When hot add in mustard seeds and hing and cook until the mustard seeds pop. Add in the mitto limbdo leaves, and close the lid, turn the heat off and let cook for 1-2 minutes. Pour the vaghar over the rice. Stir everything together. Adjust salt if needed. Serve immediately. 

Yum. 

September 16, 2013

Massaman Curry

DSC_0468

DSC_0458

DSC_0454

DSC_0461

I bought a pressure cooker. It's a second generation six-piece Kuhn Rikon Duromatic. It came in two different sizes, with a lid that can be shared between the two, another glass lid for cooking, and a trivet for steaming. Simply put, pressure cookers save time. Second generation pressure cookers are designed to be safer because they are supposed to be constructed with at least two or three safety releases, and they are designed to indicate clearly when the cooker has come to low or high pressure. There is no loud hissing. In older, or first generation, pressure cookers they usually have a jiggle top which releases pressure in loud hisses after reaching pressure.

Laura, of the Hip Pressure Cooking blog, has written extensive reviews on different types of pressure cookers, and I found her detailed, and highly knowledgeable reviews, are what sold me on the Kuhn Rikon. Her recipes are modern, adaptable, and reproducible. She has basic pressure cooking tutorials that are easy to follow, and her site has created a community of modern day pressure cooker enthusiasts.

Over the past few weeks, a personal barrier I had to using my new pressure cooker was relearning how to adapt recipes. I found that after a few weeks of trial and error, the learning curve for seasoned cooks is fast. The learning curve for beginner and novice cooks (the hubs is categorized in this category) is also fast. Our pressure cooker came with a cookbook which is a great reference guide. The hubs started out with potatoes, moved to cooking beans a few times, and made a rice pilaf, and a Mediterranean couscous. To vegetarians, the cooking time for beans and lentils will be slashed in half. This, and this reason alone, is one of the very essential reasons to own one, and it explains why pressure cookers are a sustaining life force in Indian households.

Channa Dhal Mushroom Massaman Curry
Adapted from Food and Wine
Yield: 4 servings

This curry is delicious. I think the ingredients list is a bit daunting, but the outcome is marvelous. With a pressure cooker you really save time because you can utilize the 12 minutes that the cooker is cooking to prepare other things and clean up. The sweet potatoes melt into the dish, the channa dhal bulks up the curry, and replaces chicken in the original recipe. I have added mushrooms, channa dhal, and coriander, and replaced water for the broth.

Ingredients for curry paste:
1" of ginger
2 cloves garlic
1/8 tsp salt
1 tsp Chinese five-spice powder
1 tsp cumin, ground
1 tsp coriander, ground
1/2 tsp turmeric
1/2 tsp red chili flakes
1 can coconut milk

Ingredients for curry:
2 tbsp peanut oil, divided
1/4 cup channa dhal or split yellow lentils, soaked in 1 cup of water*
1 onion
1 sweet potato, peeled and cubed into 1" chunks
3/4 cup water
1 package of mushrooms, stems removed and quartered
1-2 tsp rice wine vinegar, optional
1 medium tomato
1/4 cup cilantro, chopped
1/4 cup peanuts, chopped
4 cups cooked white long-grain rice

Directions:

  1. Soak the channa dhal in 1 cup of water. Set aside. 
  2. The next step will be making a curry paste. You have three options 1) use a mortar and pestle, 2) use a food processor, 3) finely chop with a knife. I used the mortar and pestle because you end up with about 2-3 tbsp of curry paste a small amount for the food processor. In a mortar and pestle, pound together the garlic with the salt until it is a coarse paste. Remove this to a small mixing bowl that can hold 2 cups worth. Add the ginger and pound together. Scrape this into the bowl. Add the remaining spices and the coconut milk to the bowl and stir to combine. Set aside. 
  3. In a 4 quart pressure cooker (my small pressure fry pan is < 3 quarts) heat up 1 tbsp oil over medium high heat. Once hot, sauté the onions for 3 minutes. 
  4. Add the sweet potatoes, stir together, and then add in the channa dhal along with the water. Add 3/4 cup of water. Do not add salt. Bring the mixture to a simmer and then close the lid. Bring the pressure cooker to the first red ring and then cook over low pressure for 12 minutes. Use the natural release method. 
  5. Heat up the remaining 1 tbsp of peanut oil over medium-high heat in a cast iron or non-stick skillet.  Once hot, add in the mushrooms and sauté about 7-10 minutes. Sprinkle the rice wine vinegar on top, cook 3 more minutes and cut the heat and remove the pan from the heat. 
  6. Open up the pressure cooker and put it back on the heat. Stir in the coconut milk curry mixture, add the tomatoes and bring to a simmer. This should only take a few minutes. 
  7. Garnish with peanuts and cilantro and serve immediately, preferably over cooked white rice. 

*Note: soaking the channa dhal is not necessary, but I find that it cooks faster.

March 11, 2013

Tuna with black bean sauce

Tuna with a white wine fermented black bean sauce and Thai-basil

Tuna with black bean sauce and Asian herbs with crispy potatoes
This recipe is adapted from Mark Bittman's Roasted Thick Fish Fillets. 

This dish smells marvelous when it's cooking. It's rich and filling for a Monday night dinner. Although it appears to take much longer to prepare, I made the fish, a brown rice pilaf, some flash-fried potatoes, and some steamed cabbage - in under an hour. Honestly, I did. I even put a bottle of wine into the freezer. 

I used frozen thick cut tuna steaks, and lots of freezer items. The premise of this dish is to pan-sear the tuna over medium-high heat for a few minutes on each side, and then finish the cooking in the oven. You add a liquid and some herbs and it creates a rich sauce. I chose a white-wine base with lots of Asian herbs (Thai basil, cilantro), ginger, fermented black bean sauce, and sun-dried tomatoes. My freezer is stocked with frozen herbs, and my pantry is stocked with useful ingredients. The freezer items included frozen fresh ginger, frozen cabbage from my fall CSA-box, Thai basil, and frozen cilantro. Frozen herbs aren't as good as fresh, but they seem more flavorful than dried. I store them whole in zip top bags, or I store them in ice cube trays. Place freshly chopped herbs and water in an ice-cube tray and freeze until frozen. Ginger root stores well in the freezer. When you want to use it just grate it frozen over a microplane, or run under water until just softened and chop. Jalapeños store well in the freezer.

The tuna was served with the sauce alongside a brown rice pilaf and steamed cabbage. Top the tuna with the fried potatoes and serve immediately. I paired this meal with a Sauvignon blanc. 

Tuna with a white wine fermented black bean sauce and Thai-basil
This recipe is adapted from Mark Bittman's Roasted Thick Fish Fillets
Yield: Serves 2 to 4

Ingredients:
3 tbsp olive oil 
1 medium potato, peeled and cut into a small dice (1/2" by 1/2")
1 or 2, 6 oz tuna steaks
salt and pepper
3/4 cup white wine plus 1/4 cup water (can also use vegetable broth instead of wine)
1 tbsp fermented black bean sauce (such as Lee Kum Kee)
1/2 cup mixed Thai basil and cilantro 
1 tbsp sun-dried tomatoes, chopped
Fresh ginger, shredded 

Directions:
1. Heat oven to 450º F (230º C).
2. In an oven-proof skillet, heat up 3 tbsp of olive oil over medium-high heat. Add in the small diced potatoes and cook until golden brown (6 minutes). Once golden, spoon off the potatoes with some of the remaining olive oil and place on a non-stick baking pan in the oven to finish cooking. Set a timer for 8 minutes to avoid overcooking. You should have about 2 tbsp of olive oil leftover. 
3. Dredge the tuna in a bit of salt and pepper. I used Trader Joe's chili sea salt. Place the tuna in the skillet, and sear on each side for about 2-3 minutes. Meanwhile, combine wine, water, and the fermented black bean sauce and pour into the skillet. The skillet will make an impressive sizzling sound. Lift the pan and swirl around the liquid, and then place in the oven. Set the timer for 10 minutes. 
4. Combine the herbs, sun dried tomatoes, and slivered, or shredded, ginger in a small bowl and set aside. 
5. Once the 10-minute timer goes off, flip the tuna over, add the bowl of herbs from step 4, and set the timer for another 5-6 minutes. If the tuna is thicker, it may require additional cooking time. Alternatively, if you like your tuna on the medium side, cook for less time. The fish is done when it flakes easily. Serve immediately and garnish with potatoes. 

March 31, 2012

Tofu mushroom étouffée!

Wow. I think there is something addictive in this dish. It tastes so good. I adapted it from the FatFree Vegan Kitchen. I made the roux the traditional (full disclosure: full-fat) way. I'm not a huge fan of eliminating all fats either because I think fats can carry flavors, have a role in absorbing nutrients, contribute to satiety, and good blood sugar regulation. However, her take was quite creative, and I would try it again now that I've made it and understand the steps more clearly. 


The flour used in étouffée is toasted until it becomes a rich toasty brown. Getting the red-brown sauce is done by toasting the flour in a pan. Stir it a lot. You don’t want it to burn. It will smell kind of like chestnuts. I like the addition of soy sauce from the original recipe. Overall, I think this dish actually has a lot going on in terms of prep work, cooking time, and stand-by time. Read the directions all the way through, and then begin. 


Etoufee


Tofu mushroom étouffée
Adapted from the Fatfree Vegan Kitchen's Vegan Sausage and Mushroom Etouffee
Yield: 4-6 servings


Ingredients:
1 cup long-grain rice, prepared according to package directions
2-3 tbsp peanut oil
1 package extra-firm tofu (300 g)
2 ribs celery, chopped, about roughly 
1 medium carrot, chopped into coins
1 small onion, chopped medium dice
1 small bell pepper, cut into 1" chunks
1 cup sliced buttom mushrooms, or about 8-10 sliced, wipe clean then slice
3 cloves garlic, sliced
1/2 cup parsley, divided


Roux
3 tbsp all-purpose flour
2 tbsp peanut oil
2 cups (16 oz) vegetable broth
1 tsp soy sauce
1 tsp red chili powder (or paprika if you want it less spicy)
1/4 tsp cayenne powder
1/2 tsp ground black pepper
1/2 tsp salt (optional)


Cook rice according to package directions. 


If you use a high-qualify pressed tofu (like one from an Asian grocer) you won't really have to press much water out of it. Slice up the tofu into squares, or cubes, really however you want to serve it. Lay it out on a plate and lightly sprinkle with salt. After a few minutes dab the tofu squares with a cloth to pick up the water. Flip and repeat.


Heat up a cast iron pan over medium heat. Pour in 3 tbsp of peanut oil and heat up. When ready add the tofu to the pan, laying out in a single layer and being careful not to overcrowd the pan. Cook on each side until golden-brown, about 14-20 minutes. Remove the tofu, replacing it with the other uncooked ones until all of them have been cooked.


To the same cast iron pan add in the onions and cook until just beginning to get golden brown. There should be enough oil leftover that you won't need to add any new oil. Add in celery, followed by carrots, and bell peppers. Continue to cook about 5 minutes. Add in mushrooms and stir everything carefully so the uncooked mushrooms get distributed evenly.


While you are waiting for the mushrooms to cook down, add 3 tbsp of flour to a new wide skillet or a medium saucepan. Just use a pan that you can make sure and see that the flour is changing. Cook it over medium heat. It won't turn when you're staring at it, but the second you forget about it for longer than 2 minutes, that's when it goes from white to burned. Pay attention and stir it with a whisk once a minute. Give the pan a few good shakes like you're on a cooking show. It will go from white, to golden, to still golden, to still golden, to tan, to brown and toasted. Once done remove the pan from the heat, and if you want remove the flour to a bowl until ready to use.


Stir the veggies too and now add the garlic and parsley. See what I mean about a lot of stuff going on? It's ok though because you got your rice cooking, you got the veggies done, you got the tofu on the side and ready to go.


Now get your broth ready. Once it's ready stir in about a tsp or small dash soy sauce or Bragg's. In the same pan that you used for the flour, add 2 tbsp of peanut oil and heat up over medium-high heat. Once hot add in toasted flour and whisk until it becomes like a nice chunky paste almost like miso. Gradually pour the broth mixture over whisking the mixture the whole time. It should look like a lovely brownish red sauce. Stir it continuously for 10 minutes or until it starts to thicken. Add the spices and remaining parsley. Continue stirring.


Once it reaches desired thickness, it should be thick without being too thick like a gravy, but thicker than a sauce. It should easily coat, or smother, the veggies. In whatever pan is bigger, pour the sauce in the veggies, or the veggies in the sauce. Remember to add the tofu to the veggies, I like keeping them separate because the tofu stays chewy much longer. Stir together and heat through.


Serve over rice. I like to add the rice into custard cups and turn them out onto a plate for a nice presentation. This dish is really delicious. I love popping open a beer and cranking up the music because it's much harder to leave any of this unattended. Maybe it'll end up as one of your favorites?


Beer pairing: a lemony saison, such as Saison Dupont, or a citrusy light hopped IPA. 

March 13, 2012

Tex-Mex veggie burgers


DSC_0445


DSC_0439


DSC_0425


Lately, I've been addicted to the Homesick Texan blog which I found from Rabbit Food Rocks, which I found from Herbivoracious. That is what I call blog shopping. So many cooks, so little time.

I spent an entire afternoon carefully gleaning what I wanted to cook from the Homesick Texan blog. Because I'm resourceful and a planner, I brought ancho chili powder back with me from my US visit.  Planner: bring back hard-to-find ingredients; resourceful: I came up with these Tex-Mex veggie burgers.

Oats make an excellent binder in veggie burgers. I think these could easily do without the eggs. Plan to use cooked rice and cooked beans (or canned beans) in the burgers. It saves time.

Tex-Mex veggie burgers
Recipe inspired from various postings on the Homesick Texan blog
Yield: 8 patties; use 1/2 cup measurement to shape and mold. 


2 cups of cooked beans (I used a mixture of pinto and red kidney 3:1)
1/2 cup chopped onion
1/3 cup chopped bell pepper
2 cloves garlic, shredded or minced fine
1/2 cup mushrooms, sliced
1/4 cup mixed chopped parsley and cilantro
1 cup cooked long-grain rice (approx.)
3/4 cup oats, can use up to 1 cup, or a bit more
2 tbsp panko breadcrumbs, or homemade ones
2 eggs
SECRET (not-so-secret anymore!) ingredient: about 2 tbsp canned jalapeno chunks and a bit of their juices

Ancho chili powder
1 tbsp ancho chili powder
1/3 tsp cayenne chili powder
1 tsp salt
2 tsp cumin
1 tbsp dried basil or oregano
1 tsp smoked paprika (such as Spanish or Hungarian hot paprika)
pinch cinnamon

To prepare the ancho chili powder, mix everything together in a small bowl and set aside. You'll use up all of it in the burger recipe.

Directions:
Note: Things that make this dish go faster: 1. have all the beans cooked before you begin. 2. have rice cooked. If you don't have cooked rice to start, begin by cooking 1 cup of long-grain rice (in a medium sized sauce pan add 1 cup of long grain rice and 2 and 1/4 cups water. Heat up over high heat, stirring the rice about two times, until the rice looks porous. Once it looks porous and filled with wholes and is bubbling like crazy but you don't think the water will cook off. Cover the rice with a lid, turn the heat off and let it sit there until ready to use (or let it sit there for at least 15 minutes, don't touch it). 

Alright have you located your beans and rice? Good.

Take cooked beans and place them in a large mixing bowl. To this bowl add chopped canned jalapeno chunks along with some of the canned juices. Add in herbs and mix together. Remove about 1 cup of the mixture and set this aside, then smash (with a potato masher) the remaining beans in the big bowl together.

Next, heat up 1 tbsp of peanut oil in a cast-iron pan over medium heat. Saute the onions, mushrooms, and bell peppers. When the mushrooms begin to brown at the edges, toss in the garlic and stir around until just fragrant. Is there anything better than the smell of sauteing garlic? For real.

Now back to the mashed beans. When the sauteed veggies are cool enough to handle add them to the bowl along with the chili powder. Using your hands or a big spoon mix everything together. Add in 1/2 cup of the oats and 1/2 cup of the rice. Start mixing everything together. You want everything to stick together without falling apart. Add the eggs and work it in little by little with the remaining rice and oats, and breadcrumbs. Using your hands is the best way to tell if everything is sticking together.

Place the bowl in the fridge and allow it to set for 30 minutes or longer. This does two things, it allows the oats to expand a bit, and it makes the mixture stick together. Using a 1/2 cup measuring cup as a mold, spoon the mixture and tamp it down with a spoon (or your hand). Carefully, remove it; give it a few smacks against a cutting board and shape it into a patty.

Fry them 4 at a time in a cast-iron pan about 4-5 minutes each side before flipping. Serve with lettuce, tomatoes, cucumber slices, pickled jalapenos, and anything else.

December 30, 2011

Red lentil dhal served over rice


As the holidays wind down it’s nice to have a hearty and healthy meal after days of gorging and drinking. I recently bought some Delhaize brand curry powder (no salt added) and found it fresh and delicious. I added it to these lentils along with some vegetable broth and this is the curried outcome.

This holiday we traveled by train to visit family. It was a nice relaxing way to get from one place to another. Earlier, Belgian rail strikes scared us into thinking that we’d have no trains for travel. After the strikes settled down tickets were purchased and rail travel resumed as normal. While I think car and air travel have their obvious advantages (e.g speed, setting your own schedule, convenience), it was especially wonderful to walk to the train station, sit down, read, and let the trains take us.

Happy Holidays!

Red lentil dhal served over rice
Serves: 4

Ingredients:
1 cup uncooked rice, prepared according to package directions
1 tsp olive oil
¼ tsp mustard seeds
¼ tsp cumin seeds
asafoetida (pinch)
few pods whole cardamom
1 cup onion, chopped
1 tbsp ginger, grated over a small hand grater
½ tsp cinnamon
red chili powder to taste; I used ¼ tsp
½ tsp garam masala
2 tsps curry powder
1 cup red lentils (masoor dhal), washed and drained
2 cups vegetable broth or water, plus 1 cup water extra

Directions:
  1. As always, hard to find spices can be omitted - any store bought curry powder will do. Begin cooking rice. Put 1 cup long-grain rice in a pot and fill with 2 and ¾ cups water (or according to package directions).
  2. Heat up about 1-2 teaspoons of olive oil in a medium size pot over medium-high heat. Add in mustard and cumin seeds. Once the mustard seeds begin to pop, add asafoetida and cardamom pods. Add onions and stir-fry lightly. Stir in ginger, cinnamon, red chili powder, and garam masala.
  3. Stir these until fragrant. Add in red lentils along with 2 cups vegetable broth or water. Stir and bring to a simmer. Stir this frequently. When the lentils have been cooking for at least 10 minutes, stir in curry powder and adjust for salt.
  4. Turn the heat to low and add in 1 cup of water. Simmer on low heat, partially covered, until the desired thickness is reached. Serve over rice. This last step should take about 20 minutes.

August 29, 2011

Ethiopian-style red lentils


Ethiopian-style red lentils

spices

Masala mix

These red lentils are adapted and modified from a Saveur recipe. While the preparation was simple, the homemade spice mix the Saveur recipe called for had some hard-to-find ingredients, and called (optionally) for spice-infused clarified butter. The spice mix, with ingredients that you can find, is easy to make with a spice grinder, or mortar and pestle. I absolutely love the home-made masala (masala = blend of spices) mix used in these red lentils - whether they are authentically Ethiopian is hard to tell. I think they certainly tasted more Indian (perhaps because my pantry is stocked with Indian spices?). The lentils took their sweet time cooking on the stove top, which as the aromas of this dish waft around the house, you'll stomach will grumble in eager anticipation. If you have left overs they will be spicier the next day.

Clarified butter, also known as ghee, is made by heating up regular butter over a low-medium heat, and then skimming off the milk solids which collect at the top. This leaves a clear golden liquid, that can be heated to a higher temperature, or has a higher smoke point (the smoke point is the physical temperature that hot cooked fat reaches before it starts smoking). I substituted regular butter, as butter always tastes delicious, and added in a few of the spices to the red lentils.

Here's my take, this serves 4; can be served over rice, or with dosa to mimic injera, or pita or naan bread. The red lentils are called masoor dhal or red lentils. While lentils don't need any soaking, I soak the lentils while I'm prepping the rest of the ingredients to soften them up. The butter in this imparts a lovely flavor, but can be omitted (such as using cooking spray) or replaced with oil, 1 tbsp is fine. Use as many of the spices you can find, and if you can't find them, just leave them out. Garnish with some fresh chopped onions and a squeeze of lemon. 

Ethiopian-style red lentils
Serves: 4
Ingredients, listed in order of use:

1 cup of long grain rice, cooked according to package directions (optional)
1 cup of red lentils or masoor dhal
2 tbsp butter, divided; stir in remaining 1 tbsp just before serving
1 onion, chopped fine
3-4 whole cardamom pods (optional)
3 cloves garlic, chopped
1/2 of a red bell pepper, chopped fine
2 and 1/2 tbsp home-made masala mix, recipe below
1 tomato, chopped
salt to taste
3 and 1/2 cups water
1/4 tsp fenugreek powder (optional)

Directions:
  1. If serving with rice, cook and prepare according to package directions.
  2. Next, rinse the red lentils under water. Put it in a large bowl and cover with water. Let it soak while you prepare the rest of the ingredients.
  3. Heat up a large soup pot over medium-high heat. Add 1 tbsp butter, or oil if using, and once the butter is melted and slightly foamy, turn the heat down to medium and add in the onions. Saute until golden, 7 minutes. Add in the whole cardamom pods.
  4. Add in garlic and red bell pepper. Stir to combine. Cook 5 minutes.
  5. Add in 1 tbsp of the masala powder. Stir to combine.
  6. Add in chopped tomatoes along with their juices. 
  7. Rinse the soaking lentils and drain off the soaking water. Add the lentils to the pot along with 3 and 1/2 cups of fresh water.
  8. Stir in 1/2 tsp of salt. Bring the heat up to medium-high and cook for 40-45 minutes, stirring often. Half-way through cooking add in the rest of the 1 and 1/2 tbsp masala powder. 
  9. Just before serving, stir in 1 tbsp of butter, the fenugreek powder if using, adjust for salt, and serve immediately.
Masala Mix (adapted from Saveur)
A small coffee grinder works efficiently to make ground spices. With some patience, a mortar and pestle can work just as well. Adding the toasted seeds and spices 1 tbsp at a time, begin making swift strokes to pound the spices. This will help break up the seeds and crush the larger parts. Then in a circular motion, crush the spices until a powder forms. Repeat the process to get a finer powder. Remove each batch to a bowl. A small non-slip corkboard can be placed under the mortar to protect the countertop. Pre-ground spices can be added last.

Ingredients, listed in order of use:
2 tsp whole coriander seeds
1 tsp fenugreek seeds
1/2 tsp fresh ground pepper
1/2 tsp nutmeg, ground
6 whole cardamom pods
1/2 tsp red chili powder
1/4 tsp red chili flakes
1 tbsp paprika
2 tbsp smoked paprika
2 tsp salt
1/2 tsp cinnamon

Directions:
  1. Toast the coriander, cardamom pods, and fenugreek seeds together in a small sauce pan (low heat so they don't burn). Stir them around the pan often.
  2. Once they are toasted and golden, about 5 minutes, transfer the spices to a spice grinder, or add in batches to a mortar and pestle.
  3. Place the crushed powder in a small bowl. Add in pepper, nutmeg, red chili powder, red chili flakes, both types of paprika, salt and cinnamon to the bowl.

August 11, 2011

Lemongrass tofu with soy-sesame sauce and sticky rice


I made this dish for a friend that is interested in preparing more dishes with tofu. It's a simple stir-fry so if you don't have lemongrass or ginger just leave them out. The soy-sesame sauce is fast to prepare. Sticky rice absorbs the sauce much better than long-grain jasmine or basmati, but this could be served over noodles too.

My secret to successful golden pan-fried tofu is pressing extra-firm tofu for as long as possible, 30 minutes or longer. To get started, first press the tofu. Unwrap it from the package, drain the water and set the tofu in a colander or drainer (either over a bowl, or the sink so the water can drain out). Place a plate over the tofu and stack cans of beans or other heavy objects on top. The weight will help expel the water from the tofu. Next, begin cooking the rice, and then prep and cut up the veggies. If you are fast vegetable chopper, you can also use the time the tofu is pressing to make the soy-sesame sauce, or prep it while the tofu is cooking. Fresh lemongrass and ginger are added towards the very end of cooking time.

Other good stir-fry veggies include cabbage, bean sprouts, and even cherry tomatoes. Feel free to add or remove items to use up what you have.

Lemongrass tofu with soy-sesame sauce and sticky rice
Serves: 4
Ingredients (listed in order of use)

1 package tofu, pressed and drained, and then cubed into 1" chunks
2 cups sticky rice (sushi rice), prepared with 1.5 times as much water as rice, or according to package directions
2 tbsp peanut oil
1 package mushrooms, wiped clean and quartered
1 red bell pepper, in strips
1 cup snow peas
2, 4" stalks of fresh lemongrass or enough to equal about 1 tbsp chopped (see note)
1 and 1/2 tsp fresh ginger, chopped
Note: To prep the lemongrass, use a small pairing knife and cut the stalk in half length-wise. Remove the first or second layers, it'll reveal a purplish interior. Finely chop the lemongrass stocks starting from the root end. It will become tougher about 3" inches up from the root end. For the ginger, peel the skin away with a pairing knife or veg peeler, and finely chop.

For soy-sesame sauce:
3 tbsp soy sauce
1 tbsp rice-wine vinegar
1 tsp toasted sesame oil
1 tsp sesame seeds, toasted
3 spring onions chopped, chop the long part of the greens in 1" segments
1 clove garlic, minced fine
1/4 tsp or more red chili flakes

Directions:
1. Heat up a large stir-fry pan or wok over medium-low heat. Add in 1 tsp of sesame seeds and toast until the seeds become golden. Move them around the pan often, so they won't burn. Set aside.
2. Add 2 tbsp of peanut oil to the same pan and increase the heat to medium-high heat. Once hot, add in tofu chunks. Don't touch them or move them around. Let them sit for about 5-7 minutes until the bottom 1/4" of the tofu squares look like they are turning golden. The tofu will take 15-20 minutes to become lovely, golden, and crispy. Carefully, take a spatula and lift the tofu gently up. It's ready when it gives. The length of time will depend on your pan (non-stick vs iron). When the tofu is removed easily, flip it over so the other sides can cook.
3. While the tofu cooks, prepare the soy-sesame sauce. Add soy sauce, rice-wine vinegar, sesame oil to a bowl, and adjust for taste. Add in toasted sesame seeds, the white part of the spring onions, chopped garlic and red chili flakes. Stir everything together and set aside.
4. Remove the tofu from the pan and set it aside on a large plate. There should be enough oil (about 1 tsp) leftover in the pan, if not add in 1 tsp of peanut oil. Turn heat up to medium-high or high, and add in mushrooms. Cook 5-6 minutes stirring often, and then add in red peppers, cook 4 minutes, and then add in snow peas, and cook another 2-3 minutes, or until the snow peas turn bright green.
5. Once all the veggies are cooked, add the cooked tofu to the pan, add the ginger and lemongrass, and remaining spring onion greens to the pan. Combine and stir together for 1 minute.
6. Place rice in a bowl, cover the rice with about 1 cup of the stir-fry, and top everything with 1 and 1/2 tbsp of soy-sesame sauce.  

December 29, 2010

Pumpkin Thai Soup

pumpkin thai soup
above: pumpkin-Thai soup with portobello mushrooms

pumpkin
above: pumpkin

dudley and pumpkin
above: Duds checking out the pumpkin

onze keuken
Khavanu Kitchen

This pumpkin Thai-style soup can be served alone or served along with rice. To complete the meal, I topped the soup bowls with slices of grilled portobello mushrooms.  We have a Thai grocery store which sells ready-made curry pastes, but any of the grocery store varietals will work.  Panang flavors are usually served with dry stir-fries as opposed to being stirred into coconut milk. The flavors blend very well with the sweet pumpkin, and is not spicy, instead lending the soup just a little bit of heat.  

You could use butternut squash, or another kind of winter squash, even cubed carrots could work. The pumpkin that is grown and available in Belgium is the culinary variety; if using pumpkin, buy one that is meant for cooking, it will hold it’s shape better, and tastes delicious.

Before getting started, wipe down the mushrooms (if using) and get the rice cooking first.  Make the dressing for the portobellos while the soup is cooking.  It looks like a long list with many directions, but read it through before beginning - it comes together very fast.

Serves: 4
Ingredients:
1 cup long-grain rice, cooked according to package directions
4 small portobellos (2-3 inches in diameter), wiped clean and stem removed if too bulky
1 small-medium pumpkin, or about 2 cups cubed pumpkin (1-inch chunks)
2 cups water, used to pre-cook pumpkin cubes
1 tsp peanut oil
1 tbsp fresh ginger, chopped fine
2 cloves garlic, chopped
1 green bell pepper, diced into 1-inch chunks
1 small red onion, sliced
1 vegetarian bouillon cube, dissolved in 1 cup of hot water
½ tsp salt
2 tsp Panang curry paste (you can adjust this amount, it may need more or less)
1 can coconut milk
2 cups water, divided.
2 tbsp chopped chives or cilantro

Dressing for portobello’s:
1 tbsp rice vinegar
1 tbsp soy sauce
small pinch red chili flakes

Directions:
  1. Prepare rice according to package directions. The water to rice ratio for long-grain rice is usually 2 cups water : 1 cup rice - although my way of cooking rice is measuring the water with my ring finger (obviously not package directions). The water plus rice should come up half-way on your ring finger. It’s my mom’s method, and it works everytime.
  2. Wipe down mushrooms, and trim off stems.
  3. In a large soup stockpot, heat up water until a low simmer, and then add pumpkin chunks. Simmer for 10 minutes. Remove all of it to a large bowl.
  4. In the same soup stockpot, heat 1 tsp peanut oil over medium-high heat. Once hot, add in ginger and garlic, saute a few minutes until fragrant. Add in bell pepper chunks, onions, and cooked pumpkin along with reserved water.  Stir to combine.
  5. Add in vegetarian bouillon along with with water/broth it was dissolved in. Add 1 cup water to the pot. Leave 1 cup on the side for now. You can see if it your soup needs it once the coconut milk is added.
  6. Mix the coconut milk and panang curry together. Add this to the soup pot. Stir well to combine.
  7. Bring to a simmer, adjust taste for salt, and add in the extra 1 cup water if the soup is too dense. Do not boil, leave it at a rolling simmer while you prepare the mushrooms.
  8. Heat up a wide skillet over medium-high heat. Spray with cooking spray, and add mushrooms. Cook on each side about 2 minutes. Mushrooms are done in about 8 minutes. Prepare the dressing while they cook, by combining the rice vinegar, soy sauce, and red chili flakes in a small bowl.
  9. Take mushrooms off heat, slice mushrooms and toss them with the dressing. 
  10. To serve, fill bowls with ½ cup cooked rice, top with 1 and ½ cups soup, and top with 1 portobello mushroom. Garnish with chives or chopped cilantro.
We served this with a strong Belgian dark ale, Westvleteren 12, a beer with notes of cinnamon and spicy sweetness clears the palette with this soup. A St. Bernardus Abt would pair the same way. Living in Belgium does have it's perks =)
westvleteren 12