Showing posts with label channa dhal. Show all posts

August 20, 2014

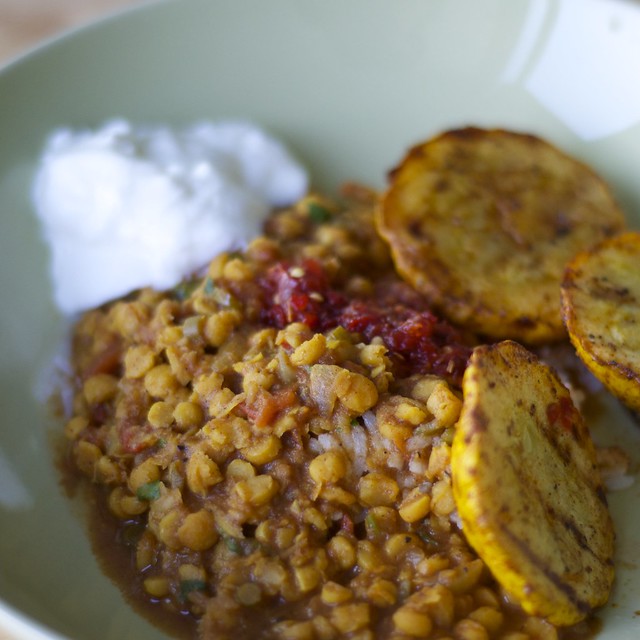
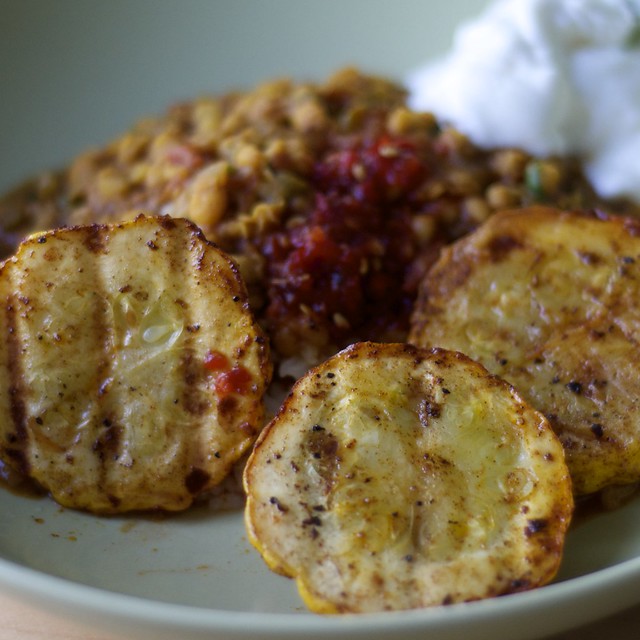
Channa dhal curry and grilled patty pan squash

DSC_0011

DSC_0020

No surprise here, another pressure cooker lentil recipe. This time, channa dhal is used (channa is yellow split pea). Channa dhal is highly nutritious. What is channa? Basically, a young version of a garbanzo or chickpea. It's packed with fiber, protein, and carbs; it has a healthy dose of iron and calcium, and it, like many other dried beans, is a great source of folate, biotin, and choline. 1 The tomatoes in the dish make the iron more bioavailable. Since tomatoes contain Vitamin C they enhance iron absorption. 1 This dish is just good. It can be used as a base for other beans or lentils, or you can sub in tofu, or chicken, or potatoes. Whatever floats your boat. I served mine with some grilled summer patty pan squash, basmati rice, yogurt, and some sambal olek.

This summer, I've been playing ultimate almost three times a week. Holy smokes, Seattle has an amazeballs ultimate scene. To get to the fields, I started riding my bike. I've been putting over 30 miles on my commuter hybrid a week (I have a 2008 Trek). To get home, I ride up a fairly long incline, and have decided to upgrade to a road bike. So if there are any foodie readers that are also bike riders, what should I be looking for?

I'm not into racing as a sport. I primarily ride on asphalt (did I really just type asphalt?), and I use my bike for most errands within a short distance. The things I like about my current bike set up: it's a workhorse, it has a rack with bike saddle bags that I use all the time. When I lived in AL, and commuted to work, I added fenders. I'd like to keep those elements. What I don't like: my bike is heavy, and slow, and I have a love/hate relationship when riding up hills. I view the uphill climb as a cardio workout, but I would like some efficiency.

On the weekends, when the weather is good, I like going for long bike rides. I've ridden up to Kenmore and Woodinville on my hybrid. The hubs has a road bike so I slow us down a lot. So far, I've been doing some online research, visiting and riding bikes at bike shops, and keeping a spreadsheet of different models, price ranges, and specs. A few weekends ago, I tried out two bikes from the same make (Raleigh Ravenio/Capri 2.0 and 3.0). The difference between my bike and the road bike was astounding. The road bikes were zippy and responsive. I would not use those two terms on my current hybrid. My hybrid is a great bike for occasional rides, that will occur on largely flat surfaces. I love that it got me used to the idea of using a bike for getting around town. Sadly, I think I have outgrown it.

Channa dhal curry with grilled patty pan squash
Yield: 4 generous servings, 1 squash per person

Ingredients
1 cup channa dhal
2 cups water
1 cup rice, such as Basmati or Jasmine rice
2 and 1/4 cups water for the rice
1-2 tbsp oil
1/2 cup onions, chopped
2 cloves garlic
1 tbsp finely minced or grated ginger
1 jalapeño, diced (optional)
3 Roma tomatoes, diced
1/4 to 1 cup water, keep on the side.

Dry Spices*
1 tbsp ground cumin
1 tsp paprika or red chili powder (use paprika if you want it less spicy)
1/2 tsp turmeric
1/2 tsp cinnamon
pinch nutmeg
lots of cracks of fresh black pepper
*if you don't have all these spices, a commercial curry mix can be subbed in easily instead. Just use 1-2 tbsp, and remember the more you use, the spicier it will be.

Garnishing spices/seasoning*
1 tsp salt (if using a commercially prepared mix, check to see if it has salt)
1 tbsp ground, coriander
1 tsp garam masala
1/4 cup chopped fresh cilantro
*if you don't have all of these, I would solely recommend salt and the cilantro.

Directions for the Channa dhal curry 
Step 1. Soak the channa dhal in the 2 cups of water, and set aside while prepping the rest of the ingredients.

Step 2. Prepare the rice. I use a rice cooker with the following amounts: 1 cup long grain white rice to 2 and 1/4 cups water. Turn the rice cooker on and forget it. Come back later, voilá: rice!

Step 3. Measure out the dry spices in a small bowl and set aside.

Step 4. In the small pressure fry pan pressure cooker (PC), heat up 1 tbsp of olive oil over medium heat. Once hot, add in onions and stir. Cook 2 minutes.

Step 5. Add in garlic, ginger, and jalapeños. Stir and let cook 1 minute. Add the dry spices and cook until the mixture becomes very dry. Then, add the tomatoes, and stir it together. The tomatoes will release water and everything will come together as the tomatoes cook. Let cook 4 minutes.

Step 6. Rinse the channa dhal, and add it to the PC. Stir in 1 to 1/2 cups of water and close the cooker. The liquid amount should not exceed the 1/2 mark on the PC.

Step 7. Turn the heat to high and bring the PC to low pressure (first red ring), and cook 14 minutes at low pressure. Once pressure is reached, turn the heat to the lowest setting to maintain low pressure (usually low heat). If using a glass range, move the PC off the heat for a minute or so. At the same time, turn the heat to the lowest setting, and then add the PC back on. When the time is up, turn the heat off and move the PC off the burner. Use the natural release method. This just means moving the PC off the burner and letting the pressure release naturally. It should take ~10 minutes. Use this time to prepare the garnishing.

Step 8. Once the PC is ready, remove the lid, and add the garnishing spices and seasoning. Taste for salt, and add a little more if needed. Serve over rice, and pass yogurt at the table. Top with the grilled patty pan squash (recipe follows below).

Grilled patty pan squash
Yield: 4 servings, 1 squash each

Ingredients:
4 patty pan squash, cut in half (you could also use compact summer or zucchini squash cut in halves)
1 tbsp olive oil
salt to taste (I am loving this flaked sea salt at the moment)
fresh black pepper
1/2 tsp paprika

Directions for patty pan squash
Step 1. Heat the grill to medium high heat if using a gas grill.

Step 2. In a large bowl, add halved patty pan squash and drizzle with olive oil. Sprinkle salt and pepper on top and toss the patty pan squash until the sides are evenly coated. Add the paprika and repeat.

Step 3. When the grill is hot, place the squash, cut side down on the grill and cook about 5-7 minutes per side. Use tongs to flip them over. Thicker (bigger) squash will require more heat. I like them slightly undercooked because they stay crunchier.

1. Brown J. Nutrition Through the Life Cycle. Stamford, CT: Cengage Learning; 2014.

May 28, 2014

Yellow split pea ginger scallion dumplings

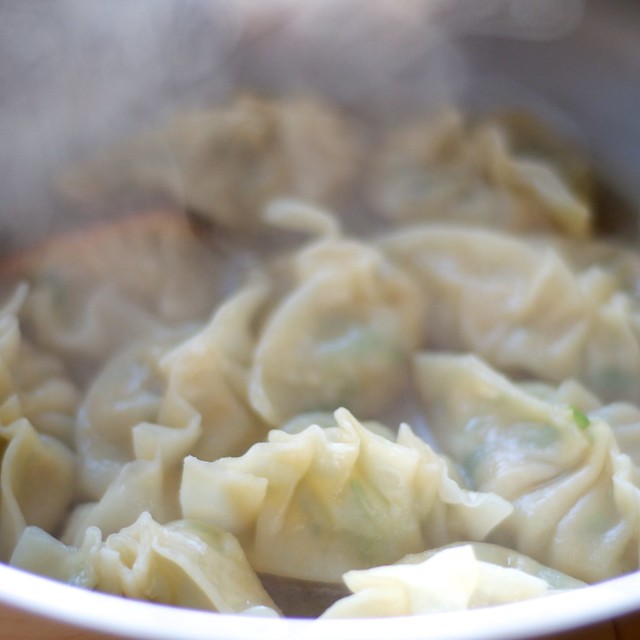
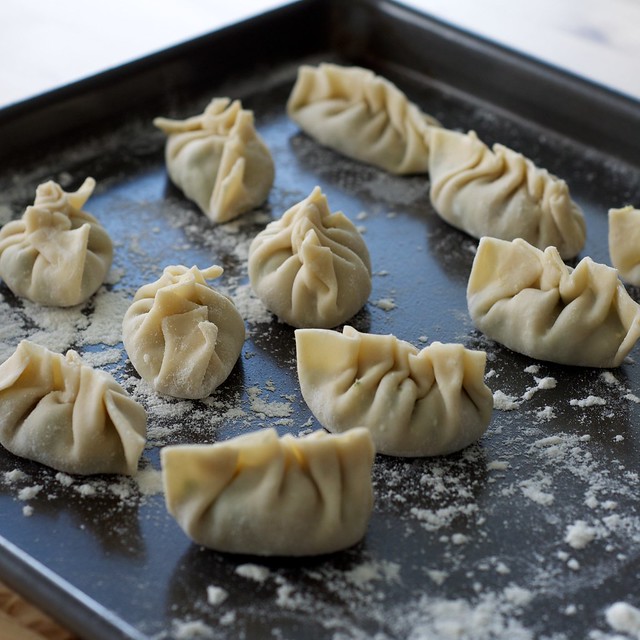
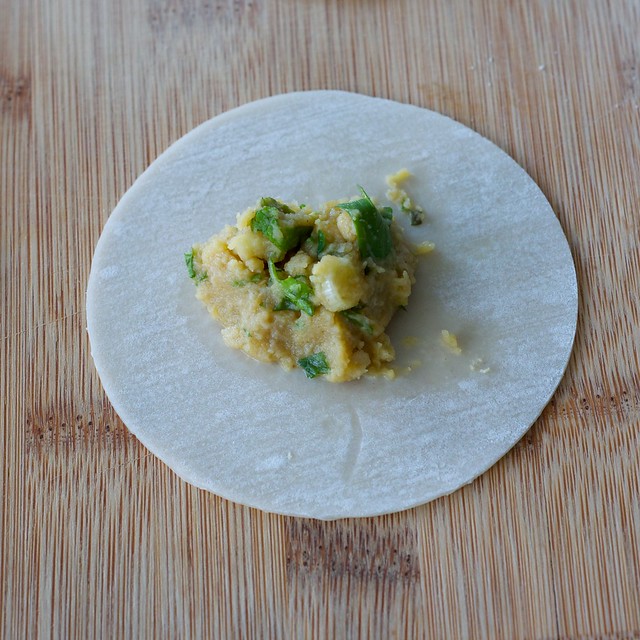
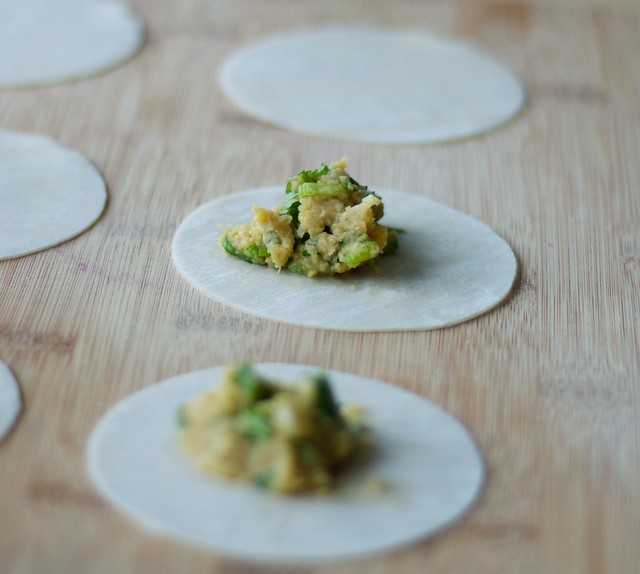
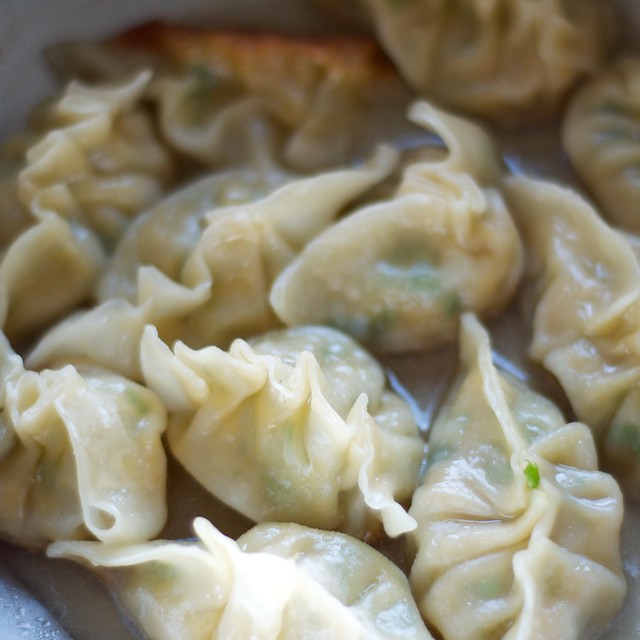
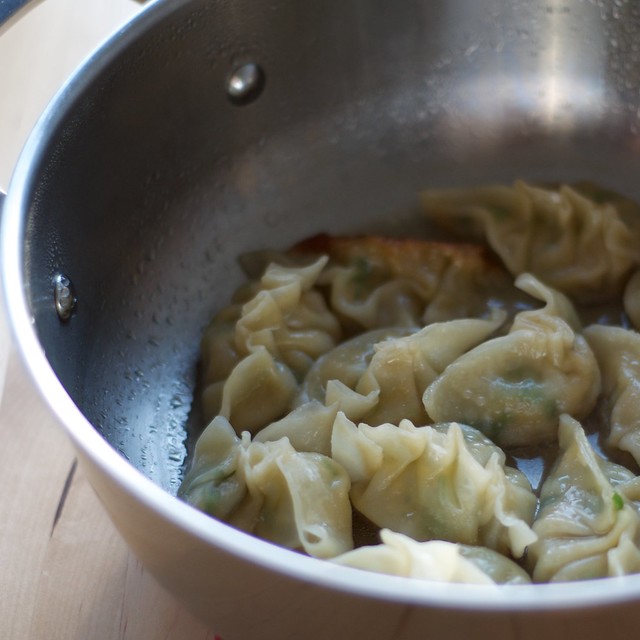
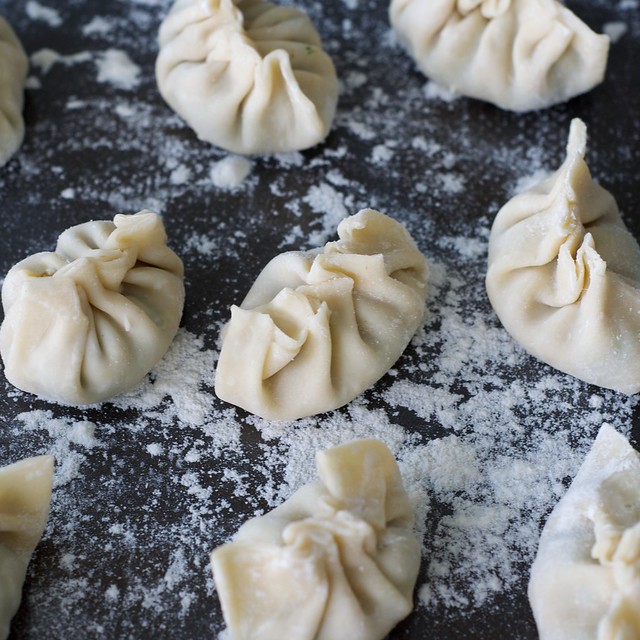
DSC_0669 DSC_0880 DSC_0862 DSC_0843 DSC_0677 DSC_0675 DSC_0875 These dumplings are pretty amazing. They are filled with a creamy gingery channa dhal, or yellow split pea, filling. They make a lot of work for a weeknight meal, but they are really fun to assemble and cook. The dumpling wrappers hold up really well, so if you are scared of tearing them or overhandling them, fear not. Since we are using lentils, we are definitely breaking out the pressure cooker (PC)! Now get excited and break out the PC!

Yellow split pea ginger scallion dumplings
The inspiration for these came from Heidi Swanson's 101Cookbooks' Golden Potstickers recipe
Yield: Approx. 50 dumplings, 1 and 1/2 tsp filling per dumpling; 5 servings, 10 dumplings each

Ingredients: 
1 cup dried yellow split peas or channa dhal
enough water to cook them in a PC
1 tsp ground cumin
1 tsp salt
1/4 tsp ground ginger
2" piece of fresh ginger, minced fine
1/2 cup chopped fresh cilantro
4 medium scallions or green onions
1 package gyoza or potsticker wrappers
water

Special tools: pressure cooker or large pot to cook lentils, a potato masher, cutting boards, a wide skillet with a lid, 2 jelly roll pans lightly dusted with flour.

Step 1. In the pressure cooker fry pan, combine the yellow split peas and enough water to cover the yellow split peas by about 3/4" of water. Stir to combine. Close the cooker and bring to low-pressure (first red ring). Once low pressure is reached, cook 11-13 minutes. Use the natural release method to release pressure.

If you don't have a pressure cooker, just cook the yellow split peas according to package directions, and let cool off enough before handling. This step can be done 1-2 days before prepping the dumplings to make the preparation faster.

Step 2. Open the PC fry pan and inspect the peas. They should be cooked but still retain most of their shape, and there should only be a small amount of water in the bottom of the pan after you lift away the first few layers of peas. If there is water up and over the peas, the water should be drained off. Return the peas to the PC fry pan, and mash the yellow split peas with a potato masher. This step can also be done in a food processor, but it is easy enough to do in the fry pan.

Step 3. Add the cumin, salt, and ground ginger to the pan and stir to combine.

Step 4. Add the cilantro, green onions, and minced fresh ginger to the pan and stir to combine. Once well combined, taste the mixture for salt. Since these will be served with a salty dipping sauce, don't worry if they taste undersalted.

Step 5. Clear some space on the counter and wipe away any crumbs. Once the counter is dry, dust lightly with flour and lay out 6 gyoza wrappers on the floured surface. Place a small work bowl filled with water nearby.

Step 6. Spoon 1 and 1/2 teaspoons of filling just slightly off the center of the middle of the gyoza wrapper. You can do this step to all of the wrappers at once.

Step 7. Now, working one a time, moisten half the circle and fold it over to make a half moon. The gyoza will want to stick. Once it comes together form small pleats where the ends meet, and push the dumpling down just slightly to give it a thick base for which it will be pan fried. Once the dumpling is assembled, place it on the floured pan until ready to cook.

Step 8. In a wide and deep skillet (if you can use one with a lid), heat up some neutral oil like peanut or canola over medium-low heat. Once the pan is hot, add the dumplings in a single layer letting their chunky bottoms line the pan. Don't overcrowd the pan. Let them sit for a about 5-6 minutes inspecting the sides right where they meet the base. The dumplings should not stick. With a small spatula or chopstick, lightly lift them up. The base should be golden and enticing. If they are not let them cook 1 minute or longer.

Step 9. Once they are golden, add 1/4 to 1/3 cup of water to the pan, and immediately close the pan letting them steam for 3-4 minutes. Serve them with some dipping sauce (see below). I guarantee they will be devoured.

These may be frozen and reheated. If freezing, place the prepped, but uncooked, dumplings in a single layer in the freezer. For example, place the dumplings in a single layer on a jelly roll pan and freeze until frozen through. Remove the frozen dumplings from the pan into a zip top ziplock bag. Date and label them.

If preparing frozen dumplings, these may be cooked just like in Step 8 and 9.

Soy-sesame dipping sauce
Yield: enough for 4 persons

This can be assembled minutes before serving. The sambal oelek is optional, and is not very spicy.

Ingredients:
3 tbsp soy sauce
1 tbsp rice wine vinegar
splash toasted sesame oil
scallions and sesame seeds
1/2 tsp sambal oelek (optional)

Directions:
Combine all of the ingredients together. Serve along with the dumplings or potstickers. Yum! Yum!

September 16, 2013

Massaman Curry

DSC_0468

DSC_0458

DSC_0454

DSC_0461

I bought a pressure cooker. It's a second generation six-piece Kuhn Rikon Duromatic. It came in two different sizes, with a lid that can be shared between the two, another glass lid for cooking, and a trivet for steaming. Simply put, pressure cookers save time. Second generation pressure cookers are designed to be safer because they are supposed to be constructed with at least two or three safety releases, and they are designed to indicate clearly when the cooker has come to low or high pressure. There is no loud hissing. In older, or first generation, pressure cookers they usually have a jiggle top which releases pressure in loud hisses after reaching pressure.

Laura, of the Hip Pressure Cooking blog, has written extensive reviews on different types of pressure cookers, and I found her detailed, and highly knowledgeable reviews, are what sold me on the Kuhn Rikon. Her recipes are modern, adaptable, and reproducible. She has basic pressure cooking tutorials that are easy to follow, and her site has created a community of modern day pressure cooker enthusiasts.

Over the past few weeks, a personal barrier I had to using my new pressure cooker was relearning how to adapt recipes. I found that after a few weeks of trial and error, the learning curve for seasoned cooks is fast. The learning curve for beginner and novice cooks (the hubs is categorized in this category) is also fast. Our pressure cooker came with a cookbook which is a great reference guide. The hubs started out with potatoes, moved to cooking beans a few times, and made a rice pilaf, and a Mediterranean couscous. To vegetarians, the cooking time for beans and lentils will be slashed in half. This, and this reason alone, is one of the very essential reasons to own one, and it explains why pressure cookers are a sustaining life force in Indian households.

Channa Dhal Mushroom Massaman Curry
Adapted from Food and Wine
Yield: 4 servings

This curry is delicious. I think the ingredients list is a bit daunting, but the outcome is marvelous. With a pressure cooker you really save time because you can utilize the 12 minutes that the cooker is cooking to prepare other things and clean up. The sweet potatoes melt into the dish, the channa dhal bulks up the curry, and replaces chicken in the original recipe. I have added mushrooms, channa dhal, and coriander, and replaced water for the broth.

Ingredients for curry paste:
1" of ginger
2 cloves garlic
1/8 tsp salt
1 tsp Chinese five-spice powder
1 tsp cumin, ground
1 tsp coriander, ground
1/2 tsp turmeric
1/2 tsp red chili flakes
1 can coconut milk

Ingredients for curry:
2 tbsp peanut oil, divided
1/4 cup channa dhal or split yellow lentils, soaked in 1 cup of water*
1 onion
1 sweet potato, peeled and cubed into 1" chunks
3/4 cup water
1 package of mushrooms, stems removed and quartered
1-2 tsp rice wine vinegar, optional
1 medium tomato
1/4 cup cilantro, chopped
1/4 cup peanuts, chopped
4 cups cooked white long-grain rice

Directions:

  1. Soak the channa dhal in 1 cup of water. Set aside. 
  2. The next step will be making a curry paste. You have three options 1) use a mortar and pestle, 2) use a food processor, 3) finely chop with a knife. I used the mortar and pestle because you end up with about 2-3 tbsp of curry paste a small amount for the food processor. In a mortar and pestle, pound together the garlic with the salt until it is a coarse paste. Remove this to a small mixing bowl that can hold 2 cups worth. Add the ginger and pound together. Scrape this into the bowl. Add the remaining spices and the coconut milk to the bowl and stir to combine. Set aside. 
  3. In a 4 quart pressure cooker (my small pressure fry pan is < 3 quarts) heat up 1 tbsp oil over medium high heat. Once hot, sauté the onions for 3 minutes. 
  4. Add the sweet potatoes, stir together, and then add in the channa dhal along with the water. Add 3/4 cup of water. Do not add salt. Bring the mixture to a simmer and then close the lid. Bring the pressure cooker to the first red ring and then cook over low pressure for 12 minutes. Use the natural release method. 
  5. Heat up the remaining 1 tbsp of peanut oil over medium-high heat in a cast iron or non-stick skillet.  Once hot, add in the mushrooms and sauté about 7-10 minutes. Sprinkle the rice wine vinegar on top, cook 3 more minutes and cut the heat and remove the pan from the heat. 
  6. Open up the pressure cooker and put it back on the heat. Stir in the coconut milk curry mixture, add the tomatoes and bring to a simmer. This should only take a few minutes. 
  7. Garnish with peanuts and cilantro and serve immediately, preferably over cooked white rice. 

*Note: soaking the channa dhal is not necessary, but I find that it cooks faster.