Showing posts with label peanut butter. Show all posts

October 21, 2014

Green chutney

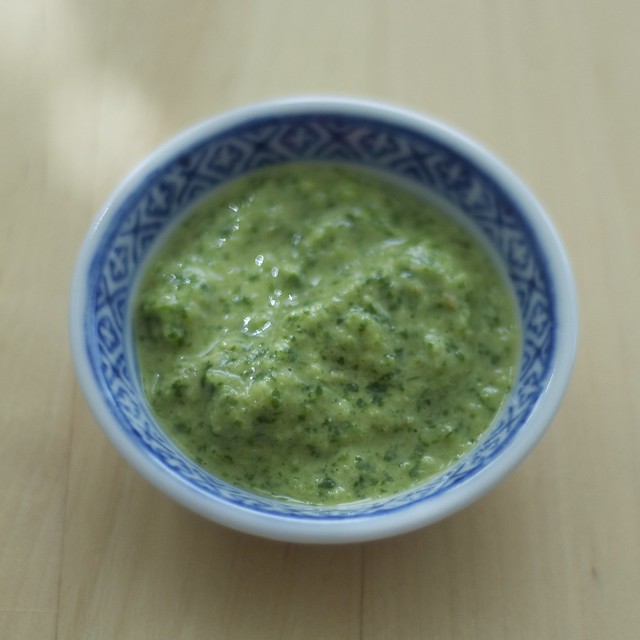
Cilantro cucumber chutney

This is a different take on the ubiquitous green chutney that shows up as a sad accompaniment to those boring papad crackers at like every Indian restaurant. I know you've seen them. Crispy round things served with red and green sauce? They are the chips and salsa of the Indian restaurant world.

My green chutney includes cilantro, cucumbers, peanut flour and sesame oil, so I call it cilantro cucumber chutney. It can be stored up to 1 week in the fridge in an airtight container. I think it's great with roasted potatoes. I used peanut flour because I found dehydrated peanut butter at the grocery store, and wanted to try the peanut flour in smoothies. It tastes like peanut butter, and it makes cleaning the blender easier. However, peanut flour can be easily replaced with about 2 tbsp of whole peanuts, or plain, unsweetened, peanut butter can be used. Have you seen peanut flour, or used it? Thoughts?

Cilantro cucumber chutney
Yield: 3/4 cup, can be stored in fridge for up to 1 week. 

Ingredients:
1 bunch cilantro, as fresh as possible
4" piece cucumber, peeled and seeds removed
1 whole jalapeno, cut into segments, remove seeds if you want a mild chutney
1/2" piece of fresh ginger, peeled
juice of 1/2 of a large lemon
2 tbsp peanut flour (dehydrated peanut butter?)
1 tbsp peanut oil
1-2 tsp sesame oil
1/2 - 1 tsp salt

Special tools: cutting board, vegetable peeler, colander, and blender.

Directions:
Step 1: Wash and drain the cilantro. Trim off any dead looking parts. If you use the freshest cilantro you can find (use same day you buy) it should be fine. Add the cilantro to the blender. Trim the cucumber, peel it, and remove the seeds. Place it in the blender.

Step 2: Trim the jalapeño and peel the ginger. Cut both into large segments, and add them to the blender. For a spicier chutney, leave the jalapeño seeds intact.

Step 3: To the blender, add the lemon juice, peanut flour, peanut and sesame oils, and salt. Add in a few tbsp of water if needed. Blend until well combined (about 2 minutes).

June 23, 2014

Tofu Lettuce Wraps

Tofu lettuce wraps

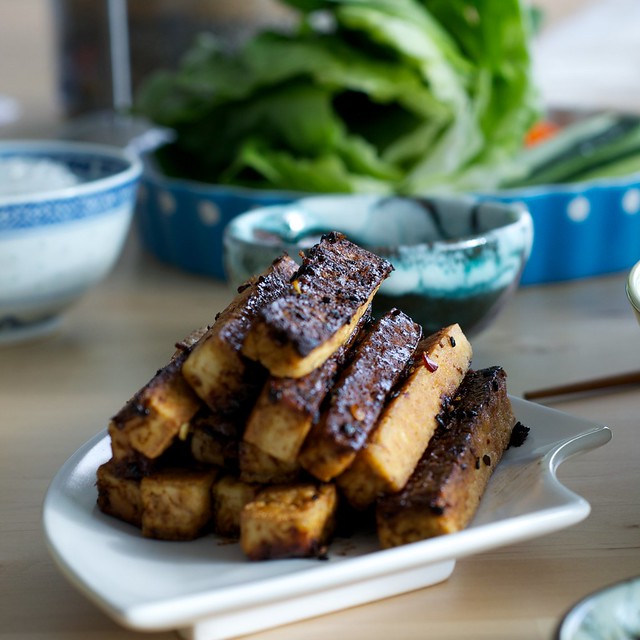
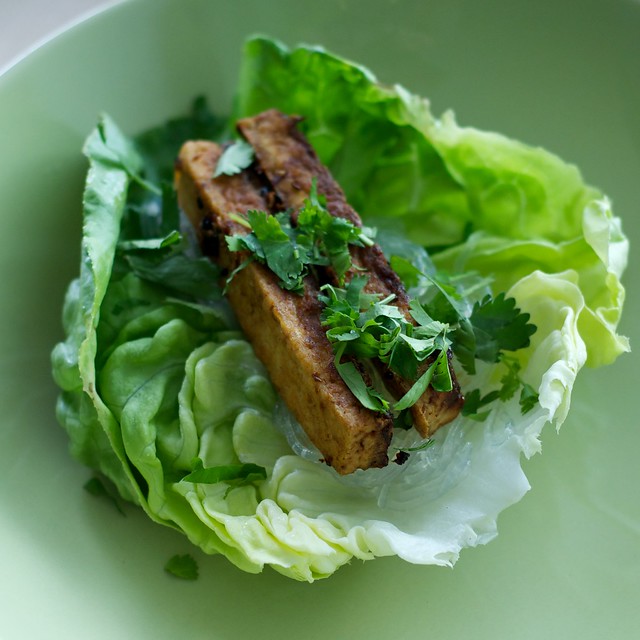
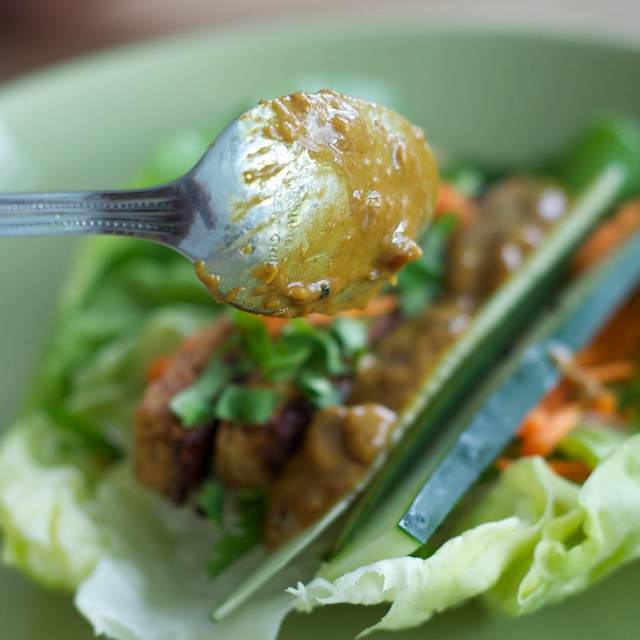
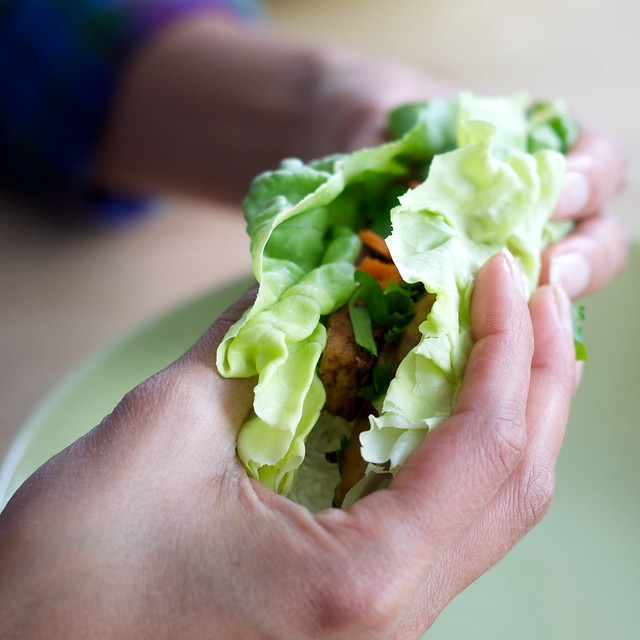
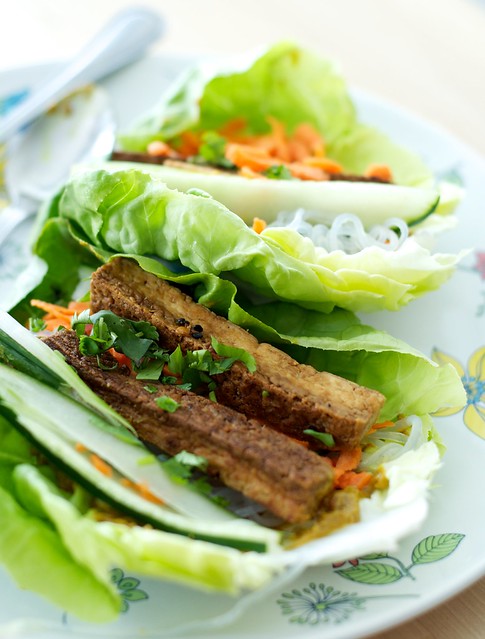
Bibb lettuce leaves create a crunchy and fresh "wrapper" for tofu lettuce wraps. Lettuce leaves are filled with a caramelized crunchy ginger-tofu, and filled with mung bean noodles, grated carrots, and strips of crunchy cucumber and spring onions. Serve these with peanut sauce, or your favorite dipping sauce.

This is a lot of work for dinner, or an appetizer, but the beauty of this dish is in each and every single component. They are fun to put together, and you'll feel healthier for doing so. I promise. If you have leftovers, you can assemble vermicelli noodle bowls. Win-Win!

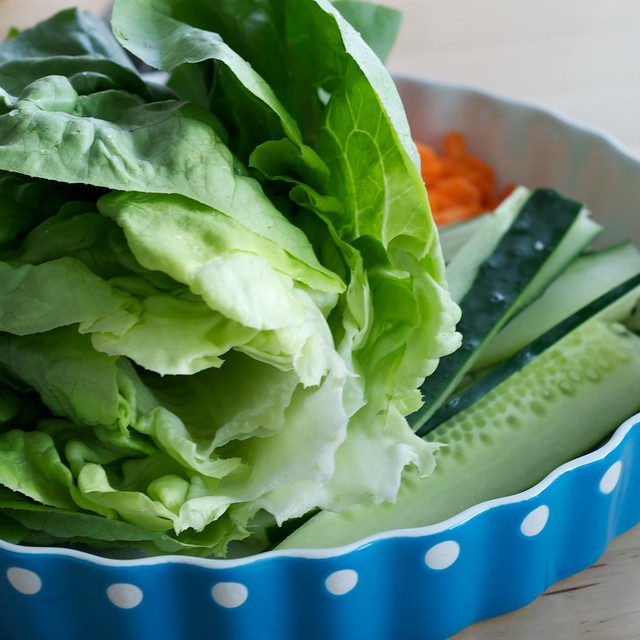
From my New Roots box, I used the bibb lettuce, carrots (earlier batch), cucumbers, and spring onions. I am loving the box, and I use it all the time. This week, I began measuring out the servings to compare cost per serving. The bibb lettuce head would easily serve 8. According to MyPlate serving sizes, 1 cup of raw veggies = 1 serving; and 1/2 cup cooked = 1 serving. I prepped the lettuce ahead of time, and it stored for longer than a week in the fridge.
'fu
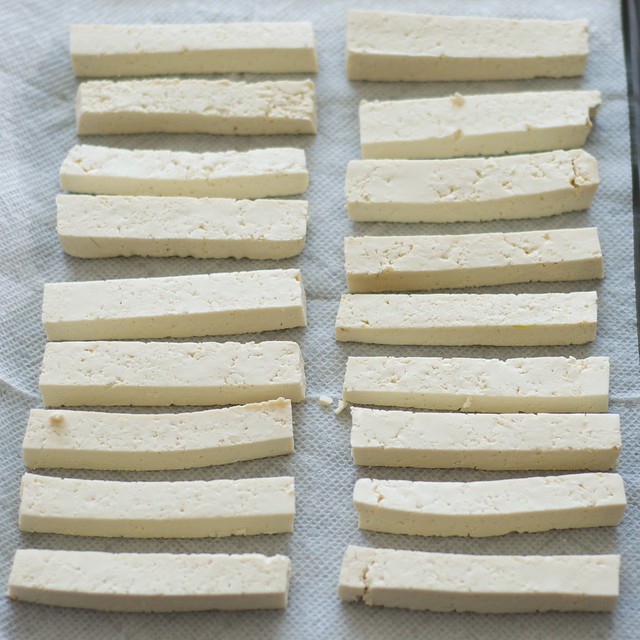
extra-firm tofu cut into strips.

Untitled
Crunchy ginger tofu

Lettuce
Lettuce wrap fixins

The Most Awesome Tofu Lettuce Wraps
Yield: 4 servings, 2-3 wraps per person

For the tofu
1 lb extra-firm tofu (1 lb is enough for 2-3 people; use 2 lb for 3-4 hungry people)
salt for tofu
1-2 tbsp peanut oil or enough to leave a slick shimmer in a wide skillet

For the wrappers
1 head Bibb lettuce, washed and the leaves spun dry count 2-3 per person
2-3 spring onions, cut into segments 3-4" in length; cut onions in half or quarter them lengthwise
2 medium carrots, peeled and grated
1/2 cucumber cut lengthwise in half, and then cut into small crunchy strips, peel skin if waxy.
2 oz dried mung bean noodles, optional. Hydrate the dried mung bean threads by briefly boiling in hot water and then draining and tossing with just a tad of sesame oil (optional).
1/2 cup chopped fresh cilantro

For the tofu glaze
3 tbsp soy sauce
1 and 1/2 tbsp rice vinegar
1 tsp toasted sesame oil
1 tsp grated ginger
1-2 tsp sambal oelek
1 tsp black or white sesame seeds
1 tbsp molasses

Serve with peanut sauce, store-bought is fine.

Special tools: not really anything too fancy: a salad spinner, a box grater, regular pots and pans, jelly roll pan, paper towels, knives, cutting boards. Attractive serving dishes would really showcase the gorgeous ingredients. We do eat with our eyes after all.

Prep ahead: prepare Bibb lettuce, and prepare peanut sauce; can also prepare mung bean noodles. I prep the Bibb lettuce by carefully removing each leaf and washing it thoroughly. Once washed, I spin them in a salad spinner to expel all of the water, and then place them in a zip lock gallon size bag. They will stay fresh for up to a week.

Directions:
Step 1: Drain the tofu and expel the water out of it. The lazy way is to wrap the tofu in a paper towel just drying it very lightly. Get out a jelly roll pan and line it with paper towels. Cut up the tofu so it is in 3/4" thick strips. Lay out the tofu strips on the paper towels and salt them. Let them rest 7-10 minutes. The salting draws the water up to the surface. Use a paper towel to "wick" away the water.  Then rotate the strips a quarter turn, and salt and repeat. This really does result in a chewy texture and makes pan-frying very easy, and with less oil. If you are letting the tofu rest, you can prep other parts of this recipe including the veggies used in the wrap, or prepping the Bibb lettuce, which I have made Step 2.

Step 2: Wash the Bibb lettuce and set aside in the fridge. Make sure that the leaves are dry. This can be done up to 4 days ahead of time. Wash each leaf carefully and then spin them dry in a salad spinner. Once dry, store the leaves in a ziplock bag in the fridge. They will last this way up to 1 week in the fridge.

Step 3: Arrange the prepared vegetables in an attractive dish or plate, and place in the fridge covered with a plate or plastic wrap to keep cold. I recommend prepping the veggies right before serving, they just look so much better. Trust me.

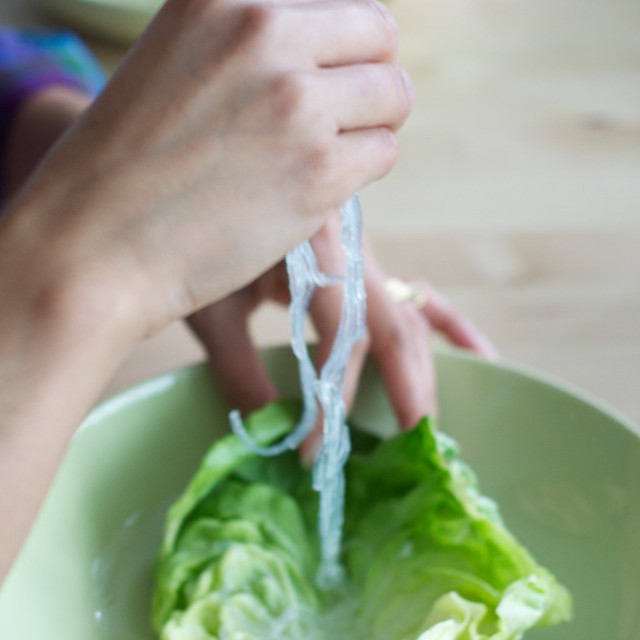
Step 4: Prepare the mung bean threads or noodles if using. To rehydrate them, cook them like you would pasta, but turn the water off when it reaches a boil AND THEN add the mung bean threads. Let them hydrate for a few minutes. They will have that consistency of jellyfish tentacles or that weird jelly goop that comes out of kids toy vending machines. I know, I know. They can be rinsed under cold water and then tossed with a bit of cold water and oil to make them loose. You can also substitute vermicelli noodles.

Step 5: Add 1 tbsp of peanut oil to a non-stick or cast iron pan, and heat up over medium heat. Once hot, pan fry the tofu until golden on each side (about 6 minutes for the first side) then few minutes each side because the pan will be hot! If preparing more than 1 lb of tofu (more than 1 package) cook the tofu in batches using about 1 tbsp of oil for each batch of tofu, and not overcrowding the pan. Remove the cooked tofu to a plate.

Step 6: Meanwhile prepare the tofu glaze. In a medium bowl stir all the ingredients for the tofu glaze together.

Step 7: Once the tofu has cooked, add it back to the pan, and ladle the glaze over the tofu, eventually pouring the remainder into the pan. It will heat up and caramelize quickly. Move it off the heat and remove the strips to a serving dish.

Step 8: Set out everything so it can be assembled at the table. I place the grated carrots, cuke strips, and scallions, and lettuce on a large plate. I set the cilantro, mung bean noodles, and peanut sauce in their own bowls. I give everyone chopsticks and spoons.

How to assemble:
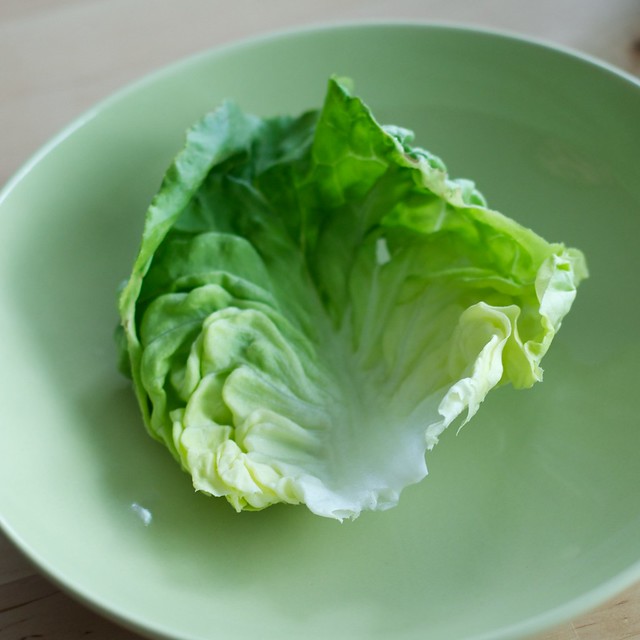
Lettuce
1. Lay out the lettuce wrapper

Mung bean noodles
2. Add in mung bean noodles

Assembly
3. Add some tofu and then add some...
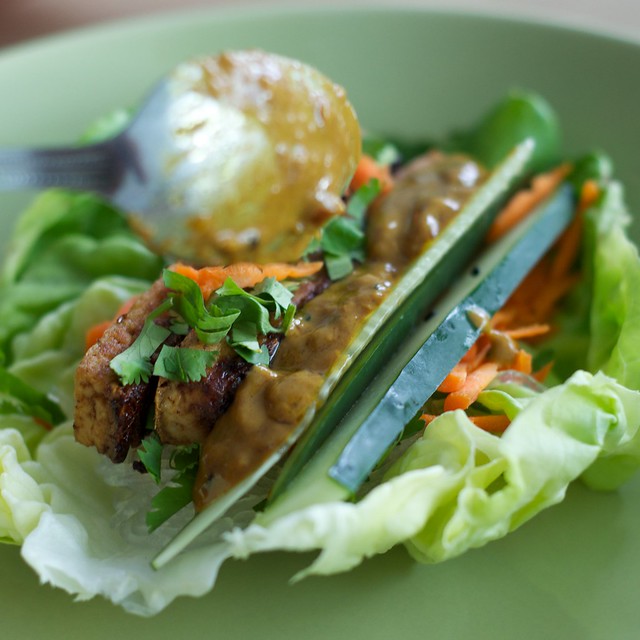
Tofu lettuce wraps

Adding secret ingredient
4. Veggies and peanut sauce

Tofu lettuce wraps
5. Eat, repeat!

June 30, 2013

Cereal Bars

Untitled
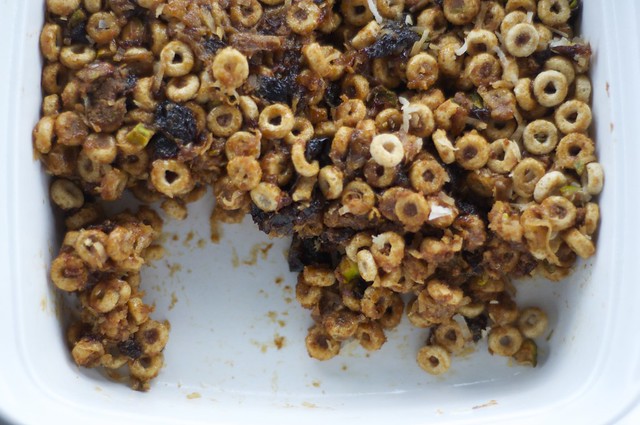
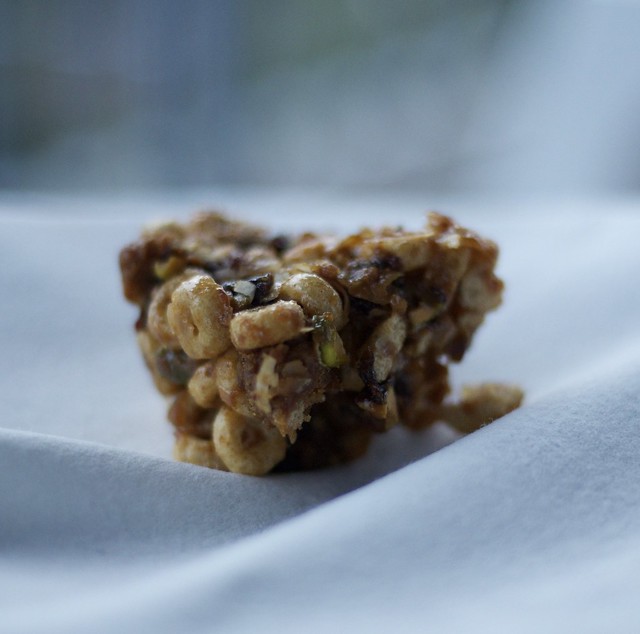
Cereal bars, look better than they taste

Untitled
I know, a bit blurry, but here you see them in all their gooey glory

Untitled

Untitled

Untitled
I let Mr. Duds sniff them from outside, and he seemed to think they were just fine.

It has been so long. I'm really sorry about that. Let's catch up. Oh fine. You're right. How could I be so lazy and neglectful? I know, I know, my last post was March.  Since March, I got caught up on work.  Rather, the last two months of the semester steam rolled me into the ground and left me drying on the asphalt. Work. Sigh. Love it. Hate it. As soon as my semester wrapped up, and not a minute later, I boarded a plane and went on a 3 week long holiday. My god it felt good. More on that later.

Today is all about cereal bars. I never blog the recipes that turn out awful (you are so welcome), but I think it's good to remember that recipes fail dozens of time. Even when they fail, I'll still consume the outcome. Sometimes the recipe is just wrong. Other times, I didn't have the correct ingredients and substituted an ingredient because I was too lazy to go to the store to buy it. Honestly, I cannot fathom driving to the store for a single recipe. It is just not how I roll.

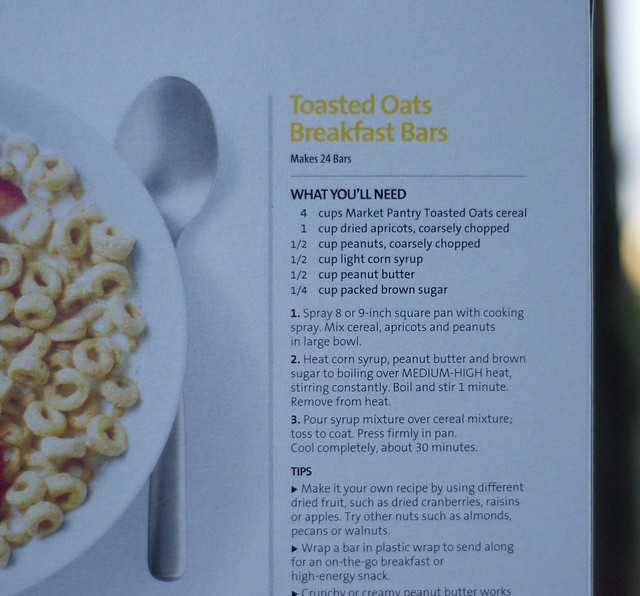
I have a coworker that teaches sports nutrition. She had her students bring in power bars, and snacks, that fit the nutrition bill and that were still made up of real food. I imagine as a sports nutritionist, one would constantly deal with questions about maxing out protein, and which whey powder is recommended. Yesterday, I was eating my plain toasted oats cereal when I turned the box over and read a recipe for cereal bars. I had all the ingredients: dried fruit, nuts, peanut butter, brown sugar, toasted oats plain cereal. However, there was one ingredient that I was a bit iffy on: corn syrup.

The recipe for cereal bars is quite simple. You add the dry ingredients to a bowl, and then you boil together the wet ingredients. Once the wet ingredients are hot and mixed, you pour them over the dry ingredients, stir everything together, and then press them in a 8x8 greased pan. You let them cool, and once cool, you can cut them into small squares. This sounded like a good alternative to granola bars.

I made a few adaptations. I used pistachios instead of peanuts. I used dried plums instead of apricots, and I used brown sugar, peanut butter, and molasses. I added coconut flakes.  I even had corn syrup, but I couldn't bring myself to add it. I'm no brown sugar advocate, but to me, corn syrup is...is....there it is. I couldn't figure out why nutritionally corn syrup had been brandished to the "it's not real food" pile. It's broken down and absorbed similarly to glucose and fructose. But then it's also obtained through a complex multi-organic-chemistry process that makes it seem much more notorious than blackstrap molasses, or brown sugar. Corn production is heavily subsidized as an agricultural commodity which makes corn syrup and high-fructose corn syrup the cheapest sweeteners to make. Corn syrup and high fructose corn syrup are found in foods that I would categorize as unhealthy: sugar-sweetened beverages, sodas, sweets and other shelf-stable baked goods, fake syrups, fruit-flavored yogurt masquerading as healthy food, some baked bread products. The list could go on. I want to note that other sugars could be just as notorious, so I'm not trying to single out corn syrup. But I did want to talk about why I immediately felt hesitation when I saw it as an ingredient.

So I tried to simmer together brown sugar, peanut butter, and molasses. It quickly became clear that this concoction would not work as the glue that I was supposed to be making. So, I added the corn syrup. The result: a super sweet, not-so-bad, cereal bar if you want your cereal to taste like cookies with plums, peanut butter, and pistachios. Now, I finally understand why granola bars have about 5 types of added sugar. Next time you crack open a granola bar, take a look at the ingredients list. The following are all types of added sugars: brown rice syrup, evaporated cane juice syrup, honey, evaporated cane juice crystals.

I think I'll avoid granola bars, and also cereal bars for the foreseeable future. I will stick to my stick-to-my-ribs oatmeal which is made by heating up plain oatmeal, adding fruit, milk (or soy milk), nuts, cinnamon, nutmeg, and sometimes honey or brown sugar (1 tsp at the max). Adding that much sugar to make something which is supposed to be healthy (breakfast or a snack) is just plain wrong.

Now if you want to improve, suggest upon, or build a better version here is the basics recipe:

(Not so good) Cereal Bars
Recipe from Target's Market Pantry Toasted Oats 
Yield: Almost 2 dozen 1.5" by 1.5" squares.

Ingredients:
4 cups toasted oats cereal
1 cup dried apricots, chopped (sub in any kind of dried fruit
1/2 cup peanuts
1/2 cup light corn syrup
1/2 cup peanut butter (can sub in crunchy or smooth peanut butter)
1/4 cup packed brown sugar (can sub in crunchy or smooth peanut butter
Optional add ins:
A few tbsps of different kinds of nuts, flax seeds, or coconut flakes.

Directions:
1. Spray an 8" by 8" pan with a little oil.
2. Stir together the dry ingredients
3. Stir together the wet ingredients in a small saucepan. Set the saucepan over medium heat, and combine until boiling. I would make sure and cover the pan so you don't get hit with any spurts out of the pan. Let it simmer for 1 minute and then pour over the dry ingredients. Stir everything together and press into the pan. Let it cool completely before cutting. If you cannot wait like me, then at least put the knife in a little bit of oil to let it cut smoothly.

January 21, 2012

Peanutty noodles


I was trying to make pad thai tonight when I realized I was completely out of tamarind paste. Since my only options for obtaining this crucial ingredient are the ethnic stores in town (which all are closed after 6 pm) I came up with this erroneous pad-thai inspired noodle dish. S and K, this recipe is largely from you guys, since you shared a similar recipe with me a few years back.

Sauteed tofu and these distelzwam mushrooms lend a meaty bite; this dish is 75% veggies and 25% noodles. 
Distelzwam are king trumpet mushrooms found in the oyster family of mushrooms. They are the largest types of oyster mushrooms. I bought them from the Mushroom Guy at the Heverlee market. This dish tastes like stir fried veggies in a peanut-sauce all mixed up with noodles, and served piping hot. While not authentic, it certainly made it on our list of faves.

Press the tofu first. Then cut up all the veggies, it should take you about 20-30 minutes depending on how fast you can cut up everything. Have all the veggies cut up before you get started. This pairs excellently with a cold spicy saison (such as St. Feuillien Saison).

Peanutty noodles
Ingredients: listed in order of use

Serves: 4
1 package tofu, drained and pressed
liberal amounts of peanut oil (I probably used about ¼ cup total).
3 distelzwam mushrooms quartered, or 1 cup whole button mushrooms, quartered
1 red bell pepper, cut into strips
1 cup sugar snaps or snow peas, kept whole
1 cup vegetable broth
1 clove garlic, chopped
1 tbsp fresh ginger, chopped
½ cup peanut butter, natural style - don't use sweetened pb!
3 tbsp soy sauce
1 tbsp or more rice wine vinegar
1 tbsp toasted sesame seeds
red chili flakes to taste (1 tsp for spicy; 1/2 tsp for medium; 1/4 tsp for mild)
½ cup red onion, sliced fine
3 cups shredded napa or savoy cabbage, chopped fine
1 large bunch of green onions chopped (enough for about ½ cup, be liberal they melt into the dish)
8 oz rice noodles, cooked according to package directions.
cilantro for garnish

Directions:
Have all the stir-fry ingredients ready. I managed to use 4 burners, with my main saute pan ready for the veggies, a (new!) cast iron pan for the tofu, a large pot for the rice noodles, and a medium saucepan for the sauce. Stir-fry ingredients: red bell peppers, sugar snap peas, red onion slices, mushrooms, cabbage, green onions, and tofu.
Sauce ingredients: garlic, ginger, vegetable broth, peanut butter, soy sauce, rice wine vinegar, toasted sesame seeds, red chili flakes, and liberal amounts of fresh green onions (to taste).

  1. Heat up 2 tbsp of peanut oil in the cast iron over medium-high heat. Once hot add in tofu making sure to not crowd the pan. Don’t touch them for at least 5 minutes. They will start to become golden on the bottom. Even then, don’t touch. Just pick up the pan, give it a whirl to move the oil around, and set down to allow the tofu to cook.
  2. In your saute pan (medium high heat) or wok (high heat). Add in about 1 to 2 tsps of peanut oil, once hot add in the mushroom and stir fry until they look seared and golden. Remove.
  3. Add in peppers and stir fry until they look seared and golden. Add in sugar snaps. The sugar snaps will brighten, once they brighten remove everything. Remove them from the pan and shut the heat off.
  4. Check the tofu, begin to flip them over when golden brown and crisp on the bottom; remove cooked pieces, replacing them with new ones. The cast iron should ensure that the tofu pieces don’t stick. Having a really nice quality pressed tofu is the key. My Belgian friends always complain about tofu because the commercially available tofu sucks (Alpro I’m calling you out). It’s too wet and spongey. The Thai/Korean markets have excellent pressed tofu, slightly tangy, and so perfectly pressed it looks like paneer. Remove the tofu to a plate once all the pieces are golden-brown. If there is any oil left in the pan, carefully pour it into the saute pan.
  5. Start heating up the water for the rice noodles.
  6. In the medium saucepan, add the veggie broth, ginger, garlic, peanut butter, soy sauce, rice wine vinegar, red chili flakes, toasted sesame seeds, and chives. Cook over medium heat stirring occasionally until the sauce thickens (should take 10-12 minutes).
  7. Add rice noodles to the large pot of boiling water. Boil for about 2 minutes and shut the heat off. Add a tsp of oil to the water and let the noodles soften up; the oil should keep them from sticking.
  8. Add oil to the saute pan or wok, if needed and turn the heat back on. Once hot, add the red onions and stir them around until they begin to wilt and look cooked, add in green onions and cabbage. Stir everything together for about 4-5 minutes. Add in the red bell peppers, snow peas, and mushrooms (to heat them back up).
  9. Drain the rice noodles into a colander, and add them into the saute pan along with the sauce. Mix together carefully by folding the sauce through the noodles (this will also reduce the amount of splatters on your arms).
  10. Garnish with cilantro and serve immediately.

December 21, 2011

Peanut butter cups

These are so easy. So easy to make and much easier to devour. All you need are a muffin pan, a dozen muffin liners, about 300 g of high quality melting dark and milk chocolates, 1 jar of peanut butter, and a bit of patience. I followed the instructions from the Hungry Mouse (my do her pics look fabulous, and the s'mores cups. Drool.) and from the Joy of Baking. I used a Jiffy-style creamy peanut butter and opted out of adding any extra sugar. They are plenty sweet. Of course, these would make excellent gifts this holiday season, but if you're like me, you'll hoard them all. 
Before you get started make sure you have enough room in the fridge, the muffin pan will go into the fridge to firm up the chocolate. You can make a double boiler by placing a heat safe bowl on top of a pan filled with water. Make sure the bowl doesn't move around when you stir it (also excellent fondue idea), it's best if it fits snugly inside. Place the chocolate in the bowl, keep the burner on medium-high, and watch the chocolate start melting. 

Peanut butter cups
Yield: 12 cups

Ingredients:
300 g chocolate (I used 150 g Cote d'Or milk chocolate and 150 g Cote d'Or Culinaire this is 54% cacao); or 2-3 cups of chocolate chips.
1 jar of peanut butter, such as creamy style, but you can pick whatever one you want. 

Directions:
  1. Line muffin pan with muffin liners. 
  2. Set up your double boiler. To do this place about 2 cups of water in a saucepan. Put your bowl, with the chocolates in the bowl, on top of the saucepan. Heat up the water in the pan over medium heat. Stir the chocolates together to avoid any lumps. This should take about 10 minutes. You should check the water occasionally. This method keeps the chocolate from scorching and it keeps it at a normal temperature. 
  3. Gradually, fill the muffin liners/cups with about 1 tbsp of chocolate. Push it around the sides of the muffin liner so it coats the side. This will help you form nice cups. Once done, place in the fridge to firm up. You could also use an egg carton (mini cups!) Wait 10-20 minutes or until firm. Turn off the heat on the chocolate. 
  4. Stir the peanut butter together and make sure it's soft. If it's not soft, microwave for 10 second intervals until it has a creamy consistency. Turn the heat back on the chocolate. Start spooning it in; 1-2 generous tablespoons should be good. 
  5. Stir the melted chocolate making sure it's good and melted. Top the cups with enough chocolate to cover the peanut butter. Repeat with all the cups. Place in the fridge and wait - yes wait - until they are firm. An hour or longer should be good if you can wait that long. Seriously this is the best thing ever. 
Ideas for leftover chocolate: chocolate milk, chocolate-dipped bananas, almonds, raisins, pretzels, Ritz crackers, strawberries.


August 10, 2009

Smoothies

Smoothies.


I was at a health food store recently and noted how marvelously expensive the smoothie-drinks were: $4.95-$6.95 for a smoothie? The cost for one of their smoothies could fuel a week's worth of morning breakfast smoothies. If you have a good blender the household smoothie idea should be revisited. I mix yogurt with soymilk, and toss in about a cup of mixed fruits, and some cinnamon. Fruit juice could be added, but it really oversweetens things and is unnecessary if using real fruits. I opt out of adding protein powders because there is plenty of protein from the soymilk and yogurt. You can add peanut butter to increase the protein if you are in to that kind of thing, a banana-peanut butter chocolate smoothie is a divine breakfast food. Best of all homemade smoothies let you control what goes in them so you can experiment to come up with something you love. This is one of my favorite breakfasts. It is simply perfect. Plenty of fruit, some protein and calcium, and enough to carry you into mid-morning without feeling hungry.

One note about blenders. I truly believe they can make all the difference in the world. I have found the carafe style, 2-3 speed setting, counter-top blender to be excellent. Screw-off bottoms can make a mess if turned the other way. I've found that you don't need multiple speed settings. You need the appropriate liquid ratios in a blender to keep things moving around. When done using your blender, rinse with water, add a little dish soap and put back on the blender on the lowest setting. Rinse the carafe and cap off and set aside to dry. Never keep the blades immersed in water or extra smoothie to store because it will dull the blades. I have a Waring Pro throwback-style blender. My sister, Chokri, swears by them and has had hers for over 8 years and loves it.

I usually have yogurt, peanut butter, and soymilk in my house at all times so purchasing a few frozen fruit bags along with any other fruits should give you some fairly easy mixins without adding too much on your grocery bill. In late summer there are so many good fruits available you can buy in bulk and freeze for later use.

Serves 2 huge smoothies, or 4 for more moderate smoothies

The base:
1/2 c plain yogurt or more. Sweetened flavored yogurts make it too sweet.
OR
1/4 c peanut butter or more

The liquid:
1 cup soy milk or regular milk

The fruit:
1 cup any fresh or frozen mixed variety. Choose plain frozen fruits instead of sweetened frozen fruits (avoid in syrup, in lite syrup). Frozen fruits keep the smoothie cold. A few mixed frozen fruit bags will run you the cost of one smoothie.

Essentially mix in 1/2 cup of the base with 1 cup liquid and place frozen fruits on top. If adding cinnamon or cocoa powders place on top and set on low-speed. Adjust liquid as needed.

Here are my favorites, just add these to the yogurt/milk base:
Banana-berry smoothie
1 banana
1/4 cup mixed berries
dash cinnamon

Peach-blueberry banana smoothie
1 peach
1/2 banana
1/4 cup blueberries
dash cinnamon

Strawberry, pineapple, mango smoothie
1 cup mixed tropical fruit blend
dash cinnamon
sprinkle of shredded coconut

Banana-Peanut Butter Chocolate
1 banana
1 T cocoa powder (or more)
dash cinnamon
(I've also mixed in frozen pineapple, yum!)