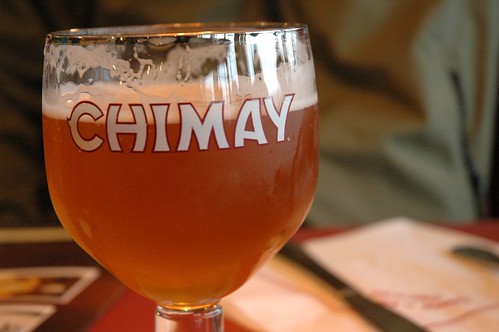
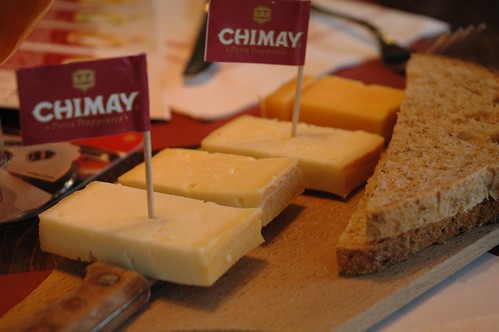
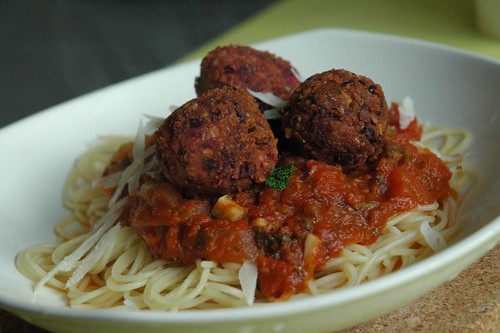
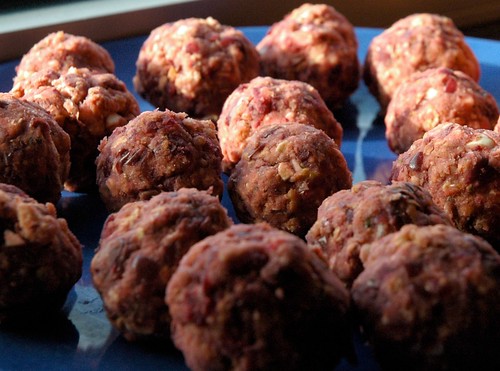
April 28, 2011

Garden Fridays: April 29

The seedlings took about 3 weeks to look sturdy enough to mess with (e.g. before I decided to split them into their own containers). So far, so good. We left for Ireland this past week and came back to some very well established and healthy plants. The outside spring garden is thriving and growing. We’re enjoying lettuce (seriously, this lettuce might last until fall), radishes, chard, cilantro, thyme, and mint. Strawberries have set fruit and cauliflower is growing. All that work is paying off in providing some delicious homegrown veggies.

first garden goods
Cukes
Cukes
Tomatoes
Siberian Tomatoes, compact and bushy even as seedlings

Tomatoes

Seedlings
All the seeds ready to move on to their new pots


Basil looks happy

After 10 days the newly planted seedlings are looking happy in their new homes and the outside garden has filled out.

Lettuce mix and red cabbage


Cauliflower


broccoli, snow peas, radishes, broccoli and spring onions
The narrow raised bed filling in

New seedlings getting settled:


Plants became Mr. Duds’ lunch
Tomatoes

April 27, 2011

Bean and beet way-better-than meat balls

Bean and beet balls way-better-than meat balls
Bean beet balls on top of some pasta


salad
Beets are lovely eh?


Mashed bean and beet mixture
Prepping the beans and beets


Bean and beet-balls


These bean balls are made out of mashed kidney beans and a small shredded beet. They come together quickly needing minimal kitchen tools. Omit the beets if you don't have them, they aren't necessary, I just liked the idea of how the beets give them a nice color and nutritional boost. If using a food processor, process very lightly; a potato masher and 10 minutes is fine if you want to do it the lazy way. Just add ingredients one-by-one and mash in a large bowl. Chilling the filling allows it to set, but if pressed for time can be omitted. Be liberal with the spices - thyme, basil, marjoram, or any mixture can easily replace oregano. 

Yield: ~20 balls
Ingredients:
1-2 tbsp garlic chopped
about 1 and ½ cups cooked kidney beans, or 1, 14 oz can kidney beans rinsed and drained
½ tsp salt
½ tsp paprika
1 tsp oregano
pinch cayenne
1 egg, beaten
1 small beet shredded
¾ cup bread crumbs
¼ cup oats
1 tsp water
olive oil to fry

Directions:
  1. Add chopped garlic and kidney beans to a bowl. Begin to mash together lightly add in shredded beet and continue to mash until the mixture begins to come together. This should take 5 minutes. Add in salt, paprika, oregano, and cayenne pepper. Continue to mash together. Stir in beaten egg and 1 tsp water and combine. The mixture will be sticky. Add in 2 tbsp of bread crumbs and oats and continue to mix together until the bean mixture can hold together well enough (without crumbling).
  2. Place the bean mixture in the fridge for 10 minutes.
  3. When done, roll the bean mixture into small balls. Place them on a tray or plate and allow to chill for 15 minutes.
  4. When ready to cook, add 1-2 tbsp of olive oil to a wide non-stick skillet. Heat over medium heat until hot. Add in half the balls and cook until golden 5-7 minutes. Carefully turn balls over so that each side gets cooked. Remove cooked bean balls and add the second batch to the pan. You might need to add additional 1 tbsp of olive oil. The bean balls tend to soak up oil, so cook them on medium heat until golden 15-20 minutes total for all of them. I leave them in the pan on low-heat so they are warm when the rest of the meal is ready.
  5. Serve on top of pasta or in anything.   

April 16, 2011

Beer post: Chimay

Chimay Tripel
Chimay Tripel
Chimay cheese sampler
Beer and cheese
Spéciale Poteaupré
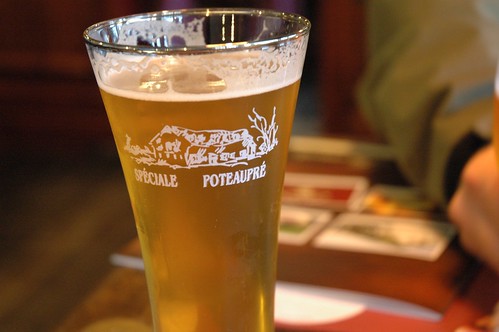
The house beer, Spéciale Poteaupré
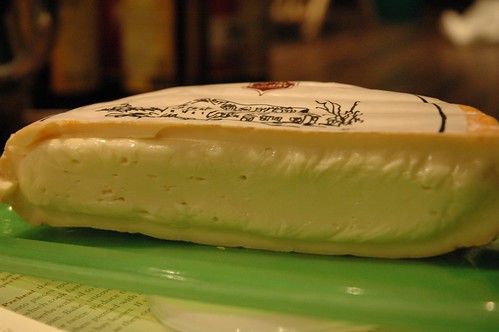
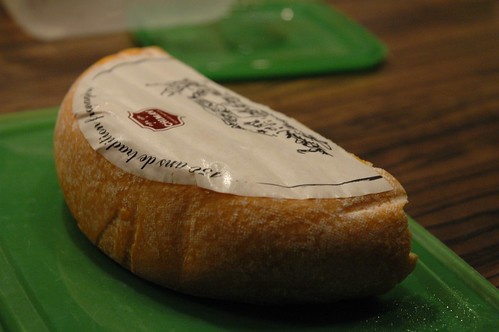
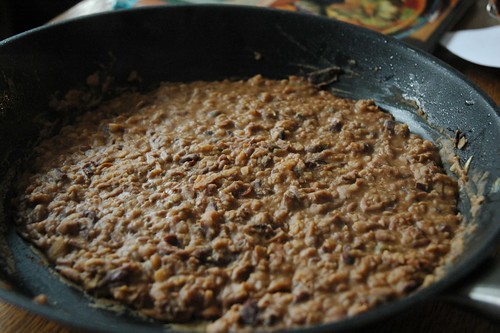
Le Poteaupré
Le Poteaupré
Le Poteaupré cheese
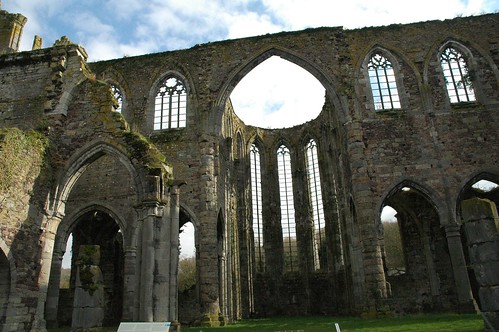
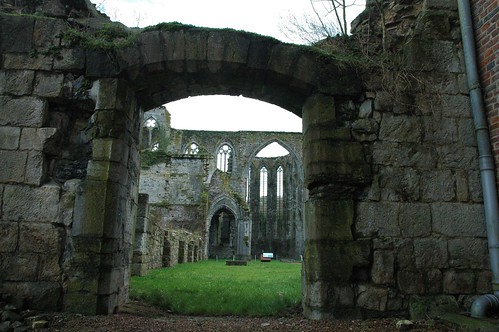
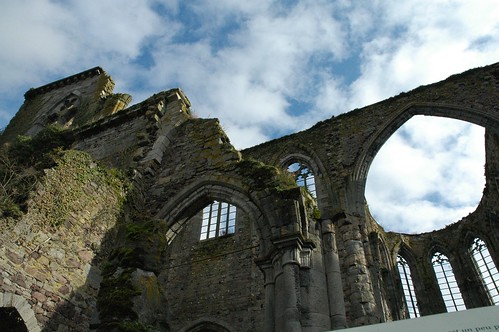
Aulne Abbey ruins (in Thuin)

A little over a year into living here and I'm 3 for 6 on my visit to the Trappists. So far, Chimay took my breath away, or rather the Auberge de Poteaupré – which is the inn/cafe that one can visit when they head to Chimay. The Trappist Monastery of Scourmont was established in 1850 when a group of monks from Westvleteren were given some land by the Prince of Chimay on the Mont Secours. The monks live from the labor of their hands. Chimay is remarkably trendy (I'm sure more Americans consume Chimay than Belgians). They are probably the most aggressive with marketing their product outside of Belgium. Chimay Blue was one of the first beers I ever tried.

Of course Chimay produces beers and cheeses (Grand Classique, À la Bière, Grand Cru, Vieux Chimay, and Le Poteaupré), but they also produce breads, and have initiated several energy conservation techniques. The menu is a culinary delight with main entrees creatively incorporating Chimay cheeses and beer. There are French, Dutch and English descriptions, and the menu highlights their marketing savviness. They have beer and cheese sampler suggestions, a fixed menu which highlights the use of the beer in multiple dishes (so you can select the red cap, white cap, or blue cap menus), and most other menu items feature the beer in sauces, or entrees; the cheeses are featured in sauces, main dishes, croquettes, and desserts. The prices were reasonable, the cafe can accommodate many people, there is a huge terrace (this is Belgium after all) with a playground for children, and lots of parking. The beer is fresher than anywhere you'll taste it – and there is a gift shop where you can take menus home with you (to write about Chimay later) or purchase items.

The abbey has employed several energy saving initiatives, including the construction of a water treatment facility, supporting wind energy efforts in nearby Baileux, utilizes 100% green electricity (from hydroelectric stations) for its production facilities, and has employed further energy conservation techniques by insulating piping and switching lighting (e.g. LED technology).

There are two walks around the inn/cafe, so if you have a few too many beers you can walk it off. The Chimay Spéciale Poteaupré and the Chimay Triple are available on draft (the others are in bottles). The Poteaupré is lighter (abv 4.5%) with hints of coriander. It has the backbone of the triple, but is lighter in alcohol – I found it to be a really tasty beer (if you will, it called out my love for hoppier IPA's). At the Chimay abbey, you can visit the church, garden, and cemetery – but the brewery is closed to visitors.

It's best to rent or drive to Chimay as busses and train travel in the area can limit what you'll see. Trains and busses are great for exploring the major cities in Belgium, but a car enables you to really see Belgium (and I'll assure you, you'll fall in love). Check the website for hours and other details.
Chimay cafe and inn: Auberge de Poteaupré Rue de Poteaupré 5, 6464 Bourlers
The Abbey of Notre-Dame de Scourmont: Route de Rond Point, 294-B-6464 Forges

If you are traveling to Chimay from the Brussels area (or happen to be driving through western Wallonia), a worthy detour is in Thuin where you can view the ruins of the Abbaye d'Aulne, and walk along the Sambre river which winds through the Wallonian countryside. The area was notably full of hikers and the brasseries were crowded. The abbey was founded in 657 AD and functioned as a Cistercian monastery. It was burned in 1794 by the French Revolutionary Army. Really, it's beautiful and costs all of 3 € per person to explore the ruins of an old Gothic abbey. There is also a newer Neo-classical church up front and - since it's Belgium there is a brewery, the Brasserie du Val de Sambre
Abbaye d'Aulne: Rue Vandervelde 275, Thuin

My 3 for 6: Westvleteren, Rochefort, and Chimay (Orval, Achel, and Westmalle remain – the seventh Trappist is La Trappe and it's in the NL)  

April 12, 2011

Chipotle Salsa

Salsa ingredients + lazy Friday afternoon + bad photography = chipotle salsa!
orange bell peppers getting diced
green bell peppers getting prepped
After hand-chopping almost a dozen of these guys, I realized I needed a picture. Tomato love.
Jars of chipotle salsa

and since it's a lazy Friday:
Duds' shows off his stretching
Not sure if salsa is kitty appropriate

This is a delicious, hearty, spicy, tasty, slightly smoky fresh salsa and I can't wait to share it on here. I've been eating it this entire past month. The recipe comes from my family in NC, I can't remember when I copied it down, but I've held onto it for a few years. It's easy to prepare and freezes well. You can chop all ingredients by hand – it'll take about an hour; a food processor will certainly speed things up, and can be used as well.

S and K's Chipotle Salsa
2 and ½ lbs ripe tomatoes, chopped fine
1 onion, chopped fine
1-2 bell peppers (green, red, or yellow), chopped fine
1-2 cloves garlic, minced
1 small can, 7.5 oz chipotle peppers in adobo sauce, chopped fine
2 tsp of adobo sauce
1-2 tbsp lime juice
1-2 tbsp vinegar (e.g. white-wine vinegar is fine)
1-2 tsp salt
1-2 tsp cumin
1-2 tsp oregano (dried is fine)
½ cup cilantro, chopped fine

For a super hot salsa, count 1-2 chipotle peppers per tomato; for a medium salsa use 4-5 chipotle peppers for the batch, and for a mild salsa use 2-3 chipotle peppers for the batch. Use gloves to handle peppers. Start off adding half the chipotle amount, taste and adjust, and add extra as needed. The salsa can get spicy quickly.

If using a food processor you'll whip this up in no time. Attach the chopping blades and mince whole garlic first. Add in onions (prepped as quarters) and chop to combine. Chop until desired consistency is reached. Remove to a bowl, or a large soup stockpot. Add in bell peppers (prepped as quarters), chop then remove. Finally, add in tomatoes (prepped as quarters) with chipotle peppers (kept whole) and chop until desired consistency is reached. Add all chopped ingredients to a large mixing bowl, or a large soup stockpot. Stir in adobo sauce, lime juice through cilantro and combine. If adding additional chipotle peppers, just chop them in the food processor and add to the pot.

Directions:
  1. Combine all ingredients together in a large soup stockpot. Stir to combine and adjust for taste.
  2. Heat up salsa over medium heat and simmer 10-15 minutes. Once cool, ladle into jars and set in fridge. You can freeze extras, thaw overnight in the fridge and it's ready to eat.

April 10, 2011

Chili sin Carne (con frijoles!)

Tacos with chili con frijoles

Chili con frijoles
Chili con frijoles

In my never-ending quest to satiate my Mexican food hunger cravings, I scoured the Leuven library to check out some Mexican cookbooks. I adapted a recipe from Tacos and Tortillas by Thea Spierings to be vegetarian and include more taco-esque ingredients. Cookbooks with simple pictures do loads to help with language learning.

If you've never had bean-based tacos I would highly recommend trying this. When I taught cooking classes, I often taught how to prepare simple healthy foods, encouraged trying new foods, and helped plan meals to make the most out of food budgets. In prepping tacos, I would recommend cutting half the beef with beans to improve nutritional content and extend food dollars. A lot of meals I taught revolved around beans – beans are high in protein, fiber, and nutrition. Beans cooked from scratch are dirt cheap (although they do take some planning), and they have a long shelf life. Canned beans can be very cheap, and require no cooking (besides heat and eat). The bean filling can be used in tacos, quesadillas, burritos, or served alongside some rice.

Chili sin Carne (con frijoles!)
Serves 4-6
1 tbsp olive oil
½ block of frozen tofu, defrosted and chopped fine (optional)
1 onion, chopped
1 bell pepper, chopped or mixture of red, yellow, or green bell peppers
1 jalapeno, seeded, deveined and chopped
2 cloves garlic, chopped
2, 14 oz cans pinto beans (or mixture kidney and pinto), rinsed and drained, or 1 and ½ cups soaked pinto beans prepared with the soak and cook method
1, 6 or 8 oz can pineapple chunks in their own syrup, rinsed and drained
2-3 tbsp hot chili sauce
1 pack of taco shells

Fix-ins for tacos:
2 cups shredded lettuce
salsa (like this really yummy chipotle salsa)
black olives
chopped tomatoes or bell peppers
sour cream
avocado chunks or guacomole

Directions:
  1. Heat up olive oil in a wide skillet over medium-high heat. If using tofu, add it in and stir fry until golden brown. Once golden, remove from pan and then add in onions and bell pepper. Continue to cook 5-7 minutes.
  2. Preheat oven to 350° F.
  3. Stir in jalapeno and garlic. Season with a bit of salt.
  4. Add in pinto beans, tofu (if using), pineapple chunks, and hot chili sauce. Stir to combine until heated through. Meanwhile, place taco shells on a pan and heat up until hot.
  5. Set out taco fix-ins on a counter and serve immediately.   

April 5, 2011

Refried Beans

Refried beans
With some pre-planning you can enjoy home-cooked delicious refried beans. This recipe contains no lard, so if you are a purist, you can sub in lard, but I made these veg. Home-cooked beans are better in this dish, although you could use canned beans. You can combine pinto beans with red kidney or white cannellini beans; black beans can be substituted for pinto beans. Soak 1 and ½ cups of dried beans overnight, or for at least 6 hours, and prepare with the soak and cook method (or pressure cooker, or crock pot, or whatever). Save the bean broth – you'll use it for the refried beans. Refried beans will last up to 4 days in the fridge, and can be frozen.

Refried Beans
Serves: 4-6
~2 cups pinto beans, cooked (canned is fine, you'll need 2, 14 oz cans rinsed and drained)
broth from beans
2 tbsp peanut oil
1 onion, chopped
2 tsp garlic
1 jalapeno, seeded and deveined, minced (optional)
salt
½ tsp paprika (optional)
  1. Heat up peanut oil in a wide skillet – cast iron is best so you can mash the beans in the pot, but I mashed them carefully in a non-stick skillet. Once hot add in onion and cook until golden brown. Stir often.
  2. Add in garlic and jalapeno and stir to combine. Sprinkle with a bit of salt, stir together, and cook another 3 minutes.
  3. Add in beans 1 cup at a time. Add in ¼ – 1/3 cup water and let simmer briefly.
  4. Once beans are hot start mashing the beans. As the water evaporates, add in more water.
  5. Repeat with second batch of beans. Add in small bits of water to keep the beans from sticking excessively. The beans will thicken up.
  6. Continue mashing until desired consistency is obtained. Adjust with salt and paprika.
  7. Serve as desired (e.g. on nachos, in tacos, with enchiladas, on heuvos rancheros, etc, etc)

April 3, 2011

Black Bean Empanadas

Black bean empanadas with chipotle salsa

Empanadas on a baking stone

Serve these baked black bean empanadas with a fiery hot salsa and sour cream. A green and red cabbage salad with radish and lime would be a nice side. The black bean filling can be prepared several days in advance. Frozen defrosted tofu adds a meatier texture. You won't miss fried empanadas after trying this.

Black Bean Empanadas
Yield: 8 Empanadas

1 recipe samosa dough (below)
2 tsp peanut oil or olive oil, divided
½ block of frozen tofu, defrosted, and chopped fine (optional)
2 cloves garlic, minced fine
½ onion, diced
½ cup bell pepper, diced
1 tsp oregano
1 tsp cumin
1 tsp paprika
1 15 oz can black beans, rinsed and drained (or 1 cup dried black beans, soaked and cooked)
salt to taste
½ cup cilantro, chopped
½ cup - 1 cup of decent mild melting cheese (use queso Oaxaca or queso quesadilla if you can find it)
¼ cup flour for rolling the dough
1 egg, plus 1 tbsp milk, beaten together (optional)
Salsa and sour cream for serving

Directions
  1. Prepare the samosa dough (or you could purchase ready-prepared empanada dough).
  2. Heat up 1 tsp oil in a wide skillet. Once hot add in tofu and stir-fry over medium-high heat. Once tofu is golden-brown (should take 7-9 minutes) stir in garlic until fragrant (about 1 minute). Remove tofu-garlic mixture from pan.
  3. Heat up the remaining 1 tsp of oil in the same wide skillet over medium-high heat. If the pan is hot you won't have to wait long for the oil to heat up. Add in onions and after 2 minutes add in diced bell peppers (if you are omitting the tofu, add the garlic at this step). Stir fry for 5 minutes until the mixture is sweating. Stir in oregano, cumin, and paprika. Add ½ tsp of salt.
  4. Stir in black beans and tofu mixture and adjust for salt. I found ½ tsp adequate for salt. Stir in cilantro and set aside.
  5. Set out cheese in another bowl.
  6. Preheat oven to 425° F.
  7. Lightly roll the balls in a small bit of flour, and roll out the dough balls on a lightly floured surface. Roll the balls into a 7-8” circle about the thickness of a corn tortilla. The dough will shrink back slightly.
  8. Place 1 tbsp of cheese (or less) and about 2 tbsp of black bean stuffing on one side of the circle. Keep about a 1/2” border from the sides.
  9. Fold the samosa over on the borders. If you lose some beans tuck them back in, or remove. Flatten the edges together with the tines of a fork. Make sure the empanada is sealed. Brush with egg mixture and place on a baking sheet. Repeat for the remaining empanadas.
  10. When ready, bake at 425° F for 10 minutes, and then turn heat down to 375° F and bake another 15 minutes (or until golden brown).
Samosa Empanada Dough
I must say that I have used and reused Aarti Paarti's dough in many baked savory pastries. It's really simple to make, and can be prepared in the time it takes you to buy ready made dough from the grocery store. You could also make a galette dough, but this is a no-fuss pastry dough.

Yield: enough dough for 8 empanadas
1 cup all-purpose flour
1 cup pastry-flour
½ cup buttermilk (if you don't have buttermilk, add ¼ tsp of apple cider vinegar to ½ cup milk or soymilk, and let rest for 5-10 minutes – and if you don't have those, use ¼ cup yogurt thinned with ¼ cup water)
¼ cup vegetable oil
pinch salt

Directions:
  1. Stir together flours and salt.
  2. Add in buttermilk and vegetable oil to the flour mixture and stir together. Begin to knead the dough with your hands and once it starts to come together, turn it out on a floured surface and continue to knead for about 5 minutes until it comes together. The dough will be slightly oily but shouldn't stick to the counter.
  3. Roll or form it into a ball and let it rest for 15 minutes.
  4. Once ready to use, roll out the dough into a 12” log. Cut the dough in half, and cut each half into 4 equal pieces.
  5. Roll the 8 pieces into balls and let rest on the counter until ready to use.