Showing posts with label cucumbers. Show all posts

October 21, 2014

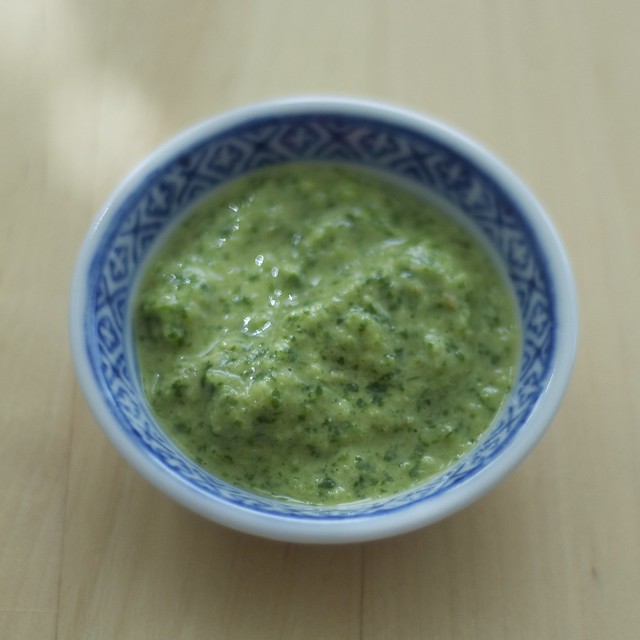
Green chutney

Cilantro cucumber chutney

This is a different take on the ubiquitous green chutney that shows up as a sad accompaniment to those boring papad crackers at like every Indian restaurant. I know you've seen them. Crispy round things served with red and green sauce? They are the chips and salsa of the Indian restaurant world.

My green chutney includes cilantro, cucumbers, peanut flour and sesame oil, so I call it cilantro cucumber chutney. It can be stored up to 1 week in the fridge in an airtight container. I think it's great with roasted potatoes. I used peanut flour because I found dehydrated peanut butter at the grocery store, and wanted to try the peanut flour in smoothies. It tastes like peanut butter, and it makes cleaning the blender easier. However, peanut flour can be easily replaced with about 2 tbsp of whole peanuts, or plain, unsweetened, peanut butter can be used. Have you seen peanut flour, or used it? Thoughts?

Cilantro cucumber chutney
Yield: 3/4 cup, can be stored in fridge for up to 1 week. 

Ingredients:
1 bunch cilantro, as fresh as possible
4" piece cucumber, peeled and seeds removed
1 whole jalapeno, cut into segments, remove seeds if you want a mild chutney
1/2" piece of fresh ginger, peeled
juice of 1/2 of a large lemon
2 tbsp peanut flour (dehydrated peanut butter?)
1 tbsp peanut oil
1-2 tsp sesame oil
1/2 - 1 tsp salt

Special tools: cutting board, vegetable peeler, colander, and blender.

Directions:
Step 1: Wash and drain the cilantro. Trim off any dead looking parts. If you use the freshest cilantro you can find (use same day you buy) it should be fine. Add the cilantro to the blender. Trim the cucumber, peel it, and remove the seeds. Place it in the blender.

Step 2: Trim the jalapeño and peel the ginger. Cut both into large segments, and add them to the blender. For a spicier chutney, leave the jalapeño seeds intact.

Step 3: To the blender, add the lemon juice, peanut flour, peanut and sesame oils, and salt. Add in a few tbsp of water if needed. Blend until well combined (about 2 minutes).

October 8, 2014

Corn salad

I work from home. During the week, I got hungry for lunch, opened the fridge, assessed its nearly empty contents, and decided to walk to a nearby restaurant. Arriving after the lunch rush, I waited to be seated. I watched patiently as the two servers on staff walked back and forth across the restaurant with no hostess in sight. The restaurant operates like restaurant + market. One can dine in, shop for specialty ingredients, or order take out from the deli counter. As I stood waiting for a table, I looked towards the deli counter where three staff members were behind the counter, performing different tasks. One was helping their only customer in line. The other two were putting food away.

A few minutes passed. I looked again to the open dining area, the "please wait to be seated" sign, and the staff members. I waited. Was I waiting in the right area? Yes. I didn't disturb anyone, but as I waited and attempted eye contact, I grew annoyed. Even as I was standing there, I was the waitstaff's responsibility, a separate customer.  I waited a bit longer, then turned around and left. I can ignore myself at home. I won't be going back there anytime soon.

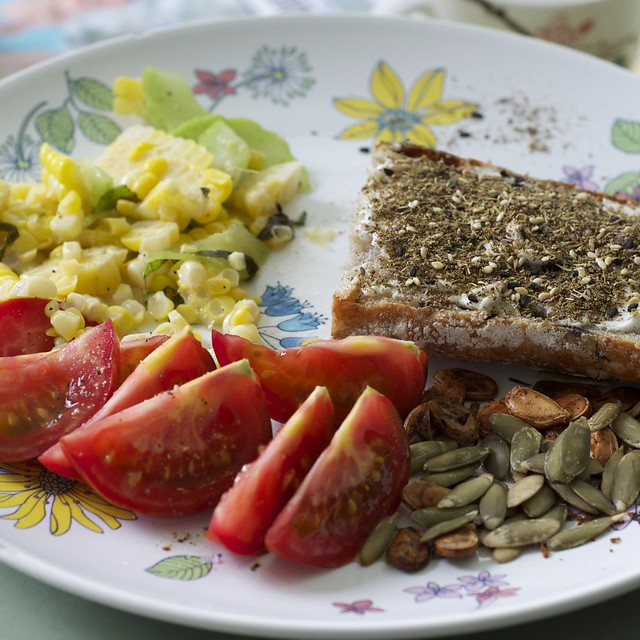
On the walk home, I picked up a baguette, and pulled out the remaining fridge contents. I had a crusty container of goat cheese, and a ziplock of corn and cucumber salad leftovers. On the counter, a sole ripe tomato waited, along with some freshly made za'atar.  Most of my lunches are scrambles like this, but the amazing part is that they end up always tasting good and filling me up. This za'atar recipe is really excellent. The za'atar has been topped on pizza, roasted pumpkin squash, yogurt, and has been added to cream cheese on toast. It is an addiction. This was the start:

DSC_0036
A nice lunch:

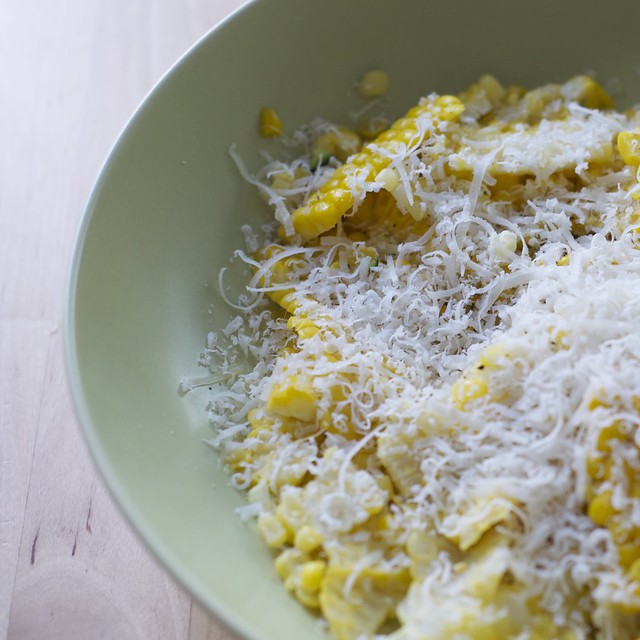
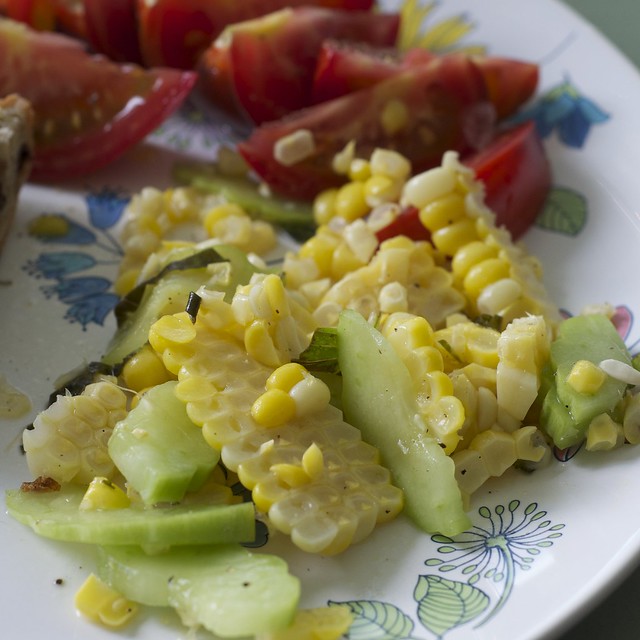
I've made this corn salad several times over the summer. The sweet creamy corn kernels taste excellent paired with freshly grated parmesan cheese and flaky sea salt. Another time, lemon juice, basil, olive oil, and cucumbers were added. I cook the cobs in the pressure cooker. They cook in 4 minutes, and the pressure release time is only 1-2 additional minutes. The cobs come out of the cooker looking golden and steamy. Cooked to perfection. The best part of the cooker, is that multiple cobs can be cooked at once. Trim them in half if they don't fit.

DSC_0068
Option 1: Corn and parmesan salad

DSC_0045
Option 2: Corn and cucumber salad with basil

Summer corn salad, two ways
Yield: enough to feed 4 people as a side, or 2 main large portions

Option 1: Corn and parmesan salad 
Ingredients:
2 corn on the cobs, cooked and shucked
olive oil, your finest and generous pour
freshly grated parmesan
Flaked sea salt + freshly ground pepper

Option 2: Corn and cucumber salad with basil
Ingredients:
2 corn on the cobs, cooked and shucked
olive oil, your finest and generous pour
2 tbsp of fresh basil cut in chiffonade or finely sliced
Fresh lemon juice from 1/2 a small lemon
1/2 cup sliced cucumbers, cut in quarters; peel if waxy.
Flaked sea salt + freshly ground pepper

Special tools: large chef's knife, cutting board, pressure cooker (small pan or large pan fine), mixing bowl.

Directions:
Step 1:  Peel the husks off the corn and trim the ends if they extend over the cooker diameter. Place the trivet on the bottom of the pressure cooker and add 1/2 cup of water to the bottom of the cooker. Place the naked cobs on top and close the lid. Bring the pressure cooker to high pressure and cook 4 minutes. When time is up, use the natural release method to bring the pressure down.

Step 2: Once done cooking, remove the cooked corn to a plate or cutting board to cool off to handle. Shuck the corn and place the corn in a medium mixing bowl. Add the rest of the ingredients and serve immediately.

June 23, 2014

Tofu Lettuce Wraps

Tofu lettuce wraps

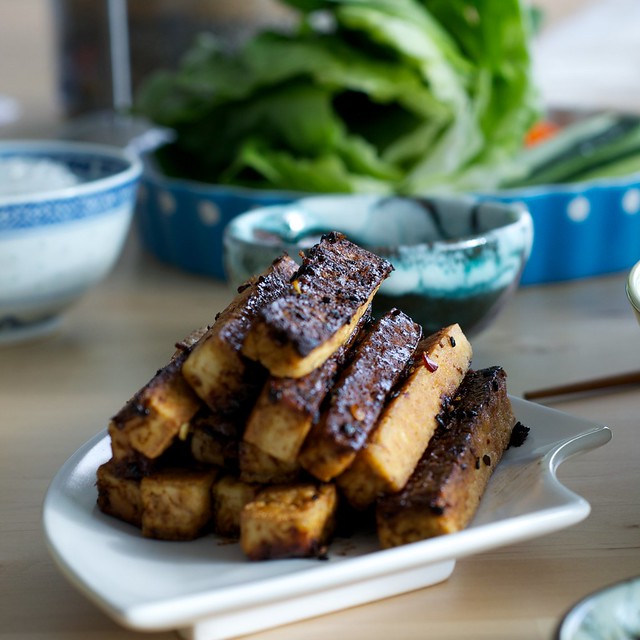
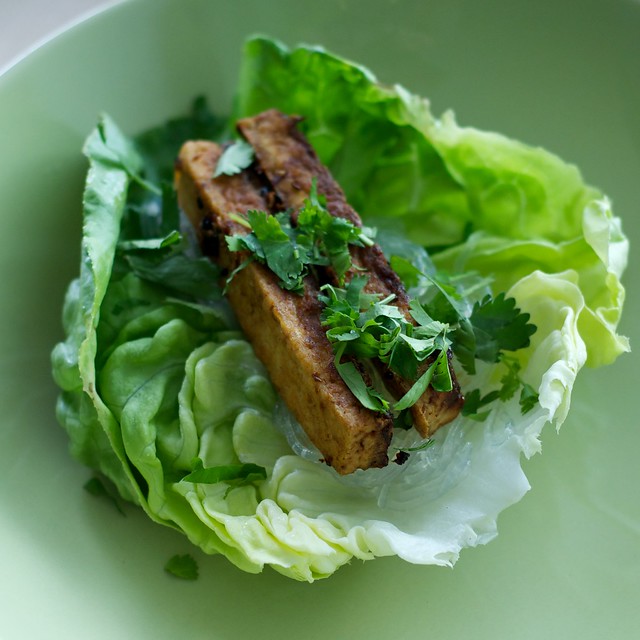
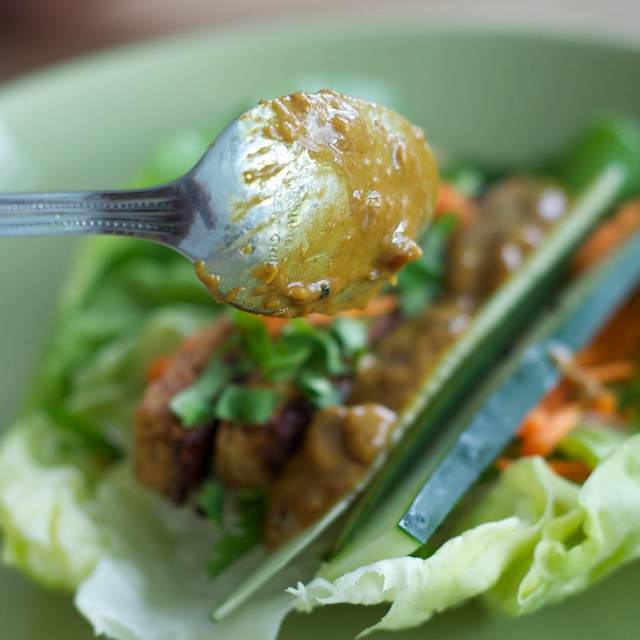
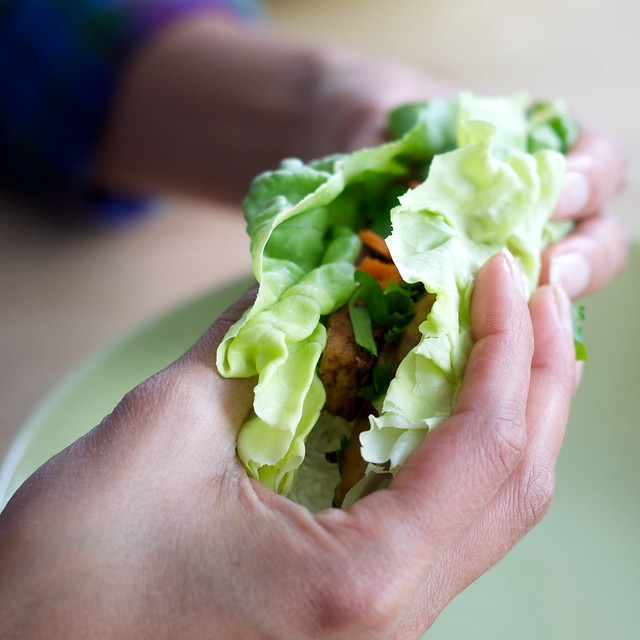
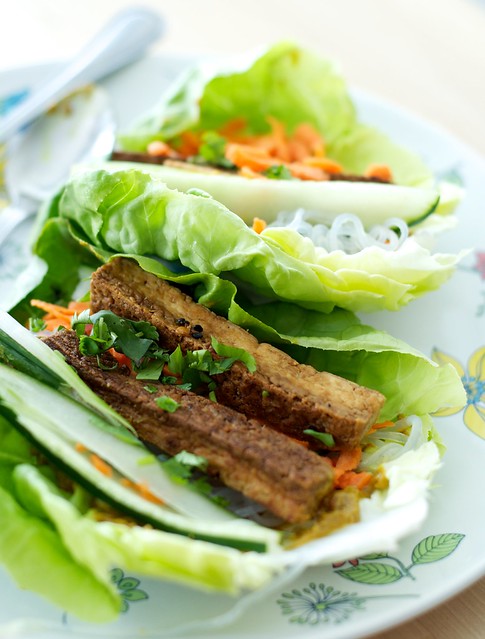
Bibb lettuce leaves create a crunchy and fresh "wrapper" for tofu lettuce wraps. Lettuce leaves are filled with a caramelized crunchy ginger-tofu, and filled with mung bean noodles, grated carrots, and strips of crunchy cucumber and spring onions. Serve these with peanut sauce, or your favorite dipping sauce.

This is a lot of work for dinner, or an appetizer, but the beauty of this dish is in each and every single component. They are fun to put together, and you'll feel healthier for doing so. I promise. If you have leftovers, you can assemble vermicelli noodle bowls. Win-Win!

From my New Roots box, I used the bibb lettuce, carrots (earlier batch), cucumbers, and spring onions. I am loving the box, and I use it all the time. This week, I began measuring out the servings to compare cost per serving. The bibb lettuce head would easily serve 8. According to MyPlate serving sizes, 1 cup of raw veggies = 1 serving; and 1/2 cup cooked = 1 serving. I prepped the lettuce ahead of time, and it stored for longer than a week in the fridge.
'fu
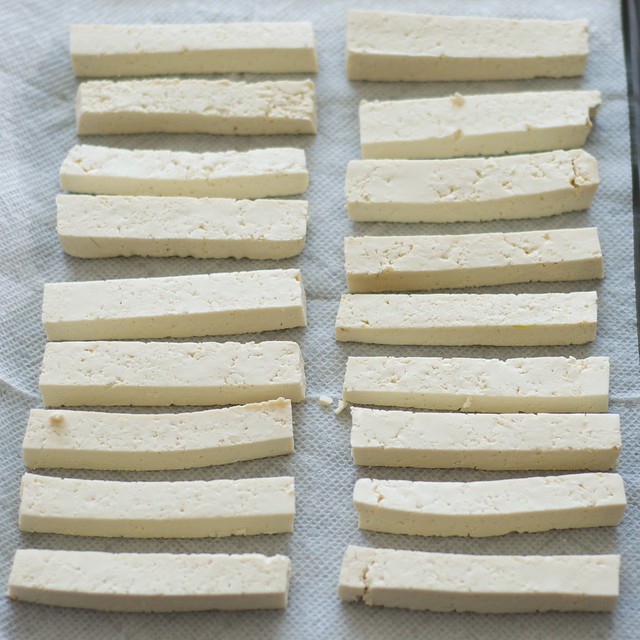
extra-firm tofu cut into strips.

Untitled
Crunchy ginger tofu

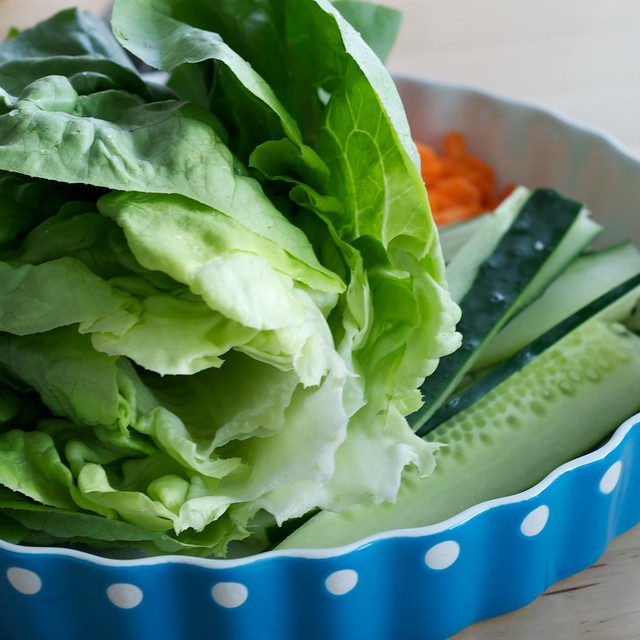
Lettuce
Lettuce wrap fixins

The Most Awesome Tofu Lettuce Wraps
Yield: 4 servings, 2-3 wraps per person

For the tofu
1 lb extra-firm tofu (1 lb is enough for 2-3 people; use 2 lb for 3-4 hungry people)
salt for tofu
1-2 tbsp peanut oil or enough to leave a slick shimmer in a wide skillet

For the wrappers
1 head Bibb lettuce, washed and the leaves spun dry count 2-3 per person
2-3 spring onions, cut into segments 3-4" in length; cut onions in half or quarter them lengthwise
2 medium carrots, peeled and grated
1/2 cucumber cut lengthwise in half, and then cut into small crunchy strips, peel skin if waxy.
2 oz dried mung bean noodles, optional. Hydrate the dried mung bean threads by briefly boiling in hot water and then draining and tossing with just a tad of sesame oil (optional).
1/2 cup chopped fresh cilantro

For the tofu glaze
3 tbsp soy sauce
1 and 1/2 tbsp rice vinegar
1 tsp toasted sesame oil
1 tsp grated ginger
1-2 tsp sambal oelek
1 tsp black or white sesame seeds
1 tbsp molasses

Serve with peanut sauce, store-bought is fine.

Special tools: not really anything too fancy: a salad spinner, a box grater, regular pots and pans, jelly roll pan, paper towels, knives, cutting boards. Attractive serving dishes would really showcase the gorgeous ingredients. We do eat with our eyes after all.

Prep ahead: prepare Bibb lettuce, and prepare peanut sauce; can also prepare mung bean noodles. I prep the Bibb lettuce by carefully removing each leaf and washing it thoroughly. Once washed, I spin them in a salad spinner to expel all of the water, and then place them in a zip lock gallon size bag. They will stay fresh for up to a week.

Directions:
Step 1: Drain the tofu and expel the water out of it. The lazy way is to wrap the tofu in a paper towel just drying it very lightly. Get out a jelly roll pan and line it with paper towels. Cut up the tofu so it is in 3/4" thick strips. Lay out the tofu strips on the paper towels and salt them. Let them rest 7-10 minutes. The salting draws the water up to the surface. Use a paper towel to "wick" away the water.  Then rotate the strips a quarter turn, and salt and repeat. This really does result in a chewy texture and makes pan-frying very easy, and with less oil. If you are letting the tofu rest, you can prep other parts of this recipe including the veggies used in the wrap, or prepping the Bibb lettuce, which I have made Step 2.

Step 2: Wash the Bibb lettuce and set aside in the fridge. Make sure that the leaves are dry. This can be done up to 4 days ahead of time. Wash each leaf carefully and then spin them dry in a salad spinner. Once dry, store the leaves in a ziplock bag in the fridge. They will last this way up to 1 week in the fridge.

Step 3: Arrange the prepared vegetables in an attractive dish or plate, and place in the fridge covered with a plate or plastic wrap to keep cold. I recommend prepping the veggies right before serving, they just look so much better. Trust me.

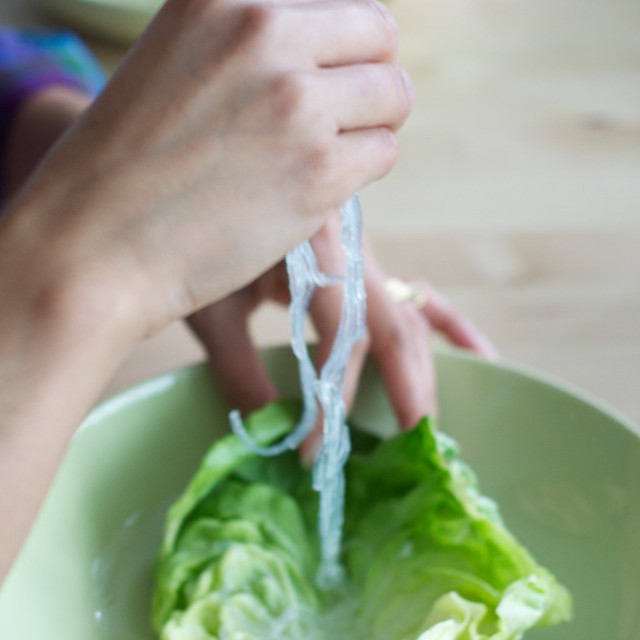
Step 4: Prepare the mung bean threads or noodles if using. To rehydrate them, cook them like you would pasta, but turn the water off when it reaches a boil AND THEN add the mung bean threads. Let them hydrate for a few minutes. They will have that consistency of jellyfish tentacles or that weird jelly goop that comes out of kids toy vending machines. I know, I know. They can be rinsed under cold water and then tossed with a bit of cold water and oil to make them loose. You can also substitute vermicelli noodles.

Step 5: Add 1 tbsp of peanut oil to a non-stick or cast iron pan, and heat up over medium heat. Once hot, pan fry the tofu until golden on each side (about 6 minutes for the first side) then few minutes each side because the pan will be hot! If preparing more than 1 lb of tofu (more than 1 package) cook the tofu in batches using about 1 tbsp of oil for each batch of tofu, and not overcrowding the pan. Remove the cooked tofu to a plate.

Step 6: Meanwhile prepare the tofu glaze. In a medium bowl stir all the ingredients for the tofu glaze together.

Step 7: Once the tofu has cooked, add it back to the pan, and ladle the glaze over the tofu, eventually pouring the remainder into the pan. It will heat up and caramelize quickly. Move it off the heat and remove the strips to a serving dish.

Step 8: Set out everything so it can be assembled at the table. I place the grated carrots, cuke strips, and scallions, and lettuce on a large plate. I set the cilantro, mung bean noodles, and peanut sauce in their own bowls. I give everyone chopsticks and spoons.

How to assemble:
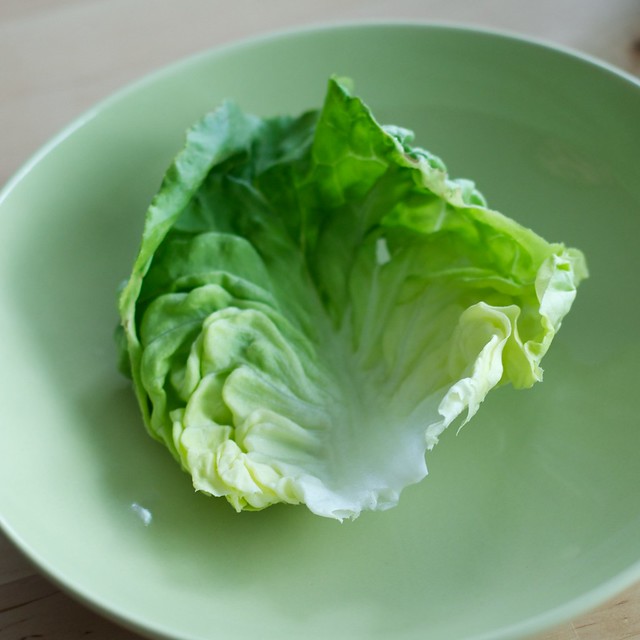
Lettuce
1. Lay out the lettuce wrapper

Mung bean noodles
2. Add in mung bean noodles

Assembly
3. Add some tofu and then add some...
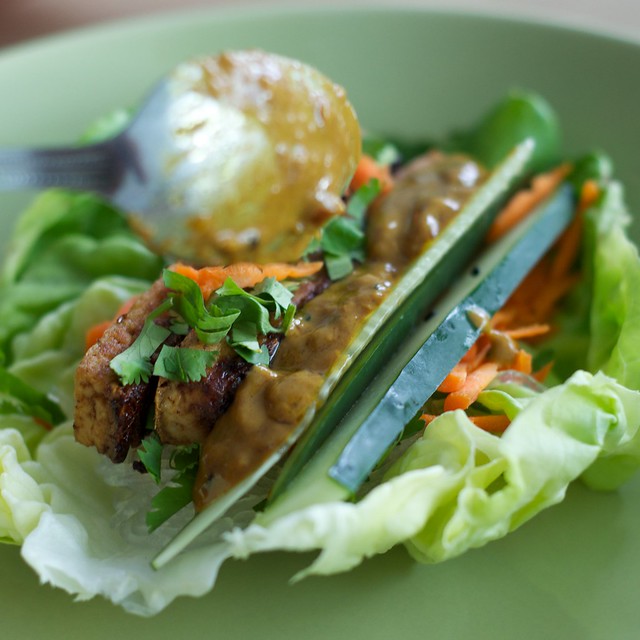
Tofu lettuce wraps

Adding secret ingredient
4. Veggies and peanut sauce

Tofu lettuce wraps
5. Eat, repeat!

July 9, 2013

Pickles

Untitled

Untitled

Untitled

Untitled

Untitled

Pickles. They are some cute, funny things. Whenever I think about making pickles, I think that they will take me a long time and that I don't have a household that could justify a huge batch. However, I was wrong about that. Last year, I made a dozen pint jars of preserved things. Half of the batch were chipotle salsa, and the other half were nectarine vanilla bean jam. We ate all of the salsa, but only two jars of the jam. I found that when I canned even those small amounts, they lasted almost a year.

Each time I opened up a jar, the smell would take me back to the summer. That feeling goes a long distance in the middle of February. I wondered, if I felt this way, how many others may feel this way and opt out of something so rewarding as canning your own summer goods? In that same year, I didn't buy salsa a single time, and I didn't purchase any jams. So this summer, I decided to step up my game.

Around me the farmers' markets have been filled with tomatoes, squash, bell peppers, corn, cucumbers, hot peppers, watermelon, blue berries, lettuce, and several healthy looking greens. I picked about 3 lb of 4" non-waxed cucumbers for $8.00. I then went to the grocery store to pick up canning supplies (pickling salt, distilled white vinegar, canning jars). In addition to the cucumbers, I picked up supplies for pickled jalapeños. The total time investment was probably a day spent purchasing the items, prepping them, canning the goods, and then cleaning up. I started around 10 am and ended around 4 pm.

Here is what the rest of it cost:
Item                                           Cost
1 dozen, 1 pint Ball jars            $9.49
Pickling salt                              $1.79
Pickling spices                         $3.59
White wine vinegar                 $3.69
White vinegar                          $3.15
Jar lids                                     $2.39
3 lb cucumbers, 4", local         $8.00
1.35 lb jalapenos                      $3.09
1 lb poblanos                           $3.19    
Total:                                       $38.38

1 jar = $3.20*
Adjusted 1 jar = $2.25
*Now this cost does not count for pots and pans. I invested in these last year, so I'm not including the cost. The adjusted cost would not count for the pickling salt and Ball jars because these could be reusable, and I would think of them as a one-time cost unless you manage to run through 4 lb of pickling salt. The other thing I did not adjust for was the energy cost associated with making all of this. If you were an avid canner, I could see that several of the up-front costs would not continue to be costs if you kept with the hobby. I didn't include the cost for sugar and garlic, because these are already in the household.

If you are new to canning, I recommend checking out a few library books, or doing a web search. Cooperative Extension agencies maintain websites on canning basics. The reason for this is that you want everything to be clean and sanitized, because you do not want any harmful bacteria growing in your preserved food products. Over the years, I have checked out different books, and I finally bought this one: Better Homes and Gardens Can It! It has good recipes and easy to follow instructions, with good visuals of what your final product should look like.

Dill-y Pickle Spears
Recipe adapted only slightly from the Better Homes and Gardens Can It!
Yield: 6 pint jars of pickles

Ingredients
3 to 3 1/4 lb 4" pickling cucumbers
4 cups water
4 cups white vinegar
1/2 cup sugar
1/3 cup pickling salt
3 T pickling spice*
3 T dill seeds*

*Note: The original recipe calls for 6 tablespoons dill seeds. I couldn't find dill seeds at two grocery stores so I used pickling spice. I had some dill spice rub that I opted to experiment with.

Directions:
1. Wash and sanitize all the jars and lids. You can immerse the clean jars in a boiling water bath for a few minutes. Use some tongs to remove them to a clean wire rack. I don't touch them at all after pulling them out. I lower the heat and add the lids and rims. Adding the lids to boiling water can activate the sealant, so just add them to the hot water and let them sit for a few minutes. Pull them out and let dry in a colander.

2. Scrub the cucumbers with a brush. Trim off the blossom and stem ends, quarter them into spears, and then set them in a large bowl, until ready to use. You will eventually place them in the canning jars.

3. Combine the water, vinegar, sugar, and salt in a medium non-reactive 4-5 quart pan. Heat up until boiling. Once boiling, turn the heat off and let sit until ready to use.

4. Now, take each jar and add 1 T of dill seeds OR pickling spice to the bottom. Hold the jar at a slight angle and pack the spears in. Leave 1/2 of headspace. If using Mason or Ball jars the 1/2" mark is usually the middle line where you screw the rim on.

5. After packing all the spears into their canning jars, top the jars off with the vinegar mixture leaving 1/2" of headspace. Tap the jar slightly to remove any air bubbles. Set the lids on top and place the rims on.

6. Process the jars in a boiling water bath for 10 minutes. Start timing it once the water has returned to boiling. Once done, remove them to a wire rack. Letting them cool on the counter can crack the jars.
Let them rest for a week before serving. If storing, store them in a cool, dark, and dry place.

I like to label the lids with the pack date along with the contents.

September 27, 2011

Black bean salsa with avocado and cukes

Black bean salsa with avocado and cucumbers

Black bean salsa

This is a simple healthy fresh black bean salsa. It's perfect with chips or as a side. If using cucumbers, it stores up to 2 days. The cukes add a nice crunch, but can be omitted (I'm sneaking in more garden produce). The avocado hits the spot. This recipe changes with whatever I have on hand. Tomatoes, a combination of bell peppers, or corn can be used as well.

Ingredients:
Yield: approx. 2 cups

1/2 cup or more of dried black beans, soaked and cooked, or 1 can black beans rinsed and drained
1/2 red bell pepper, chopped fine, about 1/2 cup
1/2 of a small red onion, chopped, about 2 T
1 clove garlic, chopped fine
1 small lemon cucumber, seeds removed, chopped fine, or 1/2 red yellow bell pepper chopped
1/2 tsp apple cider vinegar
2 canned whole jalapenos, chopped, or 1 jalapeno seeded and diced.
chopped cilantro to taste
1 tbsp or more of fresh lime juice
1/4 tsp salt, or to taste
1/2 of a ripe avocado, small dice. I like to cut all the way around the avocado, peel apart the two sides and gently make dices in the avocado flesh. Then I use a spoon to scoop them all out. This works well with ripe avocados.

Directions:
  1. In a medium sized mixing bowl, add in cooked black beans, the chopped red peppers, onions, garlic and cukes (or yellow bell peppers if using). Stir to combine.
  2. Add in apple cider vinegar, jalapenos, lime juice, salt, and cilantro. Stir together and adjust for lime juice, heat, and salt.
  3. Gently stir in avocado cubes, and fold gently to combine all ingredients.  

August 31, 2011

Easy refrigerator pickles


Refrigerator pickles made with bush and lemon cucumbers

Easy refrigerator pickles

refrigerator pickles

Khavanu turns 3 today. I started blogging (I still find that word awkward) as a way to share recipes and  store my favorite recipes online. I didn't think I'd stick with it. It has grown into something I really enjoy doing. Some outcomes I'm generally happy about are that my photography skills have improved, I've grown as a cook, and I've been able to see how progress has been made in the garden. After moving to Belgium a year and a half ago, I began including travel posts. However, my writing is still awful! Isn't it?

My goals, since this is a kitchen sink of ideas, are:
- to try out more regional Belgian (or other) foods in the upcoming posts and cook more foods with beer.
- Write better, clearer instructions from recipes that have been tested at least three times.
- Challenge myself to write more nutrition public health posts.

In keeping with my goals, and honoring my very first dorky post, here is my tried and true version of refrigerator pickles (which I've been using and adapting from Alton Brown's Good Eats!). I've made these pickles dozens of times. The cucumbers came from my garden and are a mixture of bush cucumbers and lemon cucumbers.

Easy refrigerator pickles
Yield: 3 jars, 8 oz each
Ingredients, listed in order of use

Sterilized jars and lids, such as 3 8 oz ball jars, or a mixture of other clean glass jars and lids
4-6 small-medium cucumbers
multiple cloves garlic (1 smashed clove for each jar)
1 onion, sliced in rings or half-rings
1 cup water
1 cup cider vinegar
1/2 cup white wine vinegar (or champagne vinegar if you can find it)
1/2 cup sugar
2 tbsp plus 2 tsp kosher salt
1 tsp mustard seeds
1 tsp coriander seeds
1/4 tsp turmeric
1 tsp pickling spice (optional)

Directions:
  1. With all clean utensils prep the cucumbers by slicing into 1/4" slices or prep them as spears. Place 1 smashed garlic clove in each jar. Fill with cucumbers and onions, and set aside.
  2. In a non-reactive medium sauce-pan combine water, cider vinegar, white wine vinegar, sugar, and salt. Stir to combine. Add in mustard seeds, coriander seeds, turmeric and pickling spice and heat up over medium-high heat. Bring to a simmer and let it simmer for 4 minutes to wake up the spices.
  3. Fill each jar with the pickling liquid, and let stand. Top the jars with any remaining liquid. Once cooled off, tighten the lids and place in the fridge.

The pickles should be ready in as little as 3 days, but a week is better for them to set. You can easily double the recipe if you have more pickles or jars. 

May 16, 2009

Creamy Feta Quinoa

Creamy Feta Quinoa


This is one of those lazy cooking recipes that is suited for spring or summer days, even though you could readily make this anytime of the year. Quinoa is quick-cooking grain and is packed full of good nutrients including calcium, protein, iron and fiber. The rest of the salad ingredients kick up the nutrition in this dish. Use whichever salad vegetables you have around that need to get used up.

For salad
1 cup quinoa, uncooked
1-2 cups water
1/2 cucumber, quartered
1-2 cups mixed salad greens (spinach, mesclun, & arugula)
1 cup green or red cabbage, finely chopped to give consistency of shredded cabbage
1 tomato, diced.
1/2 cup black beans, drained
1/2 cup feta cheese
2 T parmesan cheese or other hard grated salty cheese

For dressing:
juice of 1 lemon
1/4 cup olive oil
2 cloves garlic, or 1 large clove, minced fine
1 spring onion (green onion), chopped fine or shallot if you have that instead
1 tsp oregano, or any dried or fresh herbs (if fresh 1 T)
1-2 tsp dijon mustard
pinch cayenne
salt and pepper to taste

1. Place quinoa in a bowl and cover with water to remove the saponins and then make the dressing so it has time to marinade while you prep the other items. The saponins are found on the outside of the quinoa and can be removed by rinsing. They aren't particularly harmful although the quinoa (I've never noticed) may taste bitter if you skip this step.
2. In a small mixing bowl, place lemon juice through salt and pepper, and mix well. Set aside.
3. Drain quinoa and place in a saucepan and cover with 1.5 cups water. Cook over medium heat and add more water if needed. The quinoa should take between 10-15 minutes to cook.
4. Prep and cut up vegetables. Place cabbage, mixed greens, cucumbers, tomatoes, black beans and cheeses in a bowl. Check on quinoa. If it looks light and fluffy, it is done. Set aside the cooked quinoa and turn out into a bowl to cool. It doesn't have to be cold, just not steaming.
5. Gently, mix in the quinoa with the rest of the ingredients. The warmth of the fresh-cooked quinoa will melt the feta and parmesan cheese into a creamy coating.
6. Mix up the salad dressing before pouring into the feta-quinoa-salad mixture. Gently toss and mix everything together and turn out into salad bowls or plates to serve.

Stores nicely in the fridge (good weekday meals) although I think it tastes best when just mixed and served.

February 8, 2009

Thai Tofu Salad

Serves 4:
simple and pretty darn good.

1 package extra firm tofu
4 cups mixed salad or any variety lettuce greens
1.5 cups mixed cut up salad vegetables (radishes, carrots, tomatoes, cukes, mushrooms)

Drain tofu and cube into 1" cubes
Preheat broiler
Place tofu in oven-proof casserole dish with about
2 T peanut oil or canola oil
1/4 cup water or juice
2 T bragg's liquid amino's or 1 T soy sauce
Broil turning every 5 minutes. Should take about 12-15 minutes

Wash salad vegetables and place in bowl.
Mix and make dressing

4 T fresh lime juice
1/4 cup Thai sweet chili sauce
1 T soy sauce or more to taste
Mix well.

Let tofu cool after cooking. Mix dressing and tofu with salad ingredients and serve.

August 30, 2008

Post on Pickles

This post is about refrigerator pickles. With lots of summer produce around, I wanted to try and make refrigerator pickles. My first attempt at pickling, was in the preservation chapters of a college Food Science class. This same class also brewed beer for the fermentation chapter!

I used the Good Eats! recipe from prominent food scientist, writer and chef, Alton Brown. Inspiration was found here. This is a super easy recipe, and takes about 3 hours start to finish (2 if you are super organized and have everything ready to go (as in you don't run out of cider vinegar midway).

1. Get some good quality cukes. I bought these from the Carrboro Farmer's Market. They are smaller and have no waxy coating. (organic and local too)

2. Next, get out clean utensils, cutting boards, jars, and pots

3. Dress up bottles - fill with cukes and onions as slices and spears.


4. Prep ingredients - measure out and get ready to make pickling juice.

Pickling juice on stove

5. Refrigerate end product


These should be ready in about 7-10 days. Although they may taste ready in as few as 2 days, if you can wait that long! Good luck!


Note: you can buy a commercial pickling spice, or make your own. I added whole bay leaves, broken cinnamon sticks, peppercorns, caraway seeds, celery seeds, cardamom powder, a little powdered allspice and cloves. I added this after the 4 minute simmer.