September 16, 2013

Massaman Curry

DSC_0468

DSC_0458

DSC_0454

DSC_0461

I bought a pressure cooker. It's a second generation six-piece Kuhn Rikon Duromatic. It came in two different sizes, with a lid that can be shared between the two, another glass lid for cooking, and a trivet for steaming. Simply put, pressure cookers save time. Second generation pressure cookers are designed to be safer because they are supposed to be constructed with at least two or three safety releases, and they are designed to indicate clearly when the cooker has come to low or high pressure. There is no loud hissing. In older, or first generation, pressure cookers they usually have a jiggle top which releases pressure in loud hisses after reaching pressure.

Laura, of the Hip Pressure Cooking blog, has written extensive reviews on different types of pressure cookers, and I found her detailed, and highly knowledgeable reviews, are what sold me on the Kuhn Rikon. Her recipes are modern, adaptable, and reproducible. She has basic pressure cooking tutorials that are easy to follow, and her site has created a community of modern day pressure cooker enthusiasts.

Over the past few weeks, a personal barrier I had to using my new pressure cooker was relearning how to adapt recipes. I found that after a few weeks of trial and error, the learning curve for seasoned cooks is fast. The learning curve for beginner and novice cooks (the hubs is categorized in this category) is also fast. Our pressure cooker came with a cookbook which is a great reference guide. The hubs started out with potatoes, moved to cooking beans a few times, and made a rice pilaf, and a Mediterranean couscous. To vegetarians, the cooking time for beans and lentils will be slashed in half. This, and this reason alone, is one of the very essential reasons to own one, and it explains why pressure cookers are a sustaining life force in Indian households.

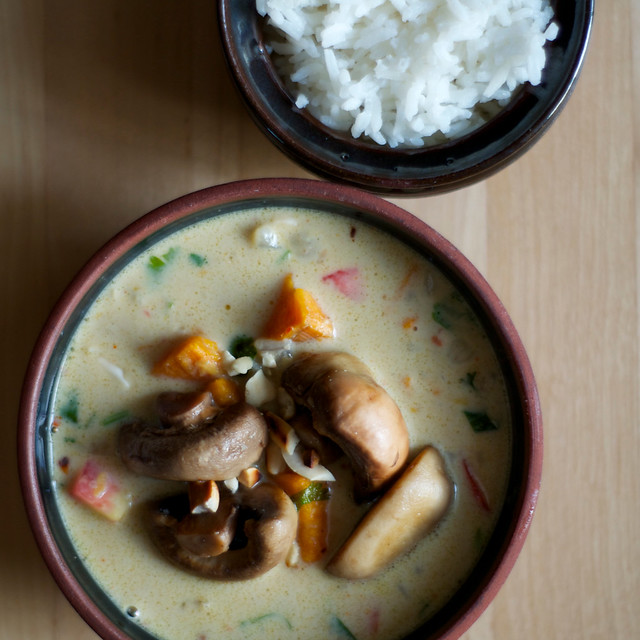
Channa Dhal Mushroom Massaman Curry
Adapted from Food and Wine
Yield: 4 servings

This curry is delicious. I think the ingredients list is a bit daunting, but the outcome is marvelous. With a pressure cooker you really save time because you can utilize the 12 minutes that the cooker is cooking to prepare other things and clean up. The sweet potatoes melt into the dish, the channa dhal bulks up the curry, and replaces chicken in the original recipe. I have added mushrooms, channa dhal, and coriander, and replaced water for the broth.

Ingredients for curry paste:
1" of ginger
2 cloves garlic
1/8 tsp salt
1 tsp Chinese five-spice powder
1 tsp cumin, ground
1 tsp coriander, ground
1/2 tsp turmeric
1/2 tsp red chili flakes
1 can coconut milk

Ingredients for curry:
2 tbsp peanut oil, divided
1/4 cup channa dhal or split yellow lentils, soaked in 1 cup of water*
1 onion
1 sweet potato, peeled and cubed into 1" chunks
3/4 cup water
1 package of mushrooms, stems removed and quartered
1-2 tsp rice wine vinegar, optional
1 medium tomato
1/4 cup cilantro, chopped
1/4 cup peanuts, chopped
4 cups cooked white long-grain rice

Directions:

  1. Soak the channa dhal in 1 cup of water. Set aside. 
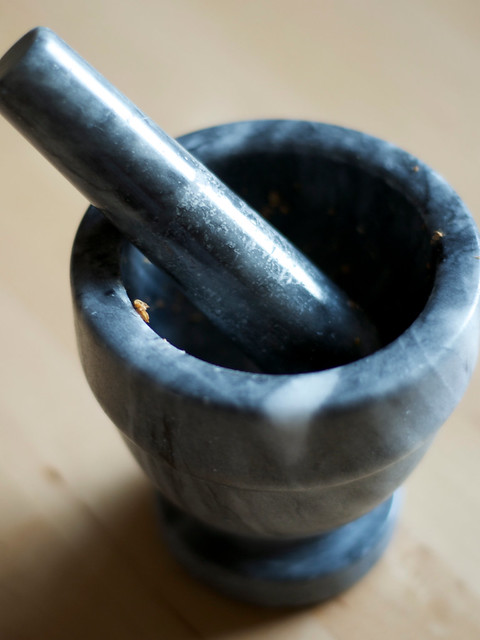
  2. The next step will be making a curry paste. You have three options 1) use a mortar and pestle, 2) use a food processor, 3) finely chop with a knife. I used the mortar and pestle because you end up with about 2-3 tbsp of curry paste a small amount for the food processor. In a mortar and pestle, pound together the garlic with the salt until it is a coarse paste. Remove this to a small mixing bowl that can hold 2 cups worth. Add the ginger and pound together. Scrape this into the bowl. Add the remaining spices and the coconut milk to the bowl and stir to combine. Set aside. 
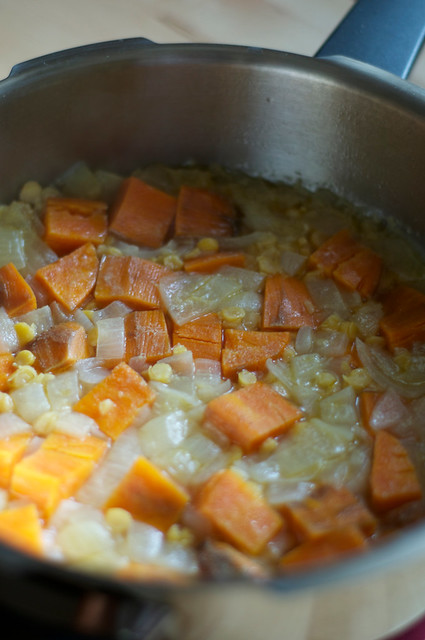
  3. In a 4 quart pressure cooker (my small pressure fry pan is < 3 quarts) heat up 1 tbsp oil over medium high heat. Once hot, sauté the onions for 3 minutes. 
  4. Add the sweet potatoes, stir together, and then add in the channa dhal along with the water. Add 3/4 cup of water. Do not add salt. Bring the mixture to a simmer and then close the lid. Bring the pressure cooker to the first red ring and then cook over low pressure for 12 minutes. Use the natural release method. 
  5. Heat up the remaining 1 tbsp of peanut oil over medium-high heat in a cast iron or non-stick skillet.  Once hot, add in the mushrooms and sauté about 7-10 minutes. Sprinkle the rice wine vinegar on top, cook 3 more minutes and cut the heat and remove the pan from the heat. 
  6. Open up the pressure cooker and put it back on the heat. Stir in the coconut milk curry mixture, add the tomatoes and bring to a simmer. This should only take a few minutes. 
  7. Garnish with peanuts and cilantro and serve immediately, preferably over cooked white rice. 

*Note: soaking the channa dhal is not necessary, but I find that it cooks faster.

September 8, 2013

Watermelon margarita

Watermelon margaritas

Watermelon margaritas

Heirloom watermelons and I have got a few things going.  I think I'm smitten with their red ripe juice, and their pretty bulky bodies. Even the seeds have something sassy to say to me. So I blended them up and shushed them with fresh lemon, tequila and simple syrup. 

Omit the tequila and simple syrup if you just want a variation of a watermelon cooler. These watermelon margaritas are delicious, simple, and refreshing. 

The heirlooms available to me are moon and stars (gorgeous!) and Charleston grays. 

Watermelon margaritas
Yield: 2 margaritas

Ingredients:
2 cups watermelon, optional to remove seeds, plus a few small wedges for garnish
1/4 cup simple syrup (directions below)
handful ice cubes
freshly squeezed lemon juice from 1/2 of a large lemon
3 oz tequila

Directions:
  1. Fill a low-ball cocktail glass with ice and water. Set aside. 
  2. Cut up the watermelon from the rind into large chunks, remove the seeds if desired, and place into a blender. 
  3. To the blender add in 1/4 cup simple syrup and ice cubes.
  4. Top with freshly squeezed lemon juice and tequila.
  5. Blend together until combined well. Meanwhile remove the ice and water from the cocktail glass. 
  6. Strain into chilled cocktail glasses, garnish with a few ice cubes and a watermelon wedge. If the seeds are left in they will fall to the bottom, but they give a nice flecked appearance when served immediately.
Note: to make simple syrup add an equal part water and an equal part sugar in a small saucepan. Heat the sauce pan over medium-low heat stirring until the sugar dissolves completely. Remove from heat and allow to cool. Store in a glass jar in the fridge for several weeks. 

September 1, 2013

Watermelon crudo with goat cheese and pickled jalapeños

Untitled

Untitled

Untitled

Untitled

Crudo is the Italian word for raw. Obviously, watermelon is best served raw; however, traditional crudo usually means raw meat or fish garnished with herbs, oils, spices, or fruits and vegetables. The watermelon looks a lot like salmon or tuna, but the fleshy colored chunks showcase summer at its finest. During the summer months, consuming copious amounts of watermelon is a rite of passage. The watermelon is topped with fruit jam, goat cheese, a pickled jalapeño round, and spices. The majority of the ingredients are at their best in the summer. The watermelon is a Charleston grey, the jalapeños are from a friend's garden, the goat cheese is from the farmers' market, the thyme from the front porch. The jam was made last summer with nectarines and vanilla beans. The jam creates a sticky base for the goat cheese to lay on.

This watermelon crudo is very easy to assemble. I like to prep the watermelon ahead of time. This means cutting up the watermelon into its desired shape and allowing the juices to drain off a bit. I set the pieces in a bowl and wait for an hour. This reduces the moisture when serving, and helps the watermelon stay in once piece. The watermelon can be cut into any shape. These can be assembled a few hours ahead of time. Keep them refrigerated until ready to use.

Watermelon crudo with goat cheese and pickled jalapeños
Yield: 8 pieces, serves 2-4


Ingredients: 
1 watermelon, about a 2 to 3 inch width block of watermelon
1 jar apricot or peach jam (can substitute honey)
1/4 cup goat cheese
1 small jalapeño, cut into thin rounds (can substitute pickled jalapeños)
1/3 cup vinegar
2 tbsp sugar
fresh cracked black pepper
1/2 tsp cumin
2 tsp fresh thyme, minced
1/2 tsp black sesame seeds

Directions:
  1. Cut the watermelon into a desirable shape. I slice the watermelon into even rounds, cut off the rind, remove the seeds, and cut them into squares or triangles. Watermelon should be at least 1/3" thick. Set in a bowl and allow the juices to drain off a bit. You can set them in the fridge while you prepare the rest of the ingredients. 
  2. Slice the jalapeños into thin rounds. Remove the seeds and extra veins. If you want the jalapeños to kick you in the mouth leave the seeds in tact.
  3. In a small saucepan, heat up the vinegar and sugar over medium heat. Stir until the sugar dissolves. Once simmering, add in the jalapeños and simmer for 5 minutes. Turn off the heat and allow the jalapeños to cool. Once cool, remove the jalapeños and discard the vinegar.
  4. Once ready to assemble, place the watermelon in a fancy serving dish. I like doing this because there is no need to move the watermelon afterwards. The assembled crudo can be kept in the fridge for a few hours before serving. 
  5. To assemble the crudo:
  • Lay out the watermelon slices in the serving dish. 
  • Top each watermelon slice with 1/2 tsp of jam. The idea is to create a sticky base for the cheese.
  • Place a small crumble or slice of goat cheese on top of the jam.
  • Set one jalapeño round on top.
  • Garnish with black pepper, thyme, cumin, and black sesame seeds.