

Black bean veggie burgers are among my favorites. These are easy to make, and the spices can be customized to your tastes. These veggie burgers are moist and hearty. Serve them hamburger style on a whole-grain bun, with lettuce, tomatoes, and other condiments, or serve over rice, a salad, or along with baked fries and veggies.
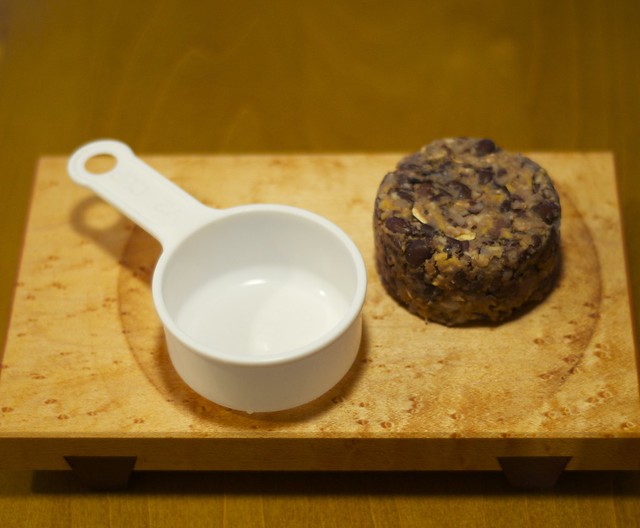
Once the ingredients have been combined, let the mixture rest for about 30 minutes in the fridge. This makes assembling the burgers easier. Once it's rested, form patties in a 1/2 cup measuring cup. To do this, use a 1/2 cup or 1/3 cup measuring cup lightly coated with a bit of olive oil. Add the patty mixture to the measuring cup and carefully dislodge the patty by lightly smacking the back of the measuring cup. I was a little bit overzealous in my smacking, as evidenced by the photos above. Once all the patties are assembled you can dredge the patties in a bit of corn meal, and pan-fry them in a cast iron pan (a non-stick skillet works fine). Store cooked patties in a warm oven on a plate or baking sheet.
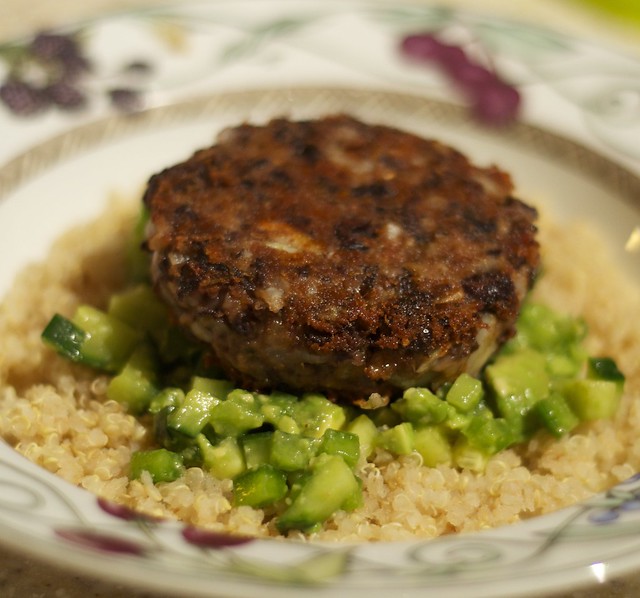
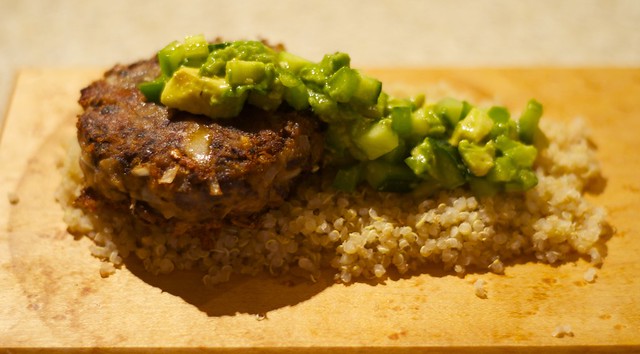
The black bean burgers pictured above were served over quinoa and topped with an avocado cucumber salsa.
Black bean cheddar burgers
Yield: 6 patties if formed with a 1/2 cup measure*; 8 to 10 if using a 1/3 cup measure*. Serves 4.
Ingredients:
3 cups black beans, cooked (or 2, 14 oz cans of black beans, rinsed and drained)
1 small onion, chopped fine
3 cloves garlic, chopped fine
a few tablespoons of water, divided
1 tsp salt
1-2 tbsp tomato paste (optional)
1-2 tbsp tomato paste (optional)
1 cup cheddar cheese, shredded (can substitute monterrey jack or pepper jack)
1/4 cup cilantro, chopped
1-2 tbsp chili powder
1-2 tbsp chopped banana peppers (or canned jalapeños)
olive oil
olive oil
Optional add ins:
1/3 cup oats
1-2 small beets, shredded
corn meal (for dredging, optional)
Directions:
Option 1: Use a large food processor.
1. Shred the cheese using the shredder attachment. Remove the shredded cheese from the food processor, and set aside in another bowl. If using the beet, shred. Leave the shredded beets in the work bowl of the food processor.
2. To the food processor, add the onion and garlic, and pulse until combined (about 10 seconds).
3. Add the black beans, tomato paste, chili powder, salt, and oats. Pulse until combined, pausing every few seconds to scrape the sides of the food processor. You might need to add in a few tablespoons of water if the mixture appears dry.
4. Add in the shredded cheese, cilantro, and banana peppers, and pulse until all is combined. Adjust for taste, and place the mixture in the fridge for 30 minutes.
Option 2: Use a large mixing bowl and a potato masher.
1. In a mixing bowl, combine black beans, tomato paste, onions, and garlic. With a potato masher, mash the ingredients together adding a tablespoon of water at a time if the mixture is too dry.
2. Add in the spices, shredded cheese, cilantro, banana peppers, and any optional ingredients.
3. Continue to mash everything until the mixture can hold on its own. You can test this by forming a ball with your hand and seeing if it falls apart easily.
4. Place the work bowl in the fridge, and allow it to rest for 30 minutes.
Combining and shaping the patties:
Set a shallow bowl with corn meal. In a 1/2 cup or 1/3 cup measure*, spoon the bean mixture into the measuring cup and gently press down until a patty forms. Turn the measuring cup over, and lightly tap the top to dislodge the patty. Finish shaping the patty with your hands, and dredge in corn meal. Set on a plate until ready to cook.
Heat up a cast-iron skillet (non-stick skillet is fine too). Pour in about 2-3 tbsp of olive oil and once the oil is hot, add in the patties and cook on each side for about 5-6 minutes. Store cooked patties in a warm oven on a plate or baking sheet.
*Note: I find that shaping the patties with the 1/2 cup measure makes a hearty veggie burger that is perfect for a bun. In addition, I've made a few notes above on which ingredients can be subbed in and out. These can be made vegan by omitting the cheese; tomato paste can be omitted as well (thanks, Stephanie!)